SCIM User Management for OneLogin
This page details the configuration steps required to establish a connection between the SCIM Application in OneLogin and Talkdesk. Please carefully review the following page before beginning the setup process: SCIM API
Creating the SCIM Application in OneLogin

- Log in to your OneLogin account, select Applications [1], and click the Add App [2] button.
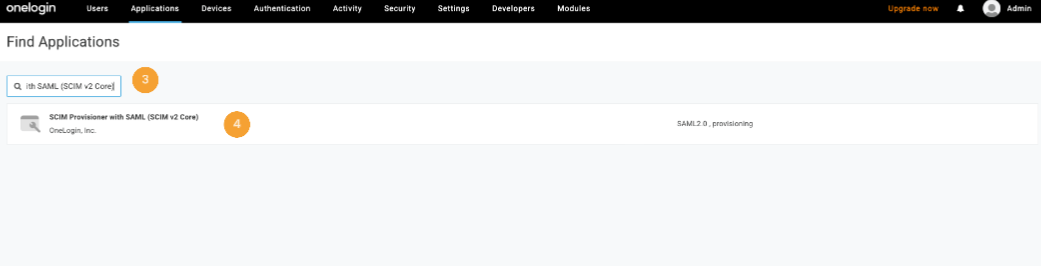
- Enter "SCIM Provisioner with SAML (SCIM v2 Core)" in the search bar [3], then click on the application from the results [4].
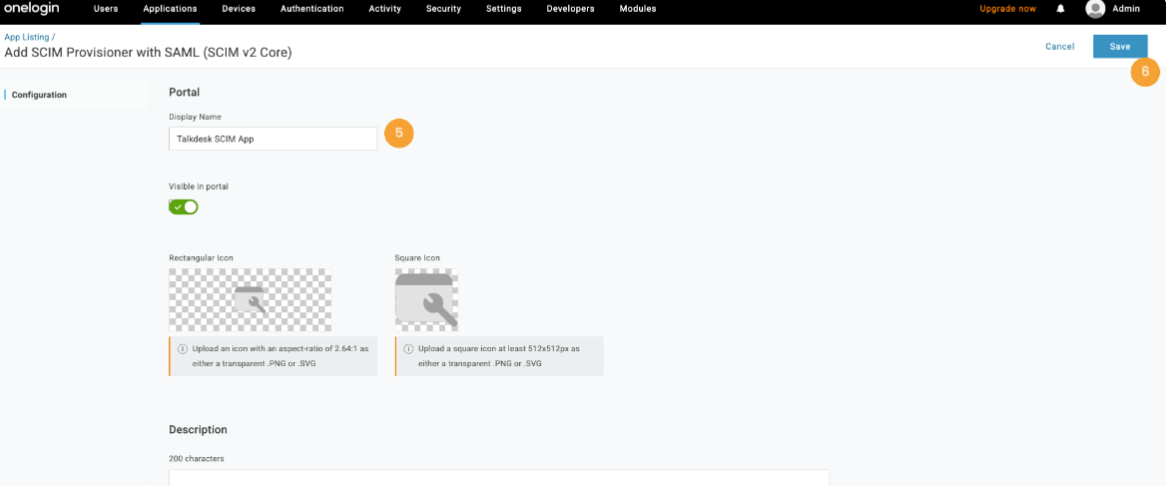
- Enter a Display Name [5] in the Portal section and click Save [6].
Configuring the Provisioning
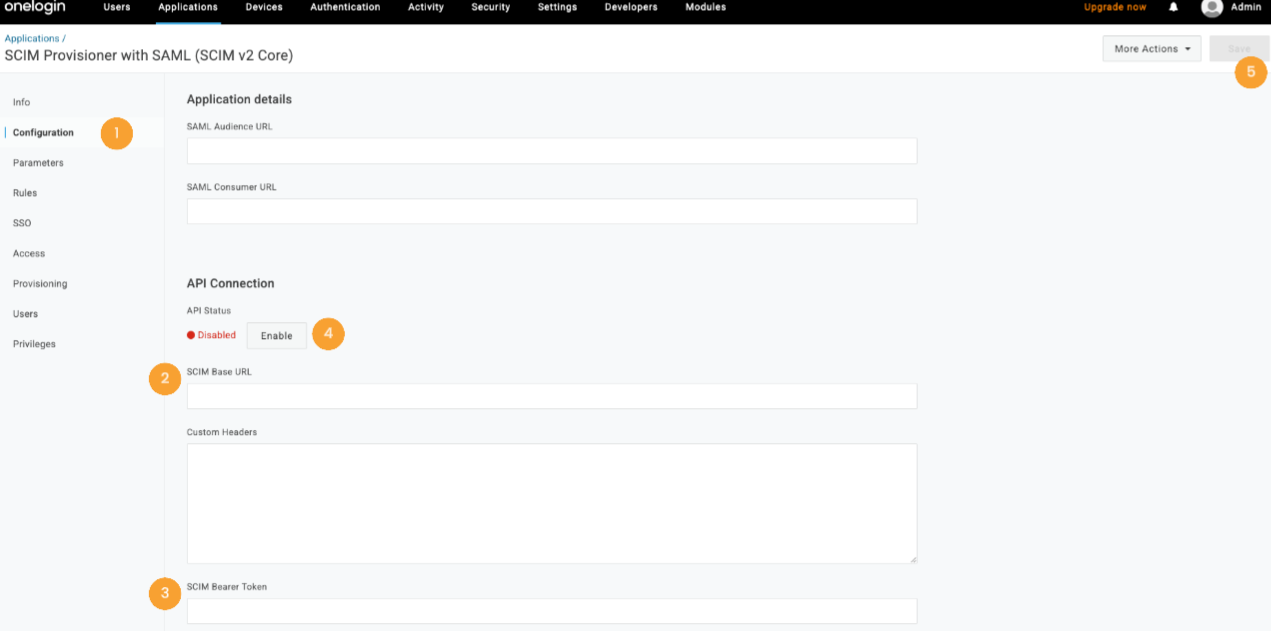
- Navigate to the application created in step one by going to Applications > Talkdesk SCIM App.
- Go to the Configuration tab [1].
- Enter https://api.talkdeskapp.com/scim/v2 in the “SCIM Base URL” field [2].
- The base URL (i.e. api.talkdeskapp.com) is determined by your account instance's region. To view the available options, please check the following page: App and Talkdesk Regions
- Then, type in the STS generated token in the “SCIM Bearer Token” field [3]. For additional information on generating an STS Token, please visit this article.
- Click the Enable button [4] to ensure it works, and then click on Save [5].

- Scroll down on the same page to configure the user provisioning attributes in the SCIM JSON Template field [6].
- For a comprehensive list of supported fields, please visit: Create User
- The mandatory fields are
userName,givenName, andfamilyName.
{
    "schemas": [
      "urn:scim:schemas:core:2.0"
    ],
    "userName": "{$user.email}",
    "name": {
        "givenName": "{$user.firstname}",
        "familyName": "{$user.lastname}"
    }
}- To include the
active,externalId,role, orteamassignment in the SCIM provisioning process, enter the following configuration in the SCIM JSON Template field:
{
    "schemas": [
      "urn:scim:schemas:core:2.0",
      "urn:ietf:params:scim:schemas:extension:talkdesk:2.0:User"
    ],
    "userName": "{$user.email}",
    "name": {
        "givenName": "{$user.firstname}",
        "familyName": "{$user.lastname}"
    },
    "active": "{$user.status}",
    "externalId": "{$user.id}",
    "urn:ietf:params:scim:schemas:extension:talkdesk:2.0:User": {
        "rolesString": "{$parameters.talkdeskRole}",
        "teamsString": "{$parameters.talkdeskTeam}"
    }
}
NoteThe rolesString value must contain a role name that already exists in your Talkdesk Account and has been previously created.
If the Role field is not mapped, Talkdesk will create the user with the default Role Agent.
NoteThe teamsString value must contain a team name that already exists in your Talkdesk Account and has been previously created.
If the Team field is not mapped, Talkdesk will not assign the user to any team.
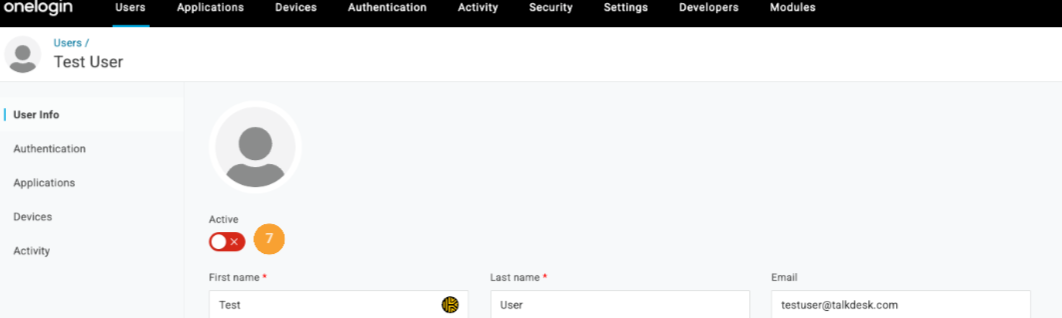
NoteWhen the active field is not mapped, OneLogin will automatically send the value from the User Active field [7].
- After configuring the template correctly, click Save.
- Role and team values can be set through multiple methods (i.e. user custom attributes, Okta roles, or Application parameters). This guide uses the Application parameters method.
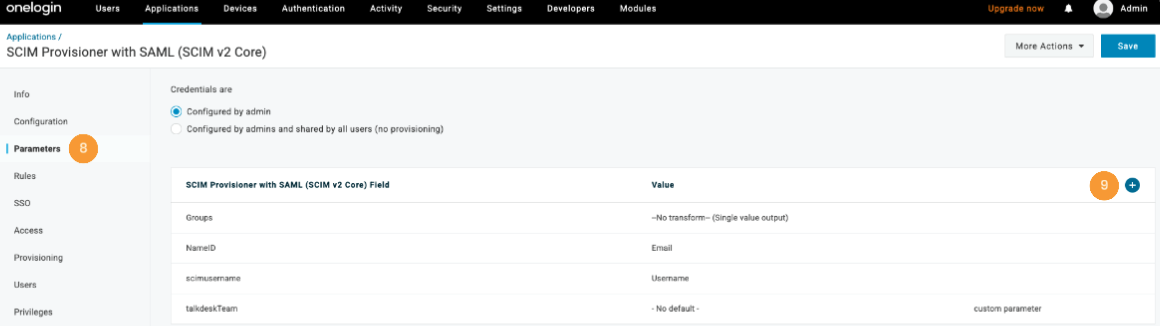
- Navigate to the Parameters tab [8] and click the + button [9].
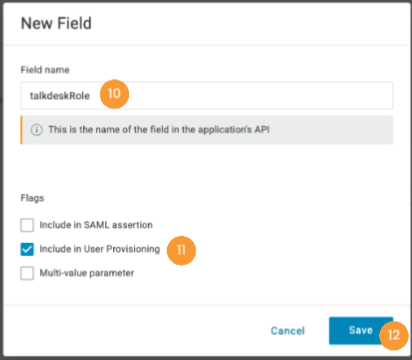
- Provide a Field name [10], enable the Include in User Provisioning option [11], and click the Save button [12].
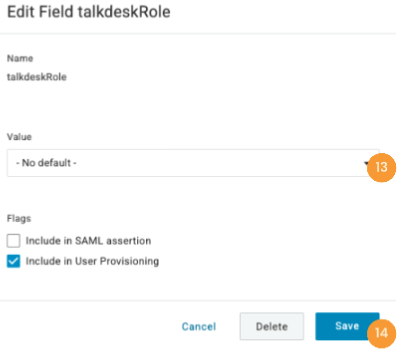
- In the Value field [13], configure a mapping for the newly created talkdeskRole field. Select either No default value or set up an advanced mapping, then click Save [14].
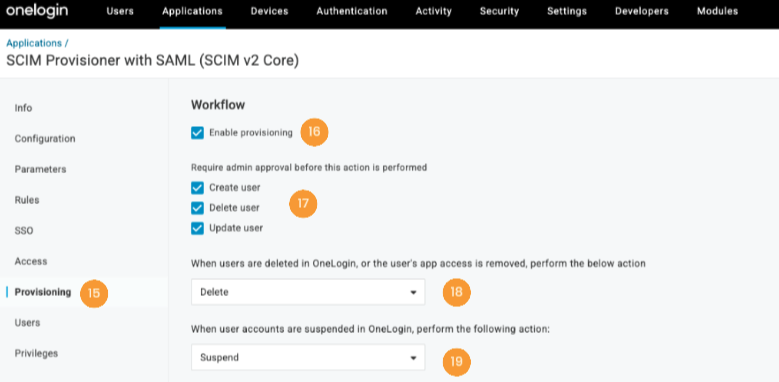
- Go to the Provisioning tab [15] and ensure the Enable provisioning option [16] is checked. Set up admin approval requirements for provisioning actions [17] and specify what happens when users are deleted [18] or deactivated [19] in Okta.
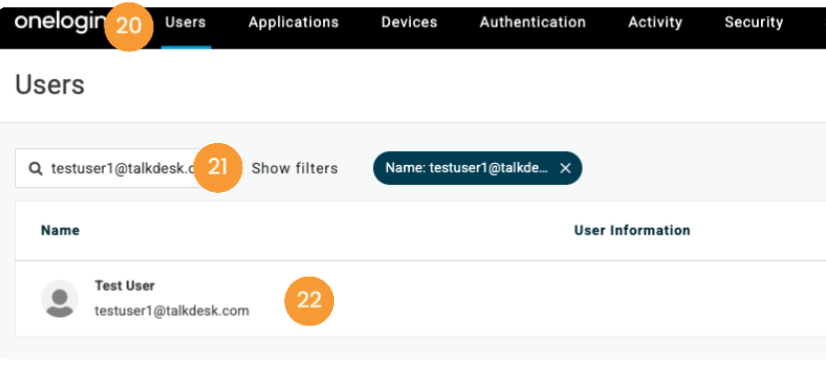
- To provision users to Talkdesk, navigate to the Users menu [20], search for a user by entering their email address [21] and pressing Enter, then click on the user in the results [22].

- Within the user details page, access the Applications tab [23], then click the + button [24].
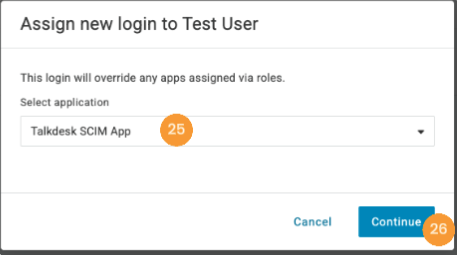
- In the Select application dropdown [25], choose "Talkdesk SCIM App", then click Continue [26].
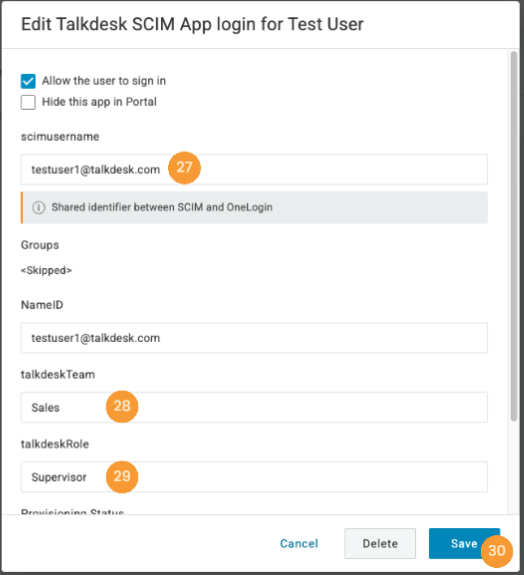
- Fill in the scimusername field [27] with the user's email, populate the talkdeskTeam [28] and talkdeskRole [29] fields, and click the Save button [30].

- Based on the provisioning settings, the user provisioning may be pending. If this occurs, click the Pending label [31].
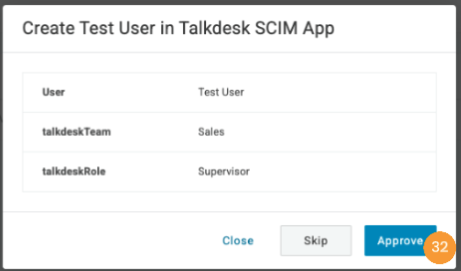
- Verify the information is accurate, then click Approve [32] to complete the provisioning to Talkdesk.
Updated about 2 months ago