Importing and Exporting Panels
Using Workspace Designer™, you can import and/or export a panel. Located in the upper-right section, there is an action button represented by the ... icon (Figure 1 - 1). Clicking this button will reveal a menu of actions, including Import (Figure 1 - 2) and Export (Figure 1 - 3) options.
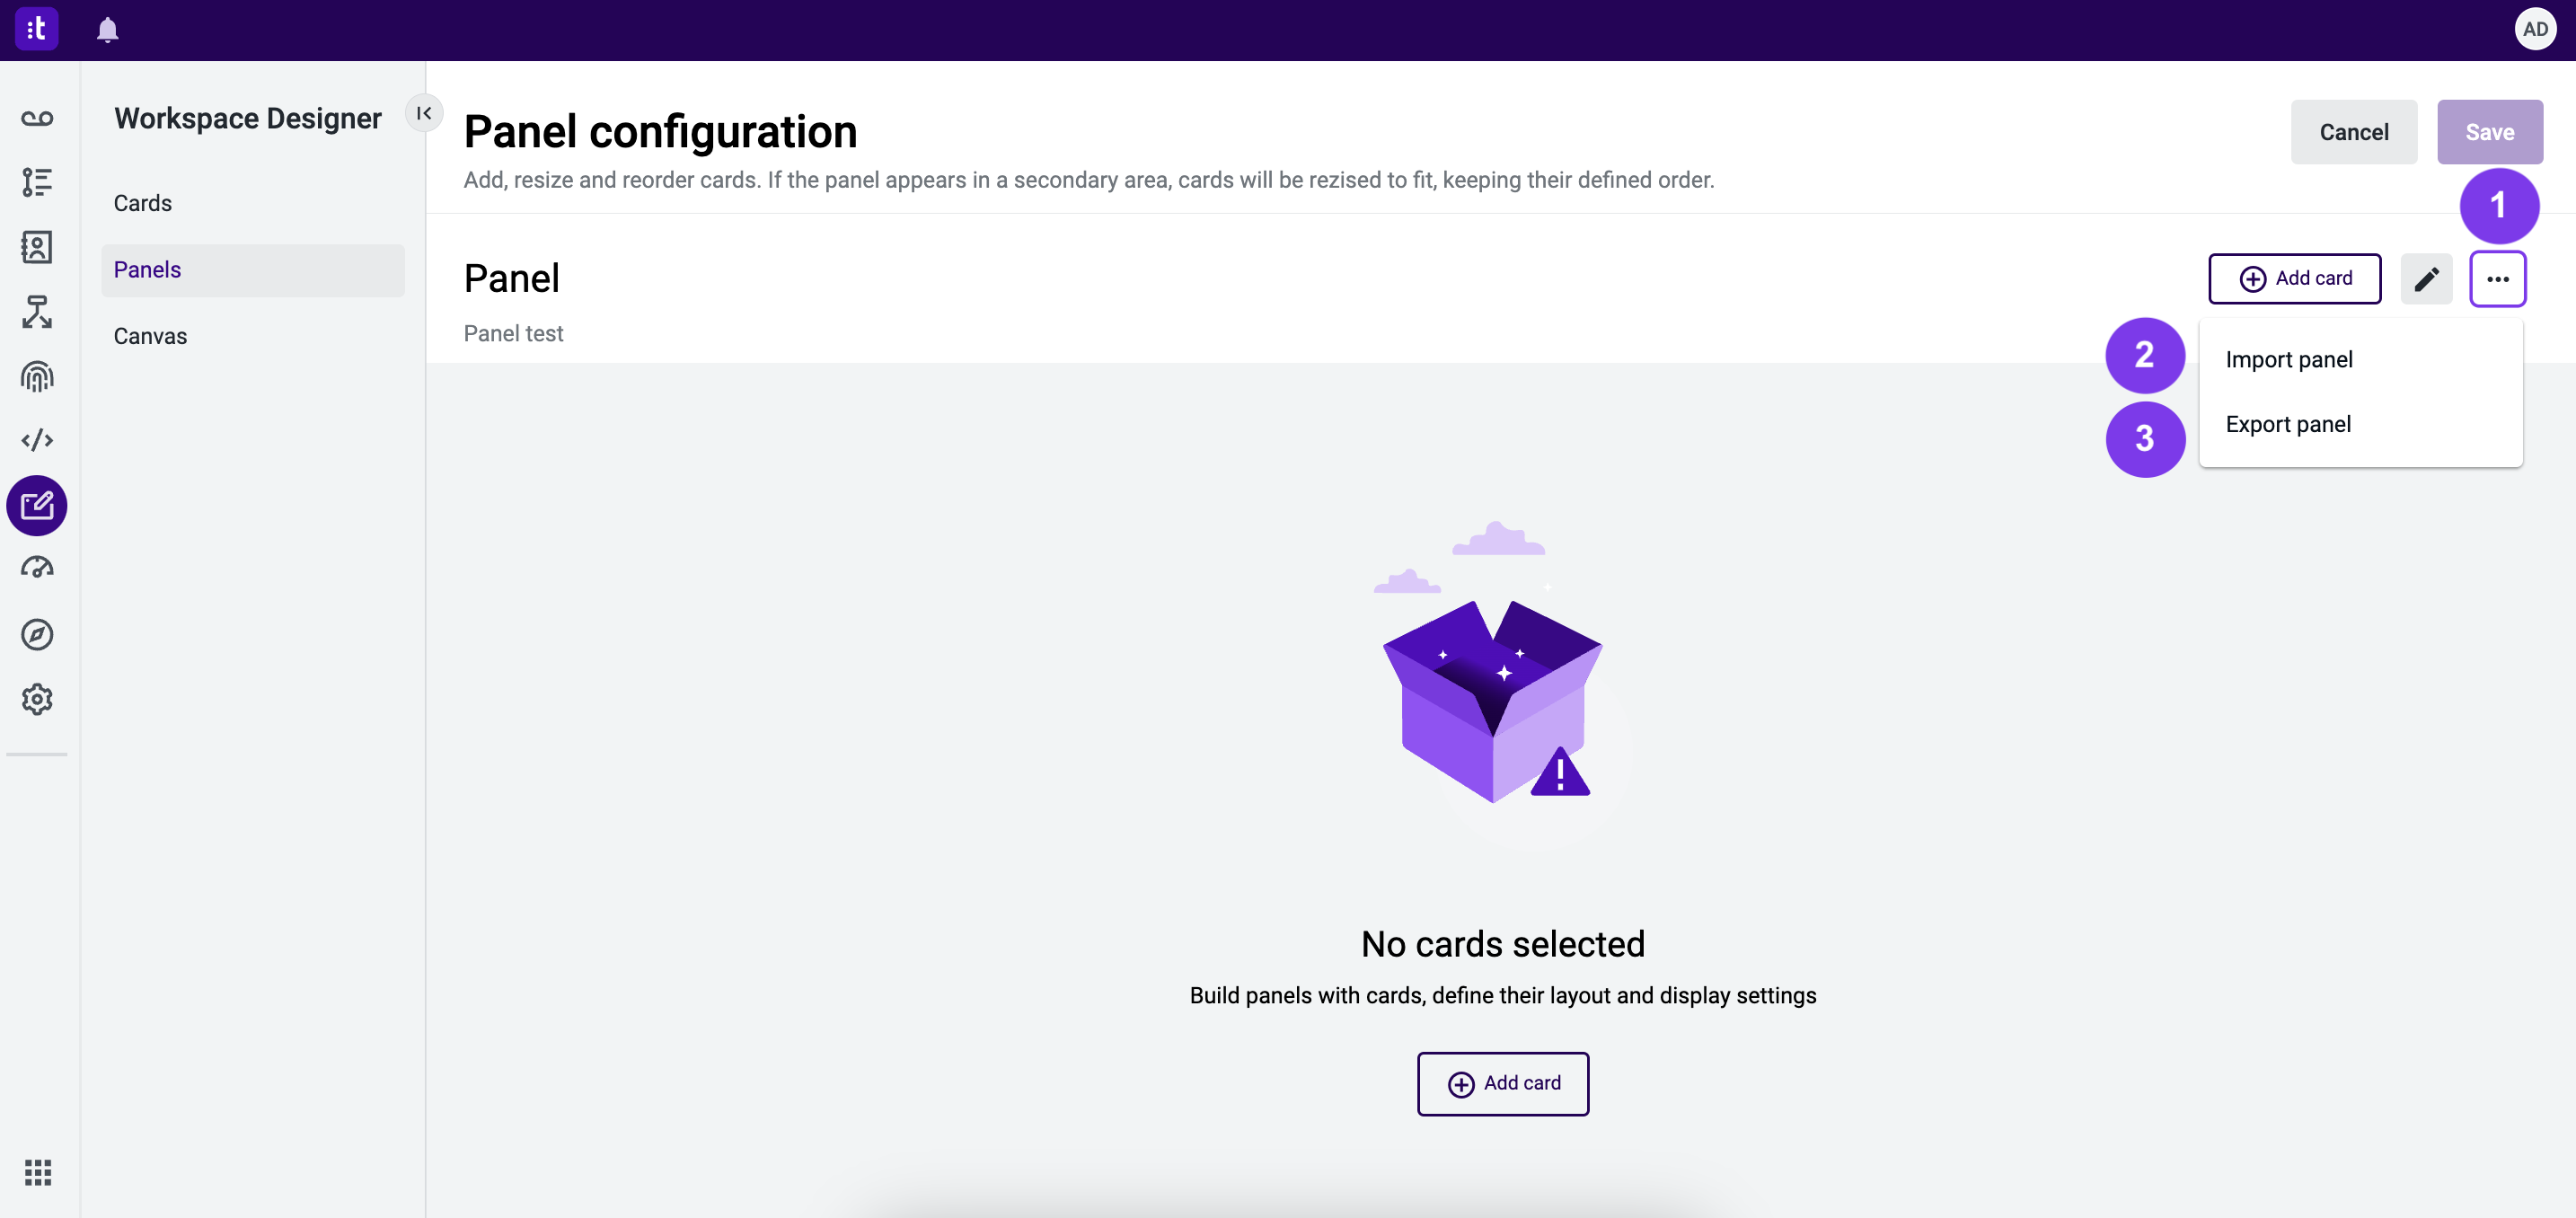
Figure 1 - Import/export a panel
Importing a Panel
The import panel functionality allows you to apply a previously exported panel to your current configuration.
To import a panel (this example shows how to import a panel from an already existing panel):
1 - Click the Panels tab (Figure 2 - 1).
2 - Click the ... button (Figure 2 - 2).
3- Click the Import panel option (Figure 2 - 3).
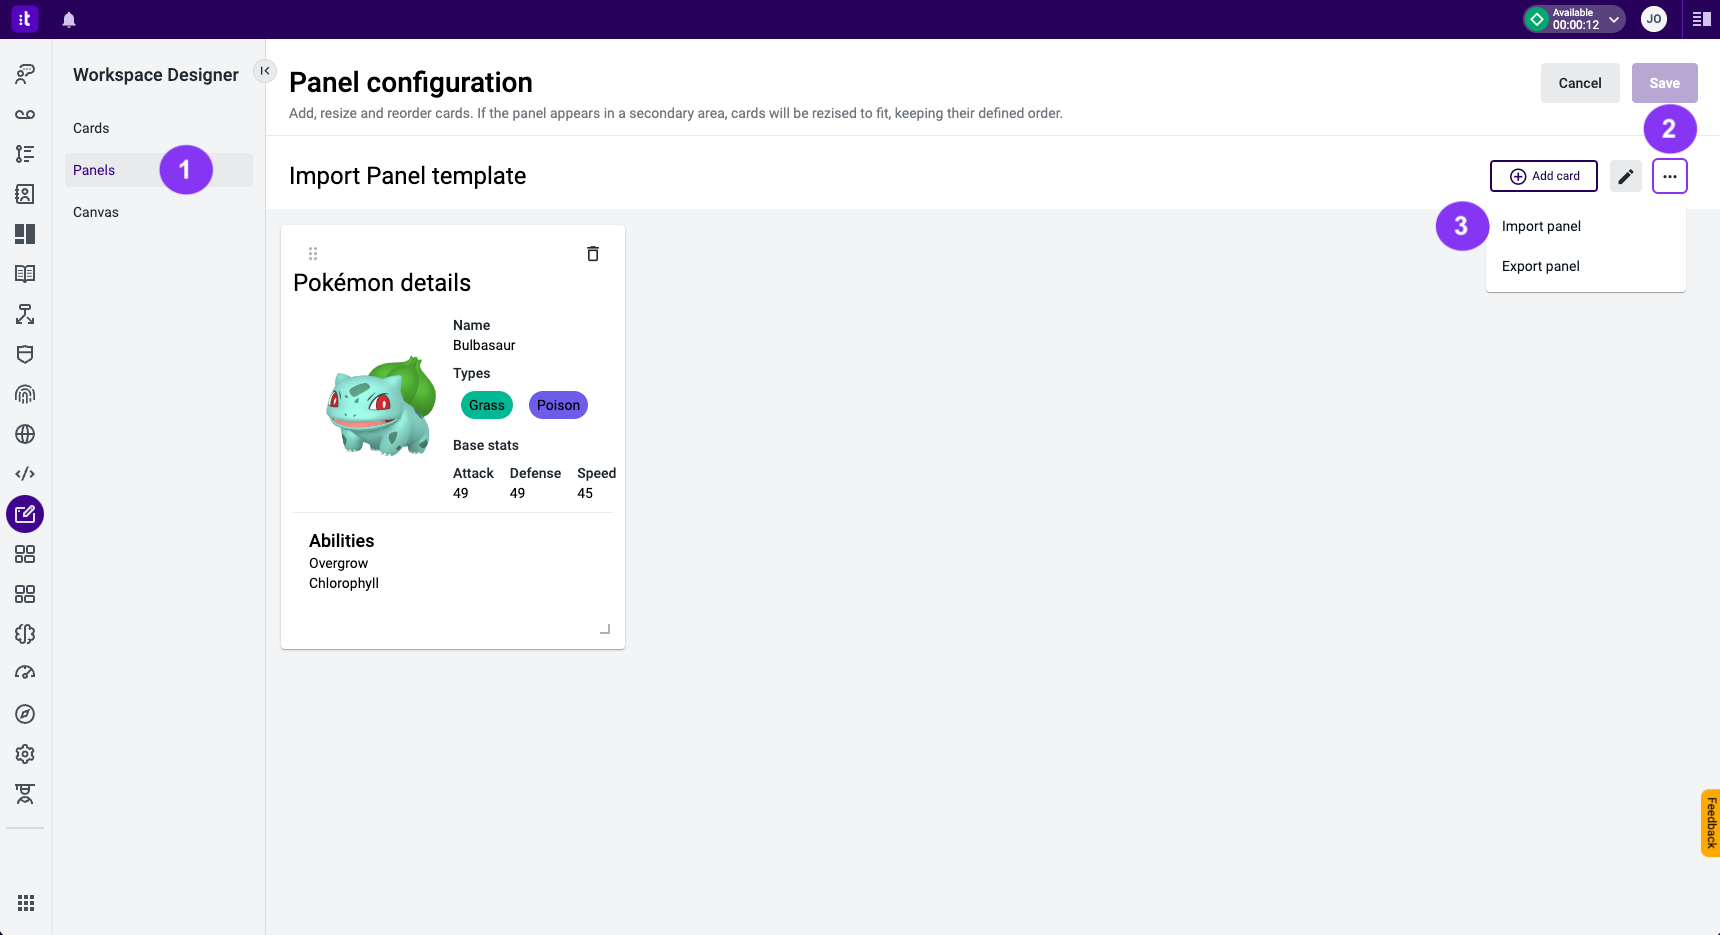
Figure 2 - Importing a panel
After clicking the Import panel (Figure 2 - 3) option, a modal will be prompted (Figure 3 - 1), facilitating the upload of a JSON file (only JSON files are permissible). You can proceed with the upload by dragging and dropping the file into the designated section (Figure 3 - 2), or by selecting the Choose a file to upload button (Figure 3 - 3).
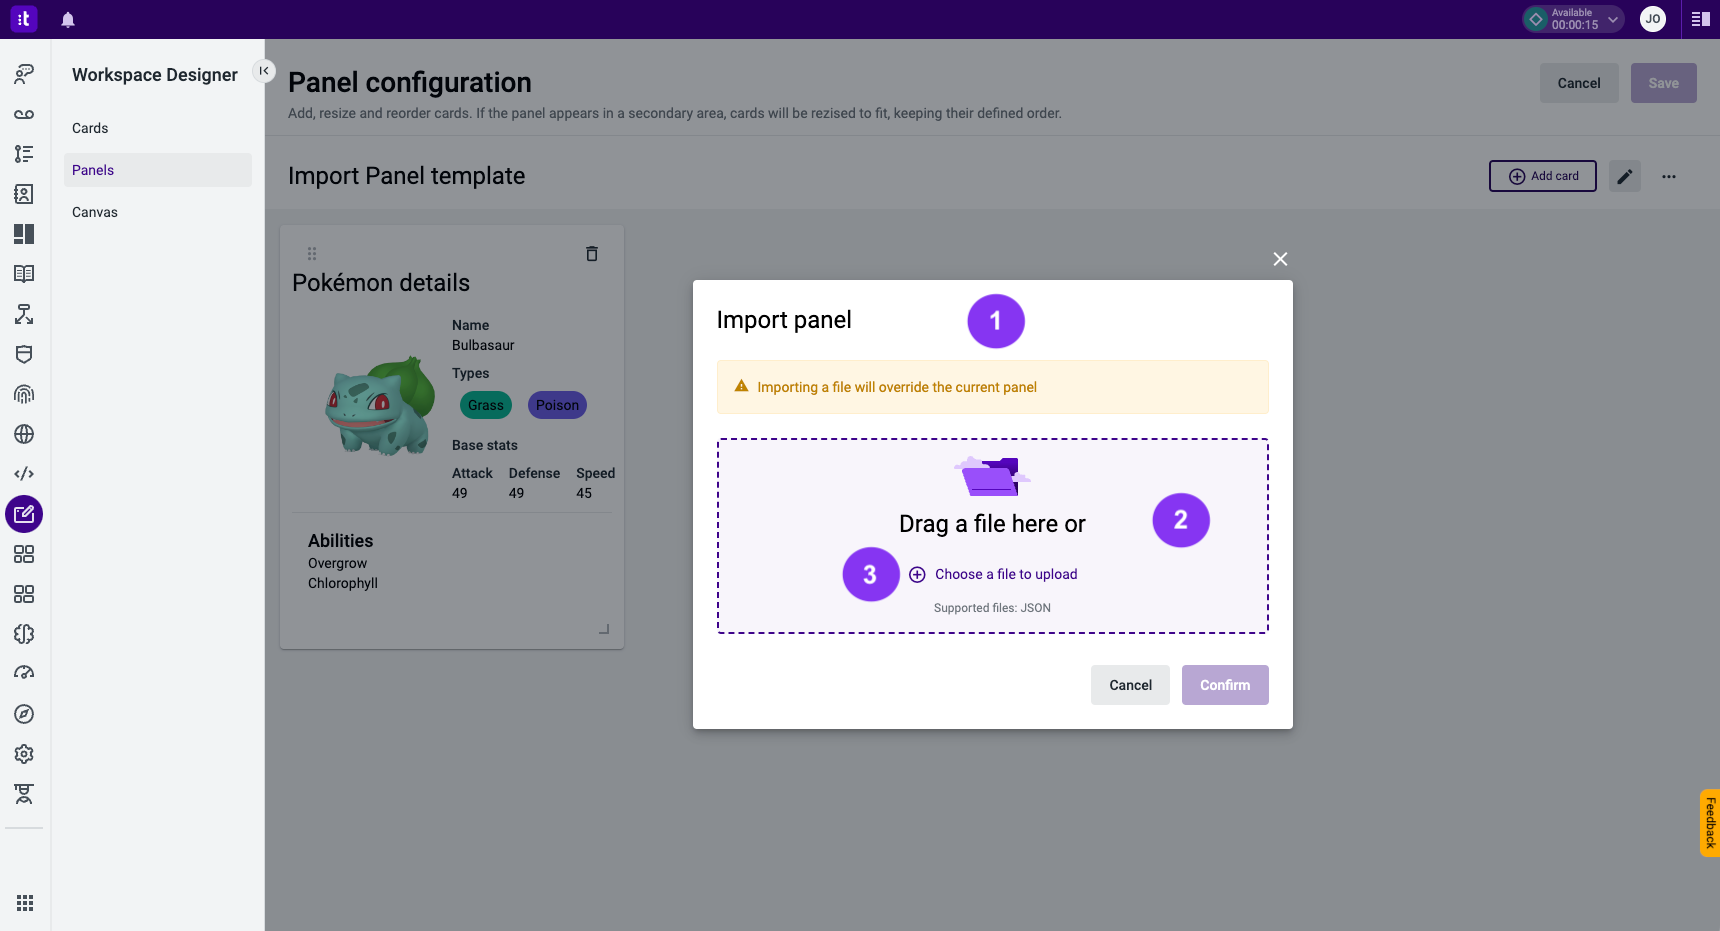
Figure 4 - Import modal
Once the JSON file has been uploaded, click the Confirm button (Figure 4 - 1).
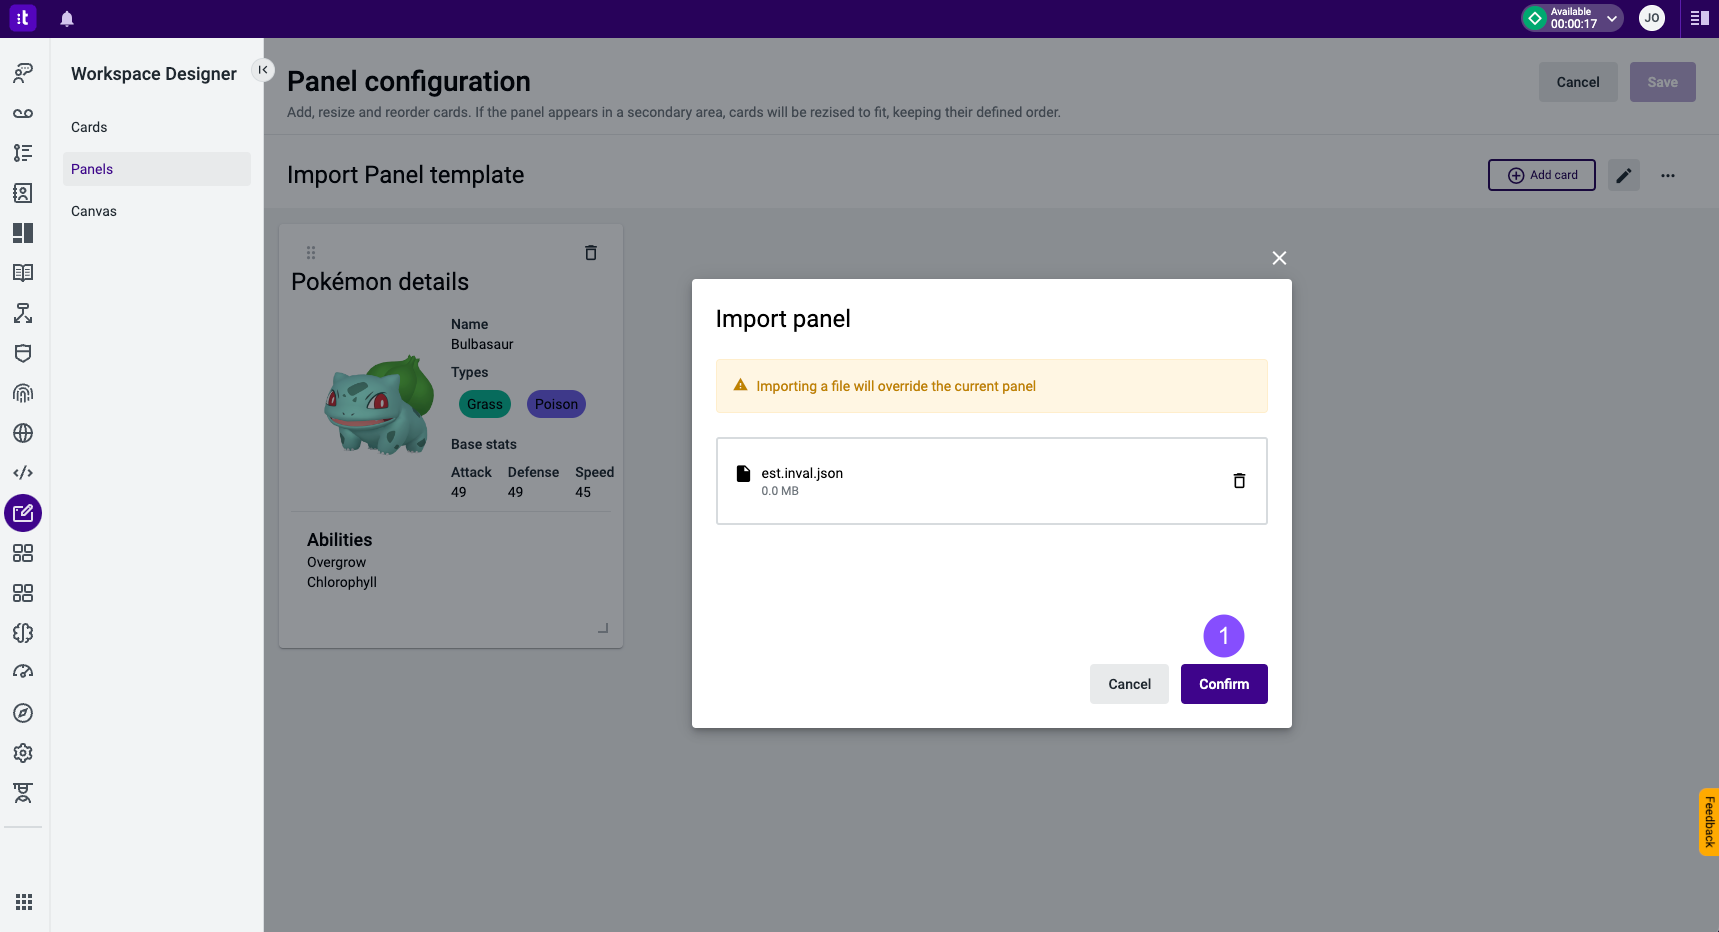
Figure 4 - Import panel uploaded file
Upon successful upload, you will observe the newly imported panel being applied, accompanied by a confirmation message (Figure 5 - 1).
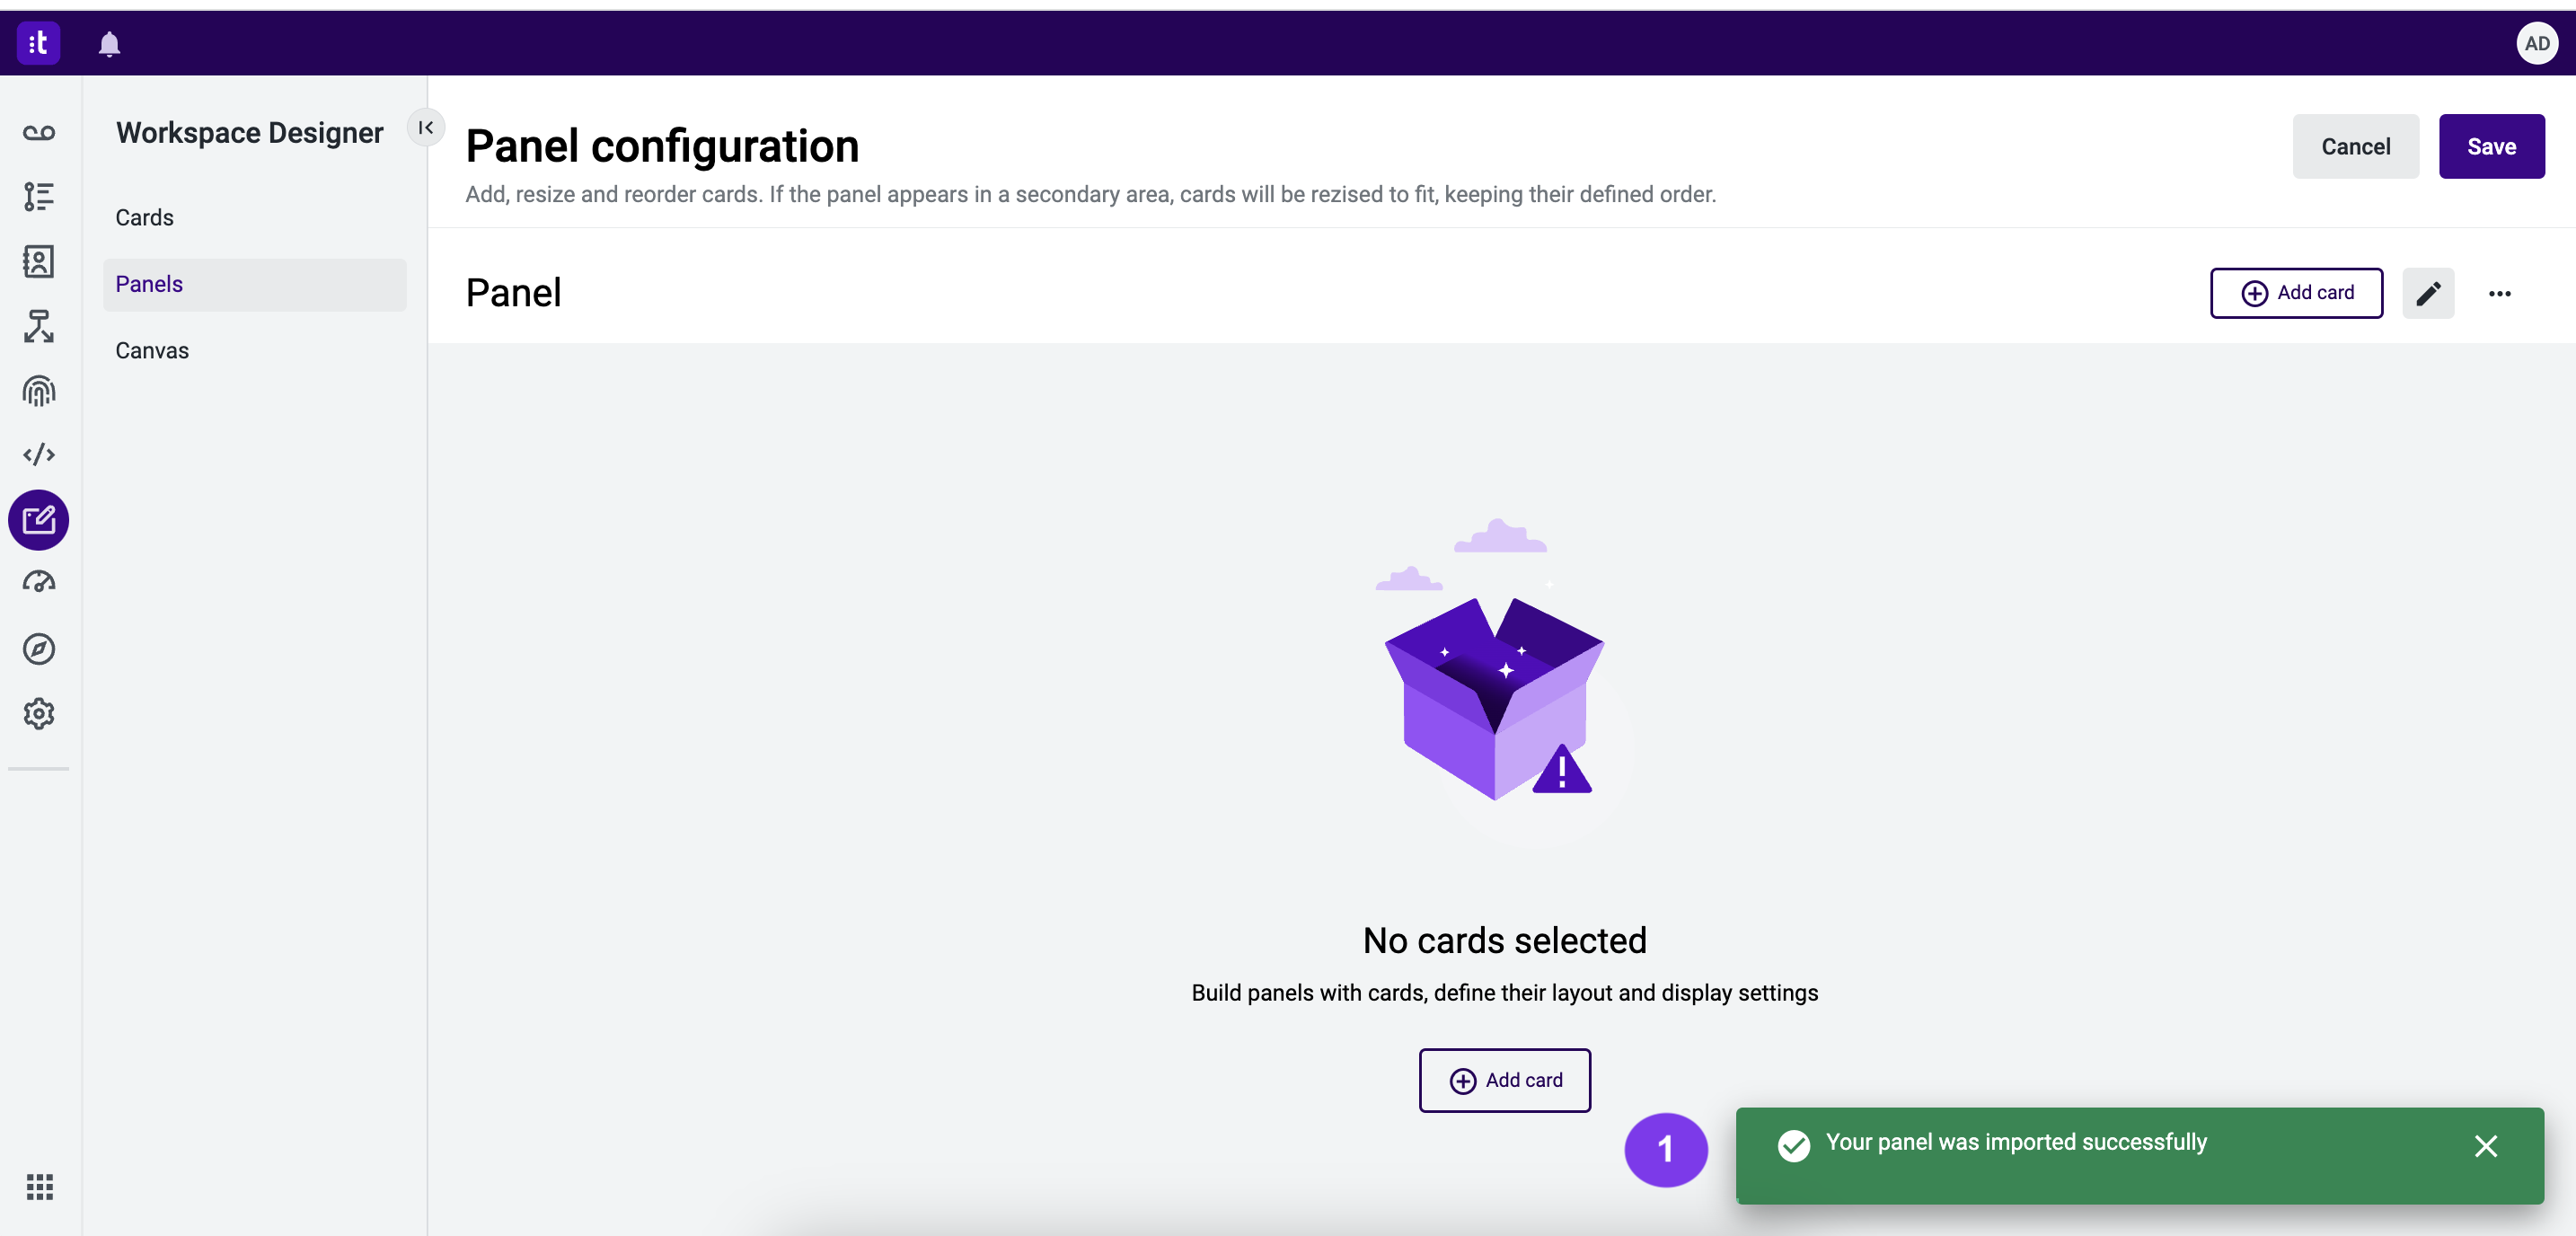
Figure 5 - Import successful
Exporting Panels
Through the export panel functionality, you have the option of saving a panel to your local device. This ensures future access and availability.
To export a panel, you can create a new panel or edit an existing one. This example shows how to export a panel from an already existing panel:
1 - Click the Panels tab (Figure 6 - 1).
2 - Click the ... button (Figure 6 - 2).
3 - Click the Export panel option (Figure 6 - 3).
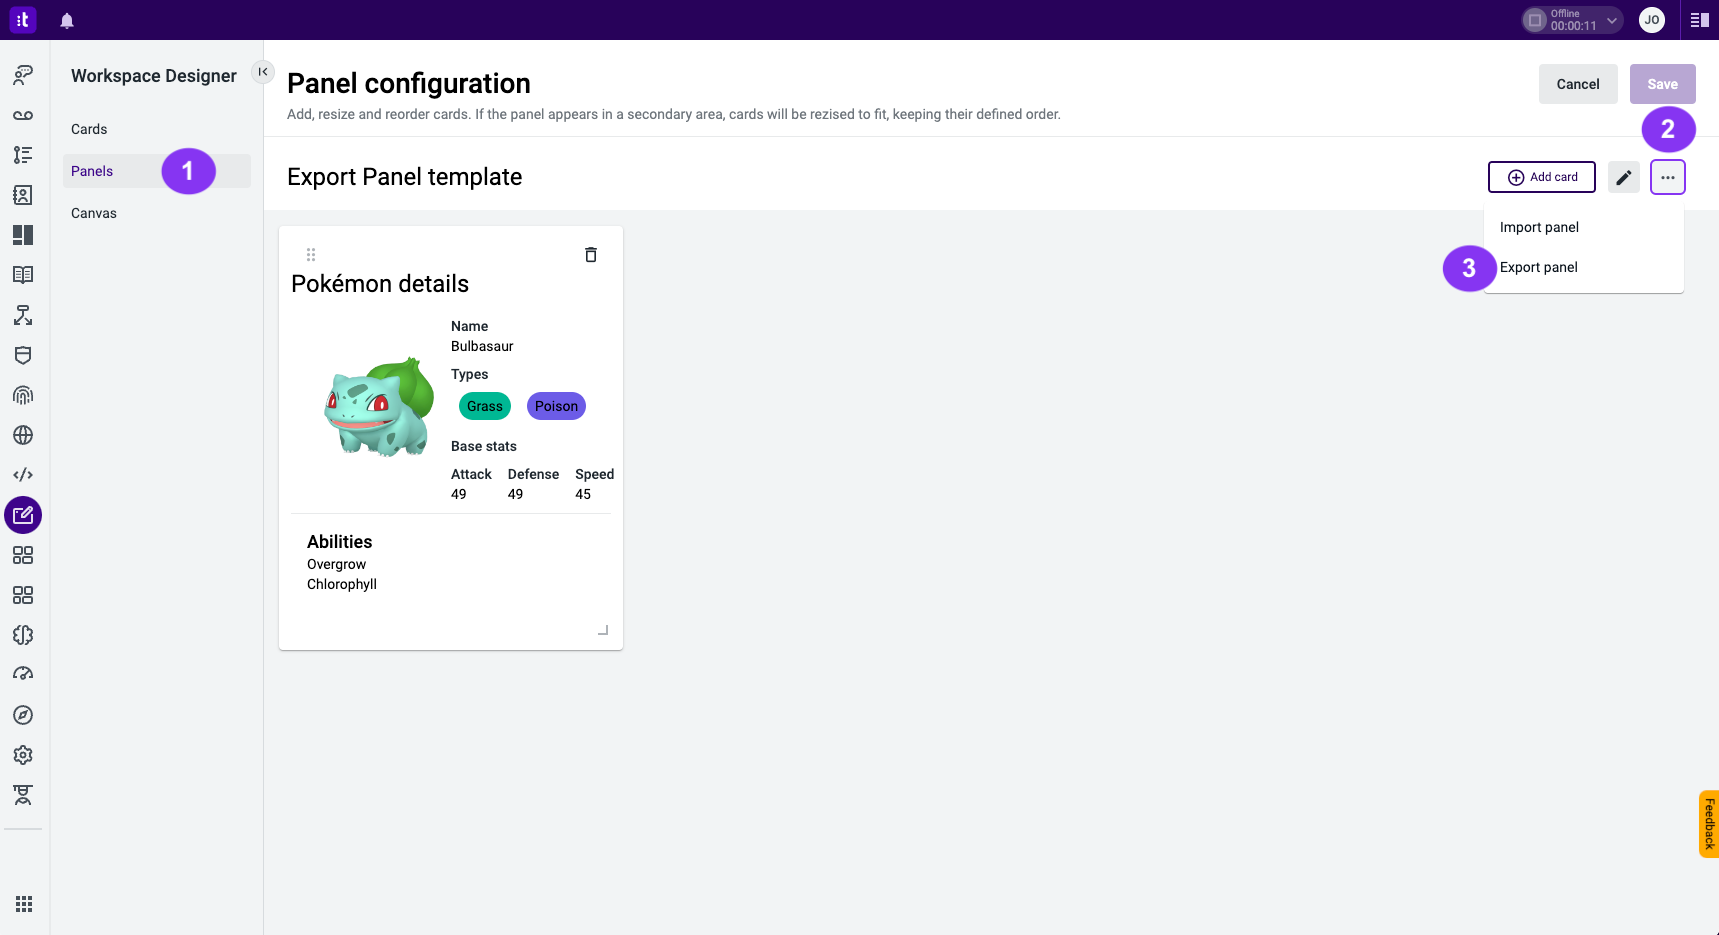
Figure 6 - Export a panel
As soon as you click the Export panel option, the download will commence, accompanied by a message informing you that the download is complete (Figure 7 - 1). The panel is saved in a JSON file.
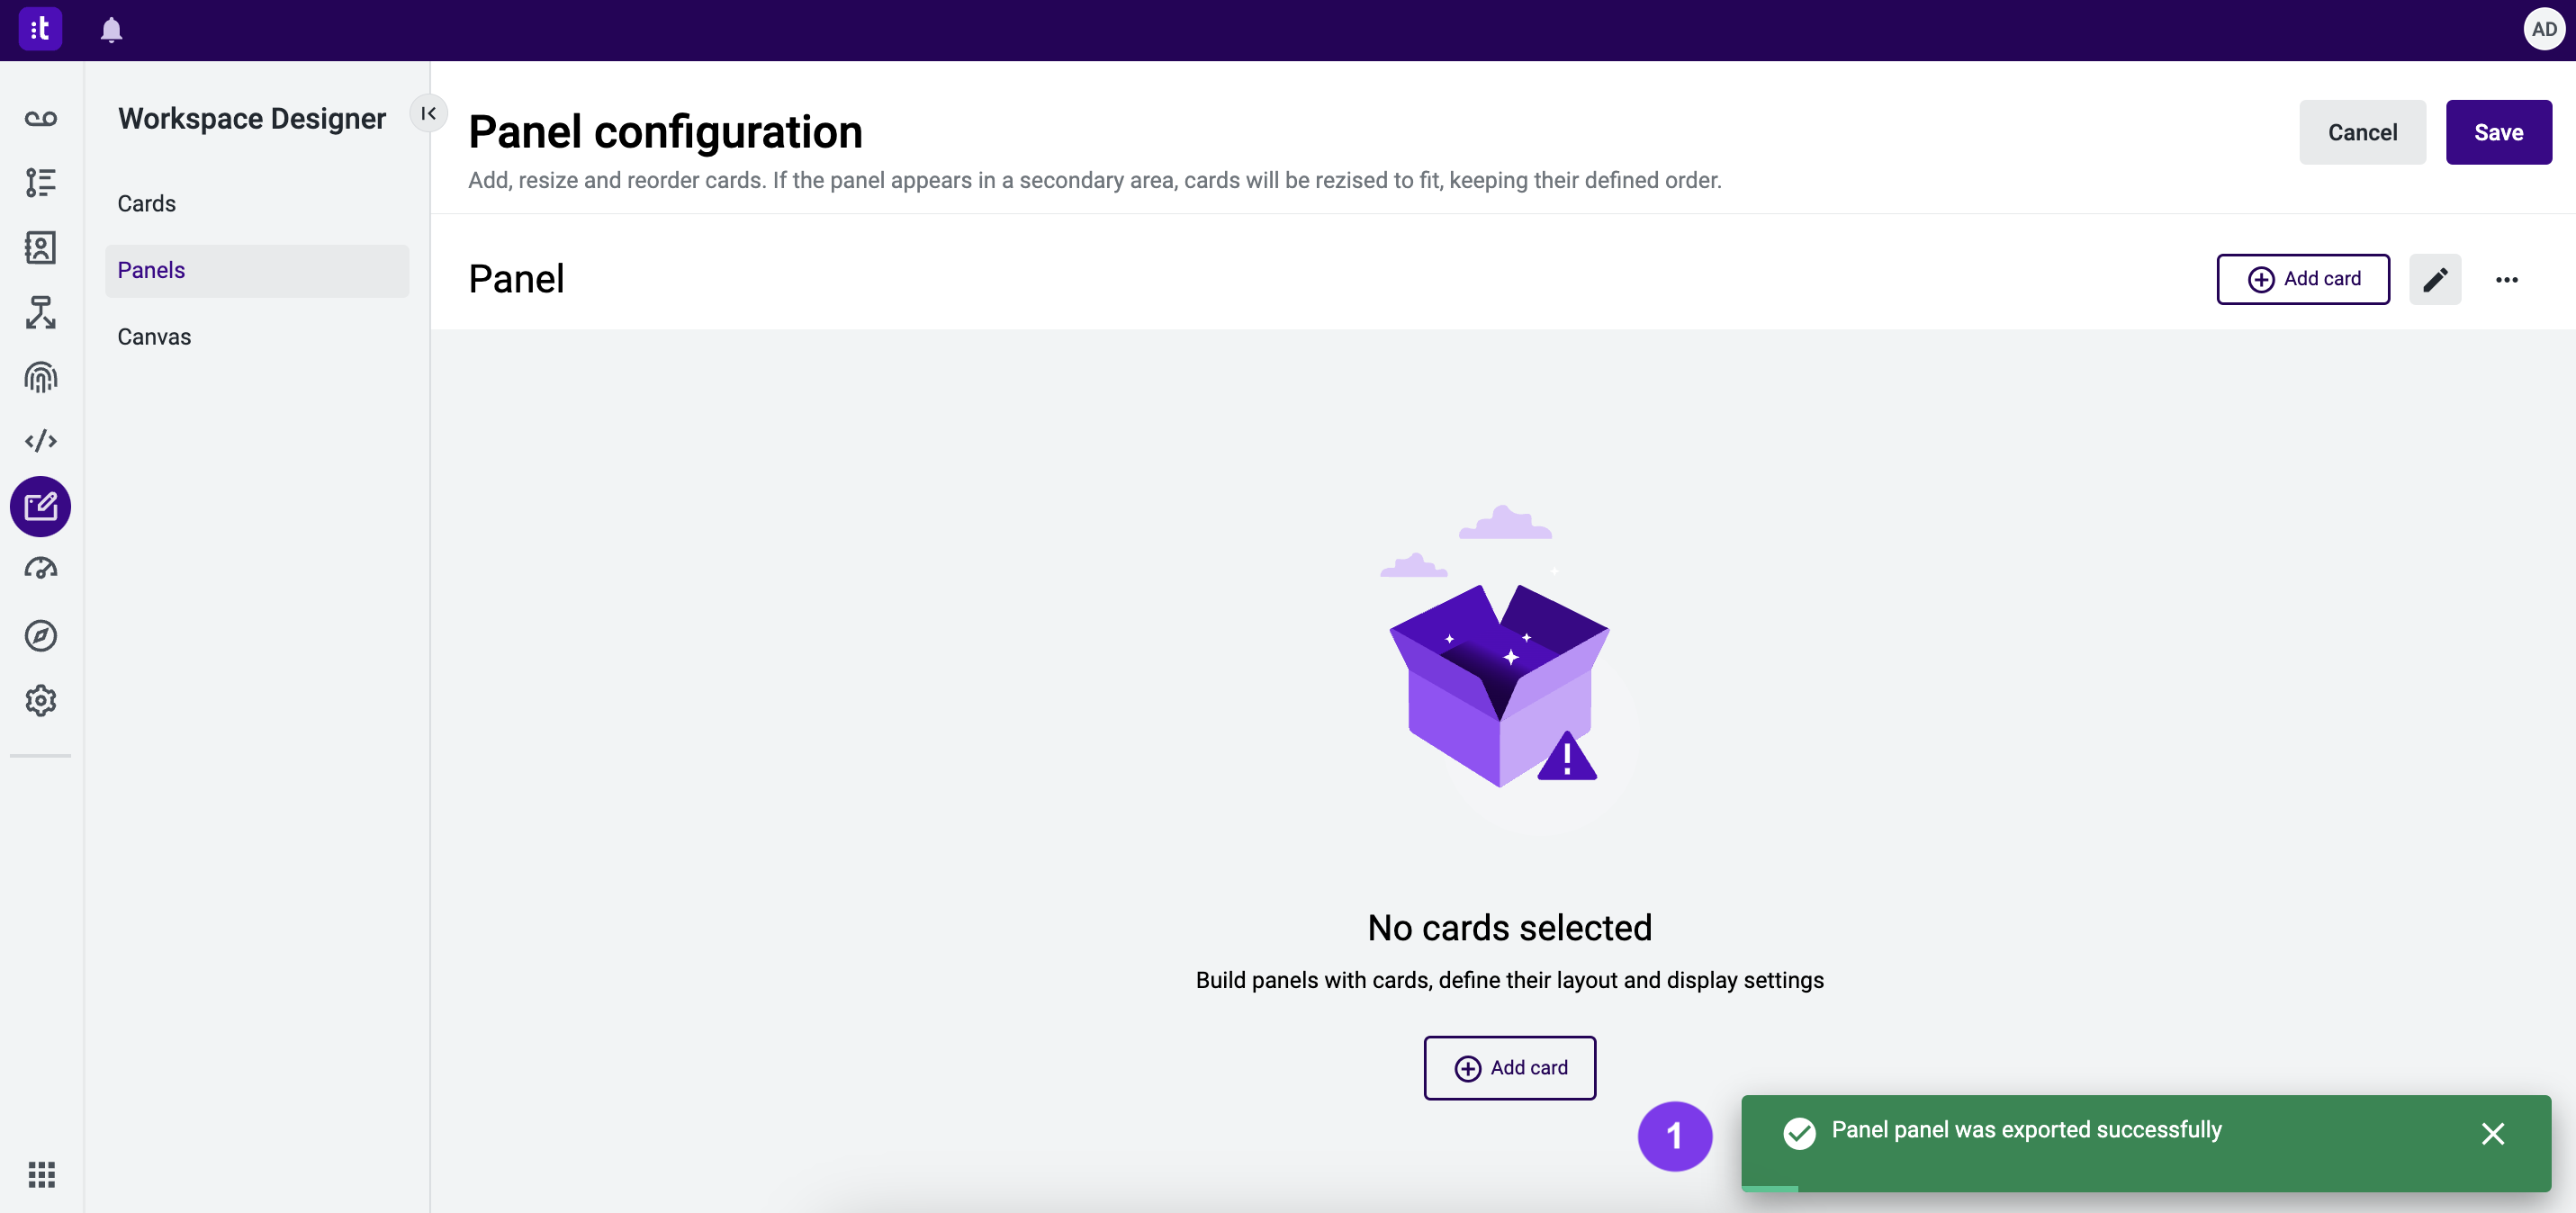
Figure 7 - Export successful
Updated 26 days ago