OAuth2 Authorization Code Flow
Authentication Configuration
When the OAuth2 Authorization Code Flow authentication type is selected in the Authorization type dropdown (4 from Figure 3 of this page), the options of Figure 31 will appear.

Figure 31 - Configuring an OAuth2 Authorization code flow authentication
Registering an App on an External System
To obtain the values of the fields, register your app on the external system. Each external system allows this to be achieved in different ways, so the corresponding documentation must be consulted.
Guidelines for Some of the Most Common CRMs that Use this Type of Authentication
All these systems include the creation of an OAuth Client to obtain this data. When doing so, it will be necessary to provide a redirect URL for Talkdesk®.
Redirect URLThe redirect URL to be defined on the external system when creating the OAuth Client is, according to the account region:
Authorization Required Prompt
After filling in all the required information from Figure 31, clicking Save (Figure 32 - top right corner) will prompt a message indicating that an authorization is required, as depicted in Figure 33, providing you with two options.

Figure 32 - Saving Authorization
By clicking the Go to settings button (1 - Figure 33) you will be redirected to the screens from Figures 35 and 36 (below), depending on whether the integration is successfully activated (Figure 35) or not (Figure 36).

Figure 33 - Authorization required prompt
Authorization Process
By clicking the Authorize button (2 - Figure 33), you will be redirected to a page of the external system, where you will be required to log in to the external system (if you are still logged out). This allows for a connection between the two systems. If you were connecting to Zendesk, for instance, you would be prompted with the message from Figure 34 (after logging in).

Figure 34 - Zendesk authorization screen
New Custom Connection
If the process goes well, you will now have a new custom integration (Figure 7 from this page).
Figure 35 depicts an example of how custom integration settings are presented when checking the configurations of the new custom integration.

Figure 35 - Settings of a custom connection with the OAuth2 Authorization code flow authentication
The client ID and client secret are never displayed (Figure 35).
Authorization Process - Error
If an error occurs during the authorization process, you will be immediately redirected to the Settings page, which will appear as shown in Figure 36.
To restart the authentication process, click the Reconfigure button, and you will go back to the configuration page from Figure 32.

Figure 36 - Settings page in case of authorization Error
Because OAuth2 Authentication Code Flow doesn’t work in Talkdesk Workspace, make sure the Talkdesk user setting up the Connection does not open Workspace by default. If you are currently on Talkdesk Workspace, go to Admin > Agents, click the relevant user, and find the login part in the Talkdesk Workspace section. There, enable the Activate Talkdesk Workspace option (Figure 37 - 1) as the default login experience, and click Save (Figure 37 - 2)
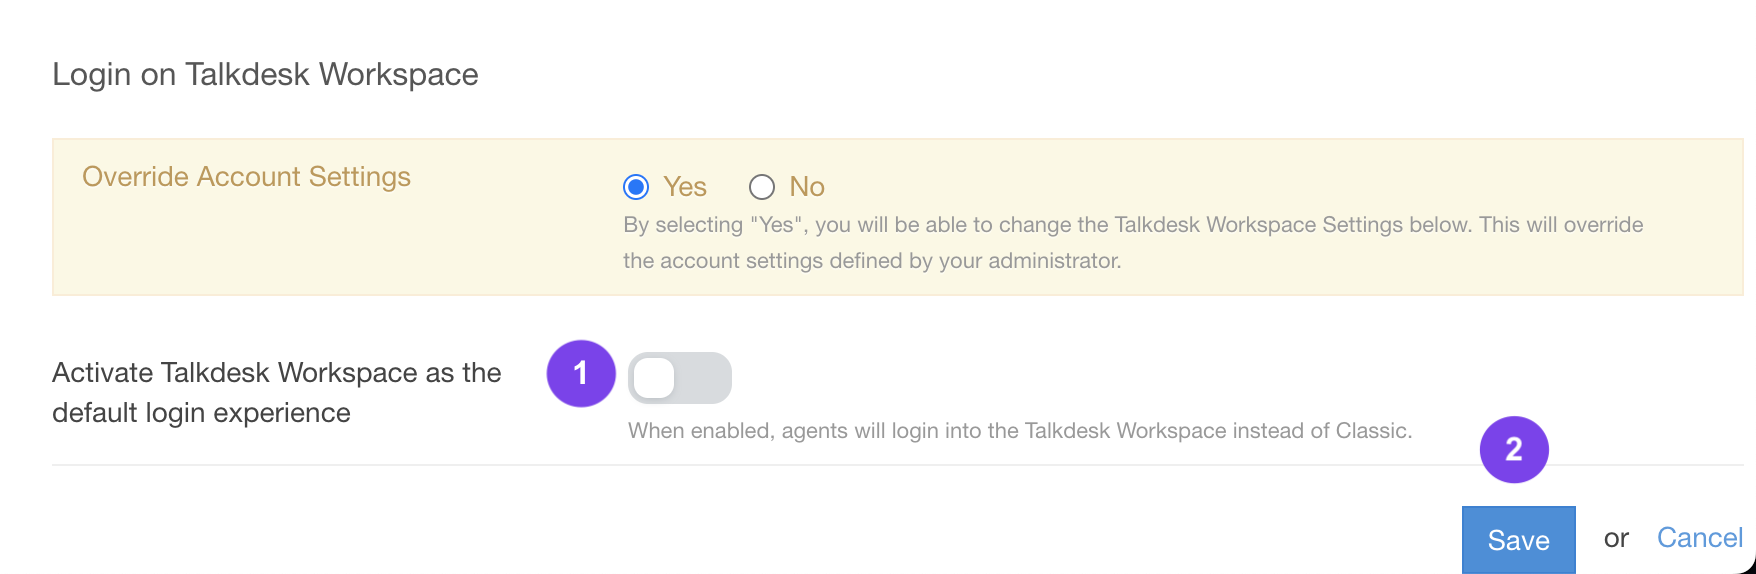
Figure 37 - Talkdesk Workspace Login
TroubleshootingIf you have questions or technical issues, please open a ticket using this form.
Updated 6 months ago