Card Preview
You can preview the content of the card by clicking the Preview Card button in the Code Editor tab. After clicking this button, a modal will appear with the meta information about the card and then an area where the card's content is rendered.
If the card uses variables, it’s possible to mock their values - use the Preview panel (Figure 1 - right side).
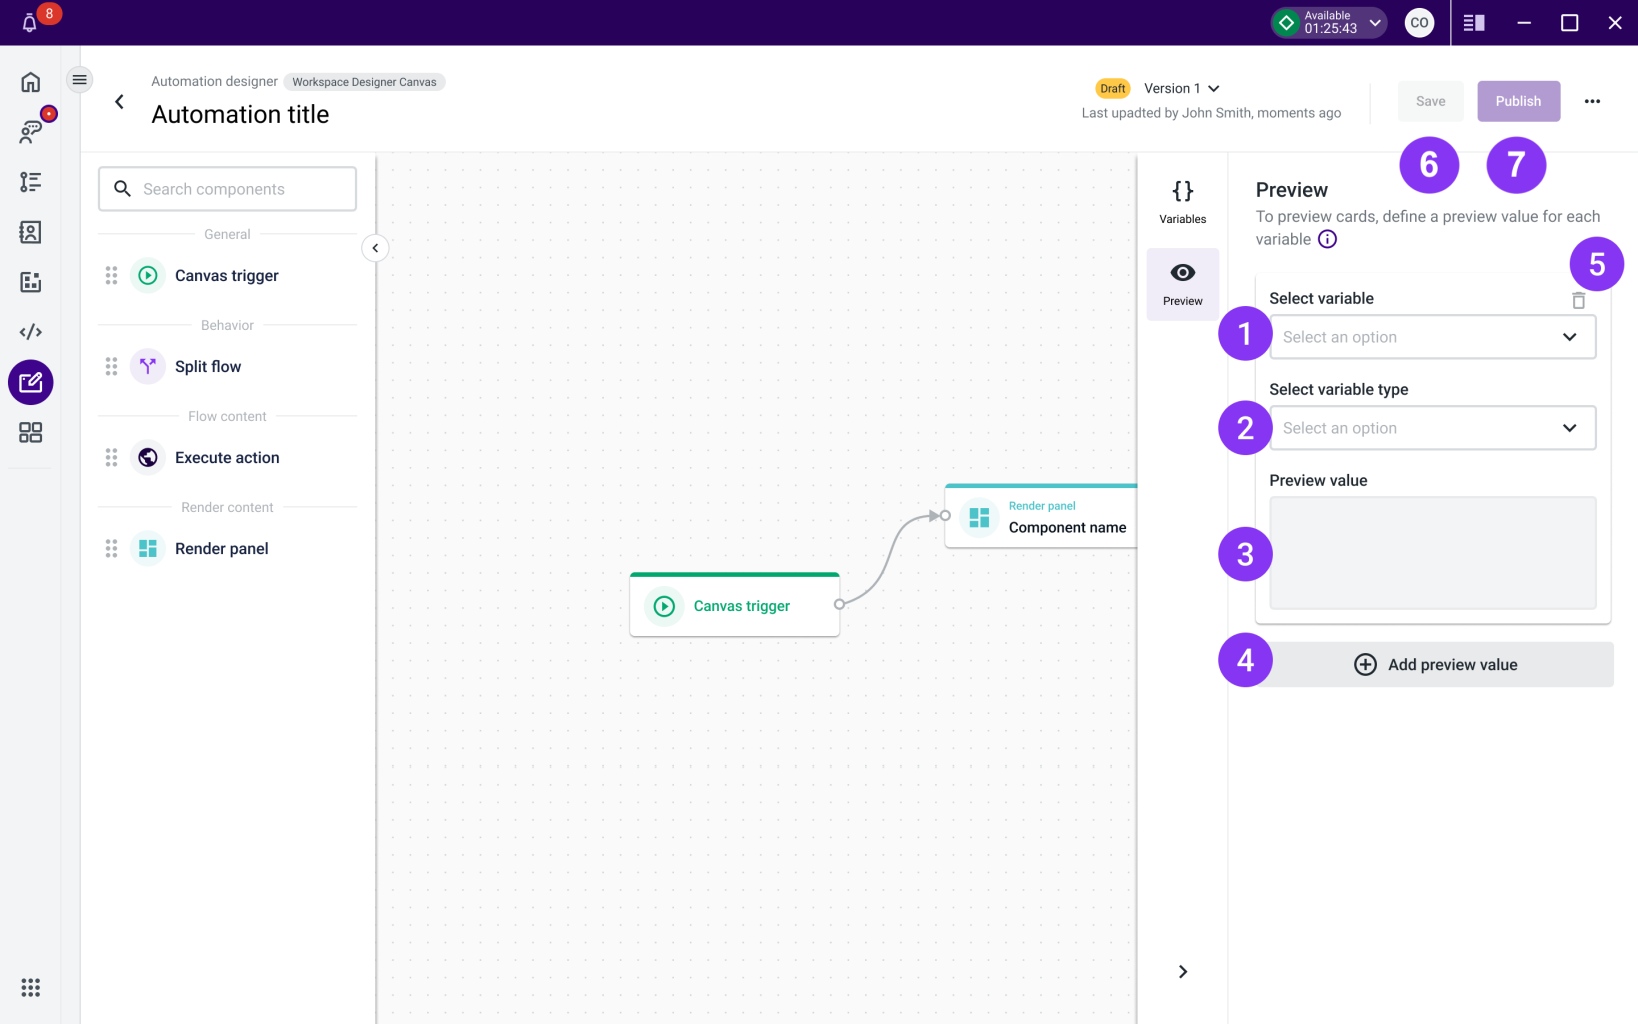
Figure 1 - Custom variables management
When opening this tool, you will have a field to assign a mocked value to an existing variable. In each form field, you have the following configuration options:
- Select variable (Figure 1 - 1) - the variable to be mocked. Choose one of the list of available variables. It’s not possible to define more than one different mocked value for the same variable.
- Select variable type (Figure 1 - 2) - the type of the variable mocked value. It could be a String, Number, Boolean, Array and/or Object.
- Preview value (Figure 1 - 3) - the mocked value of the variable.
To add another mocked value to another variable, click the Add preview value button (Figure 1 - 4). You can also remove a mocked value by clicking the delete icon (Figure 1 - 5).
Once you have finished configuring your card preview fields, you can save the changes (Figure 1 - 6) and/or publish them (Figure 1 - 7). By saving them, you will validate if there are any errors and your work will be temporarily saved. Only when you click Publish will the changes be effectively implemented and reflected in the card/canvas usage.
The variable Preview values is stored locally in real-time within the automation. If you exit the automation configuration, it will reset the values.
TroubleshootingIf you have questions or technical issues, please open a ticket using this form.
Updated 6 months ago