SCIM User Management for Microsoft Entra ID
This page details the configuration steps required to establish a connection between the SCIM Application in Microsoft Entra ID and Talkdesk. Please carefully review the following page before beginning the setup process: SCIM API
Creating the SCIM Application in Microsoft Entra ID
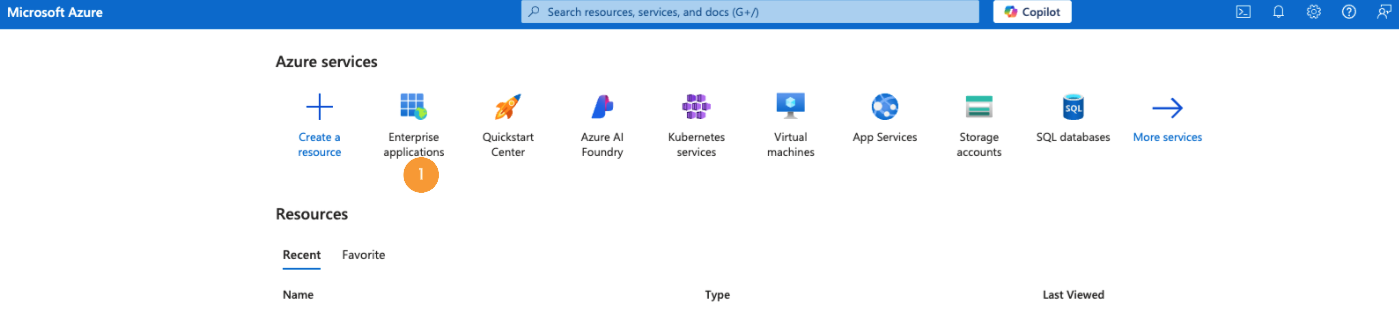
- Log in and go to Enterprise applications [1].
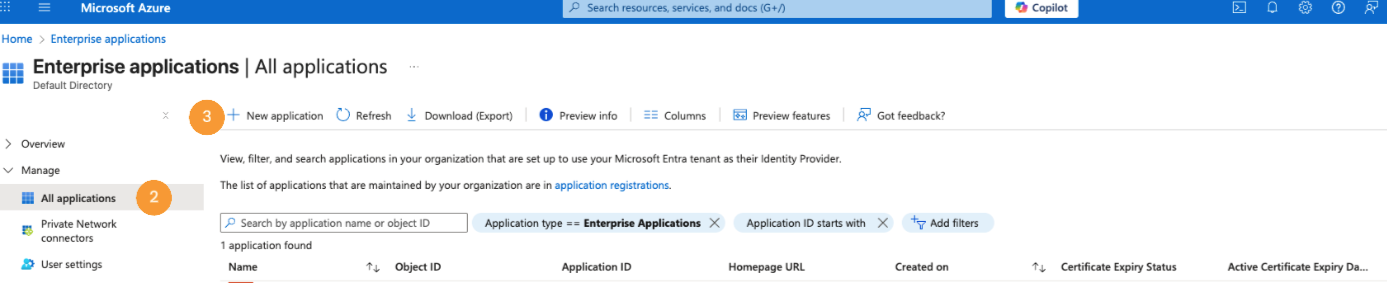
- Navigate to All applications [2] and then click New application [3].
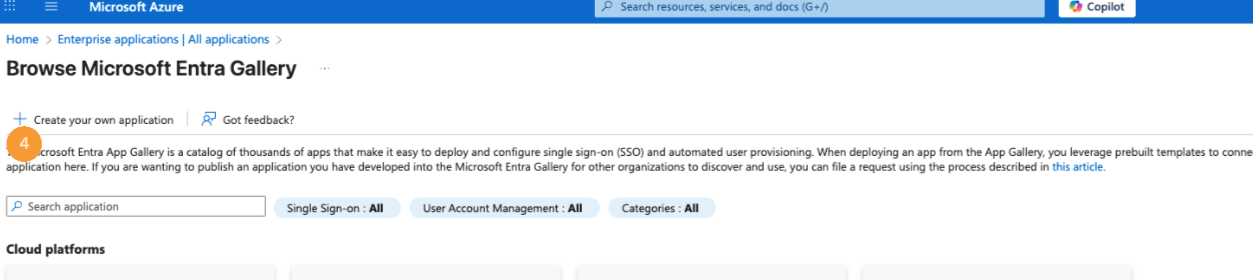
- Click Create your own application [4].
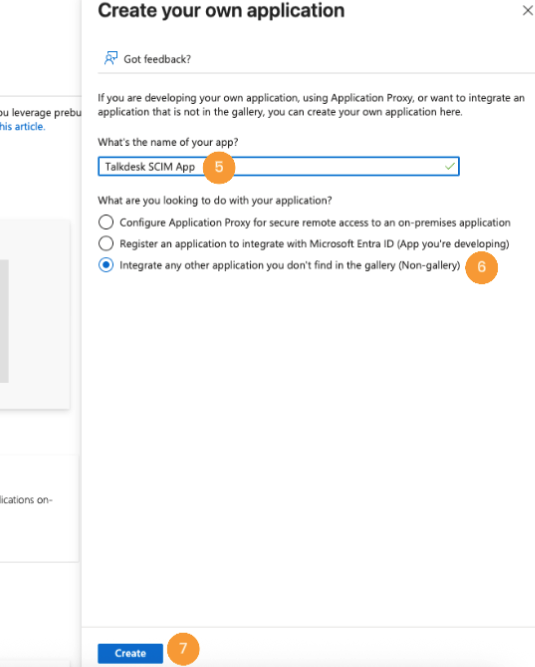
- Give the application a name (i.e. “Talkdesk SCIM App”) [5], check the Integrate any other application you don’t find in the gallery (Non-gallery) option [6], and click Create [7].
Configuring the Provisioning
- Enter the application we created in the first step in Enterprise applications > All Applications > Talkdesk SCIM App.
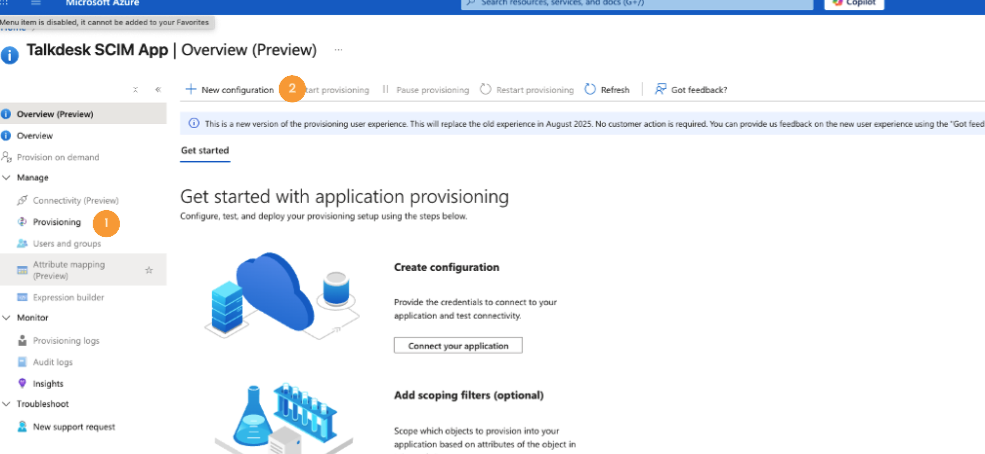
- Navigate to Provisioning [1] and click on New configuration [2].
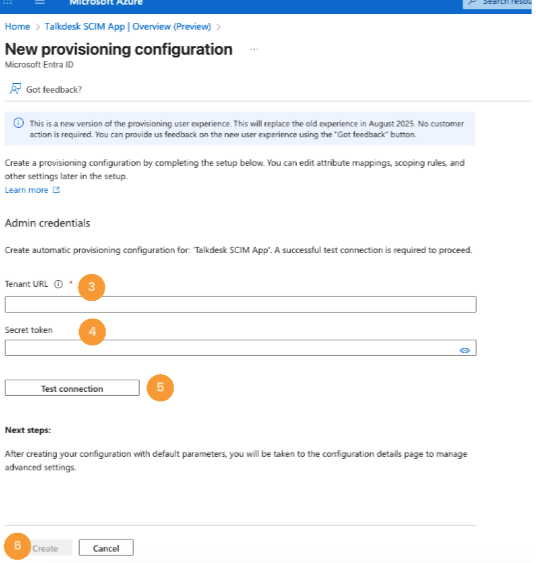
- Enter https://api.talkdeskapp.com/scim/v2 in the “Tenant URL” field [3].
- The base URL (i.e. api.talkdeskapp.com) is determined by your account instance's region. To view the available options, please check the following page: App and Talkdesk Regions
- Then, type in the STS generated token in the “Secret token” field [4]. For additional information on generating an STS Token, please visit this article.
- Click on Test connection [5] to ensure it works, and click on Create [6].
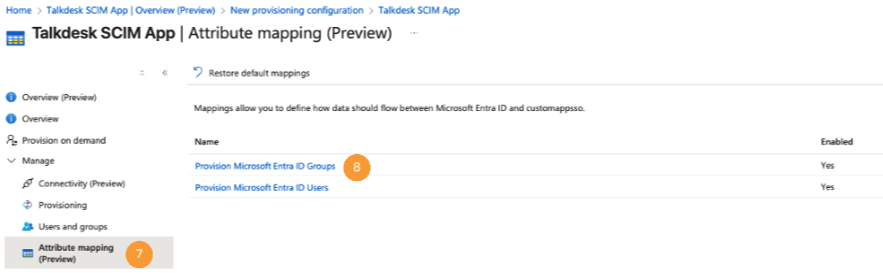
- Navigate to Attribute mapping (Preview) [7] and click on Provisioning Microsoft Entra ID Groups [8].
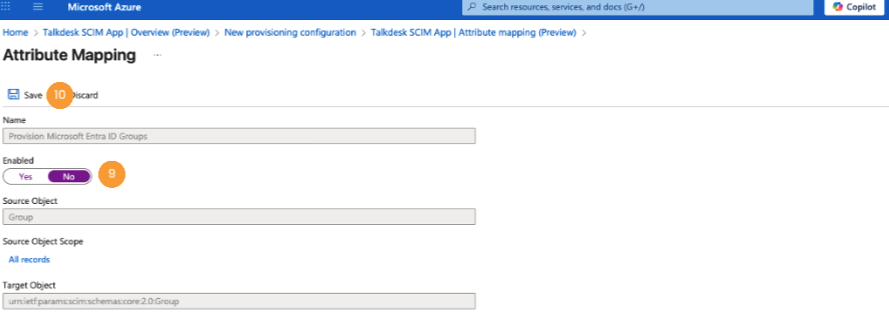
- Ensure groups mapping is Disabled [9] and click Save [10].
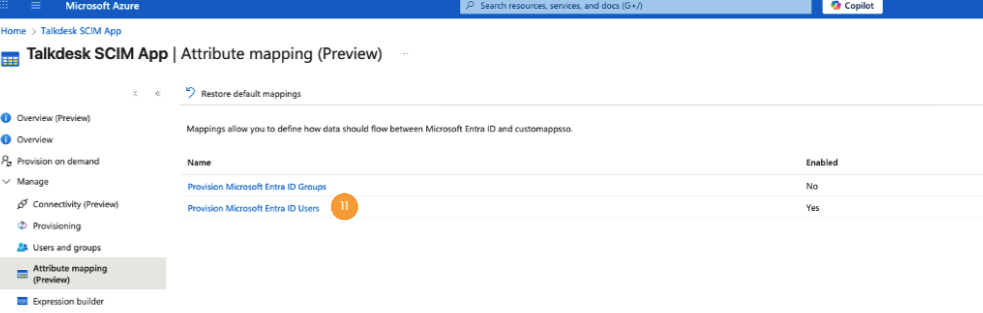
- Return to Attribute mapping and click on Provisioning Microsoft Entra ID Users [11].
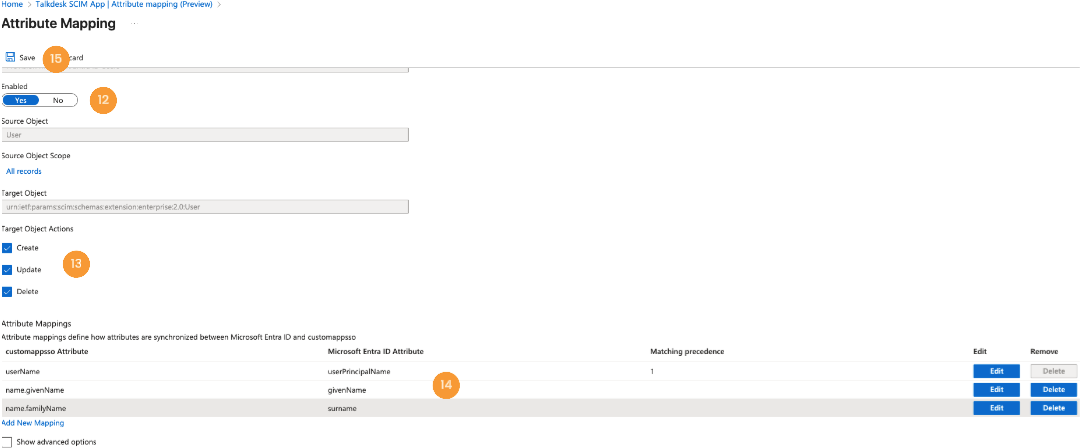
- Ensure attribute mapping is Enabled [12] and specify which User operations should be synchronized with Talkdesk [13].
- On the same page, ensure that only supported fields are present in the Attribute Mappings [14] and click Save [15].
- For a comprehensive list of supported fields, please visit: Create User
- Some fields are mapped by default and need to be removed (i.e. Honorific prefix).
- The mandatory fields are
userName,givenName, andfamilyName.
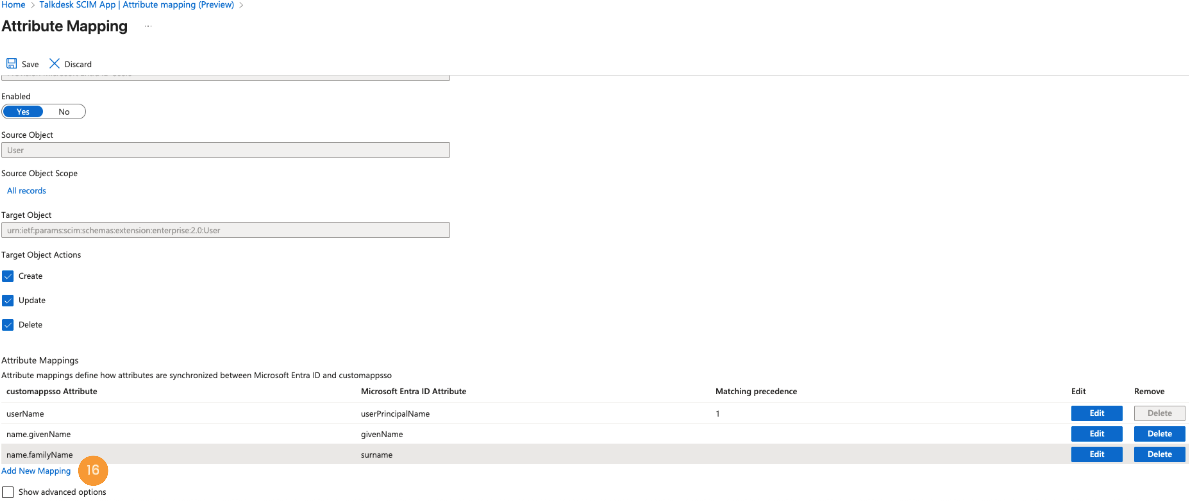
- Alternatively, to assign the
activeandexternalIdto the user during the SCIM Provisioning process, click on the Add New Mappings [16] link.
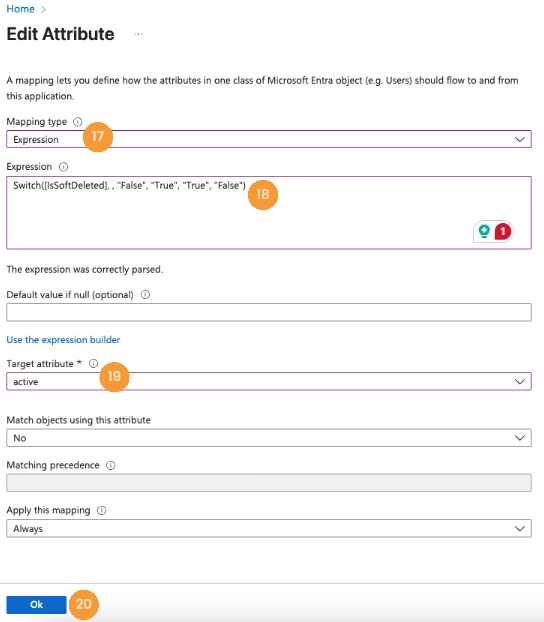
NoteIf the active field is not mapped, Talkdesk will try to create the user with active=true.
- For the
activefield, set the Mapping type to "Expression" [17], enter the codeSwitch([IsSoftDeleted], , "False", "True", "True", "False")in the Expression field [18], choose "active" as the Target attribute [19], and click Ok [20].
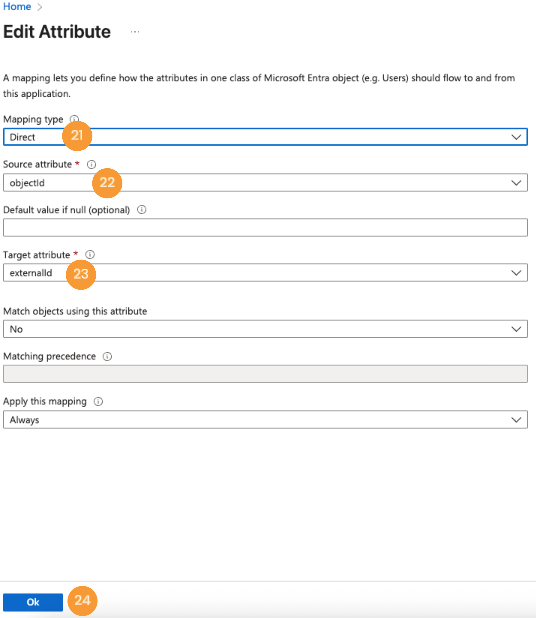
- For the
externalIdfield, set the Mapping type to "Direct" [21], select “objectId” in the Source attribute field [22], choose "externalId" as the Target attribute [23], and click Ok [24].
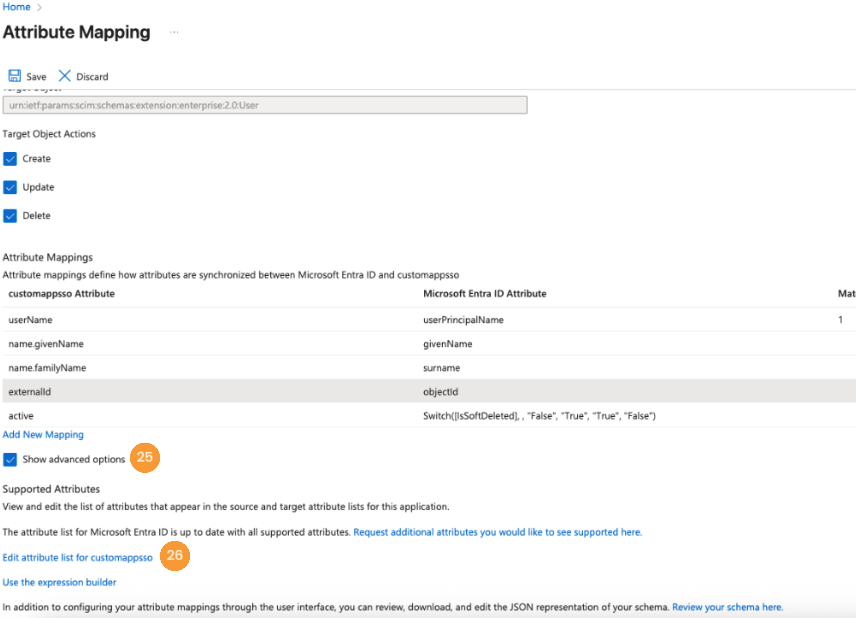
- Alternatively, to assign the
teamandroleto the user during the SCIM Provisioning process, enable Show advanced options [25] and then click Edit attribute list for customappsso [26].
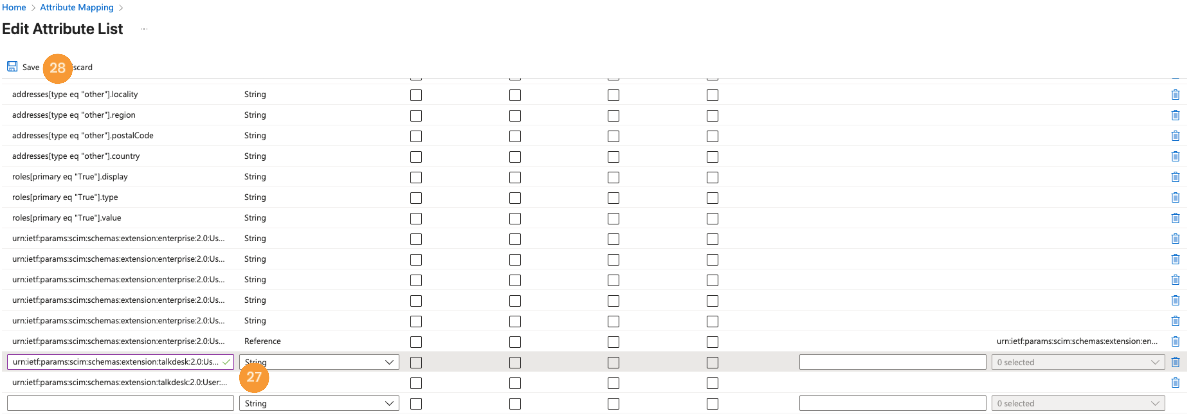
- Scroll to the end of the page and create
roleandteamattributes [27]. Useurn:ietf:params:scim:schemas:extension:talkdesk:2.0:User:rolesStringfor the role name andurn:ietf:params:scim:schemas:extension:talkdesk:2.0:User:teamsStringfor the team name. Configure both as String attribute types and click Save [28].
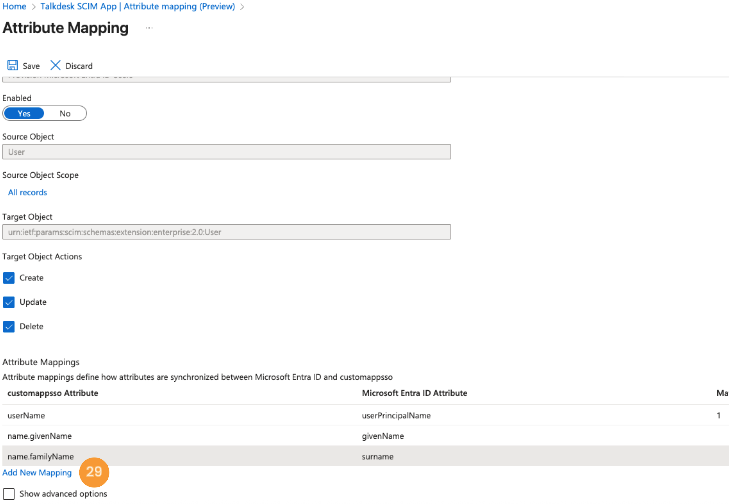
- Role and team values can be set through multiple methods (i.e. user custom attributes or application roles). For demonstration purposes, this guide uses constant values to populate these fields. Click on the Add New Mappings [29] link.
NoteThe rolesString value must contain a role name that already exists in your Talkdesk Account and has been previously created.
If the Role field is not mapped, Talkdesk will create the user with the default Role Agent.
NoteThe teamsString value must contain a team name that already exists in your Talkdesk Account and has been previously created.
If the Team field is not mapped, Talkdesk will not assign the user to any team.
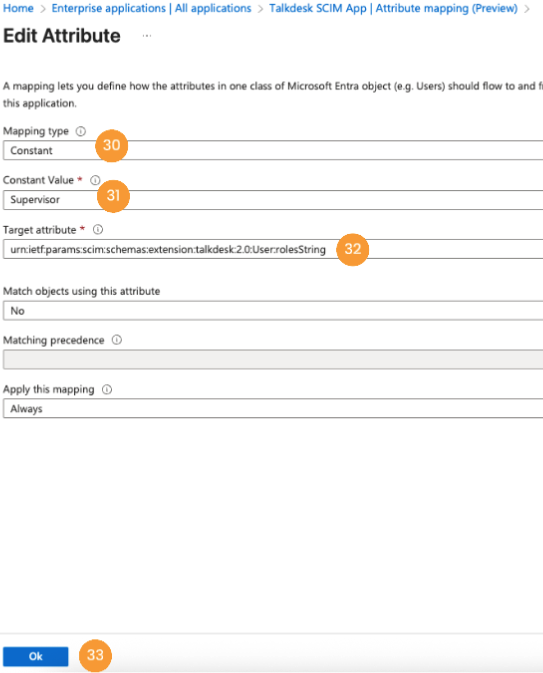
- Set the Mapping type to "Constant" [30], enter the desired value in the Constant Value field [31], select the appropriate Target attribute [32], and click Ok [33].
- When configuring role field mapping through application roles, specify the expression
SingleAppRoleAssignment([appRoleAssignments])in the attribute mapping settings.
- When configuring role field mapping through application roles, specify the expression

- To assign users to the application, navigate to Users and groups [34], and click on the Add user/group [35].
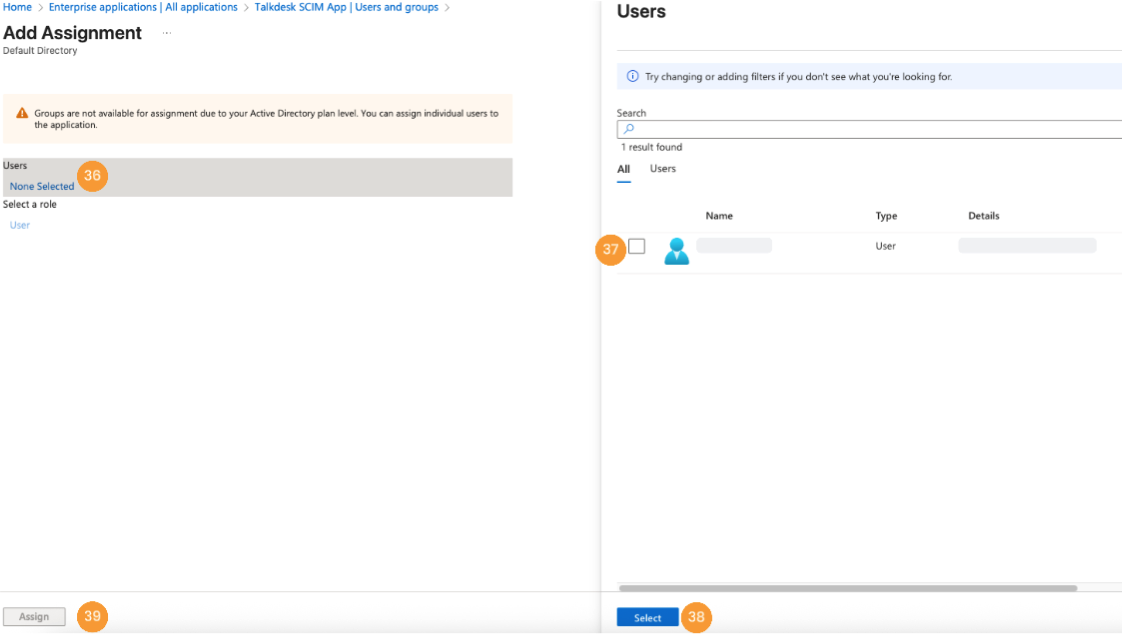
- Click the None Selected link [36], check [37] the desired users in the side panel, then click Select [38]. After adding all users, click Assign [39].
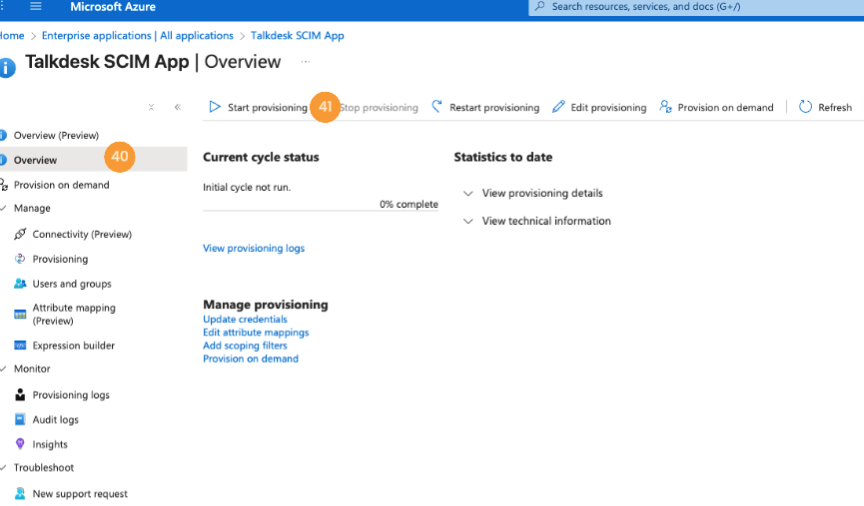
- Finally, navigate to Overview [40] and click Start provisioning [41].
Updated about 2 months ago