Chat Widget V2
- Getting Started
- Chat Widget Methods
- Chat Widget Events
- Chat Widget Snippet Code Configuration
- Chat Widget Theme Configuration
- Content Security Policy
- CSP Domain Description
- Chat Widget Scenario Best Practice Cases
- Limitations
Getting Started
Chat Widget is a JSSDK (hereafter referred to as Chat widget) that allows embedding into your own website and comes in handy whenever contacts want to contact you. More detailed configuration and usage documents are here. This document mainly focuses on JSSDK-related content.
Custom integration demo
This contains the best ways to customize the most commonly used integration methods or events.
IOS Native app integration
Chat Widget Methods
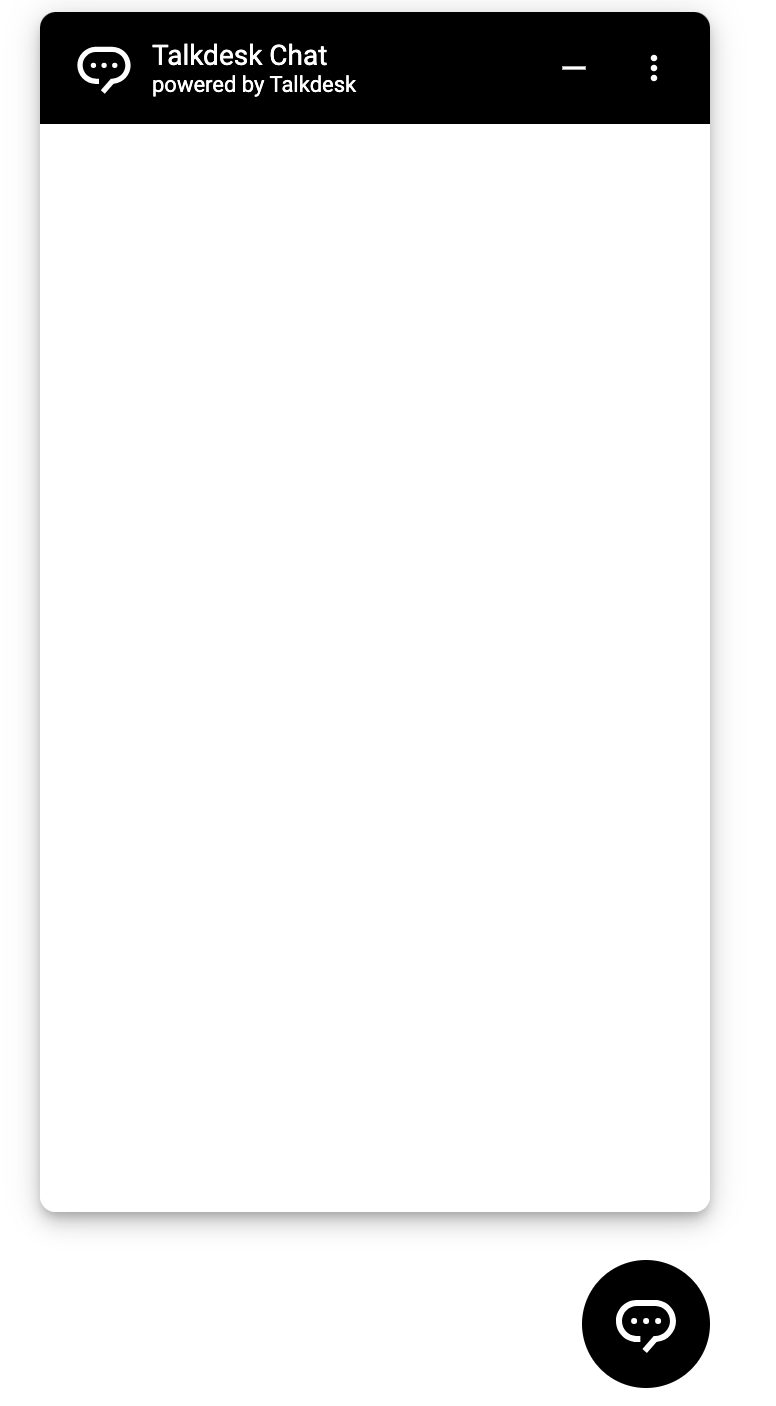
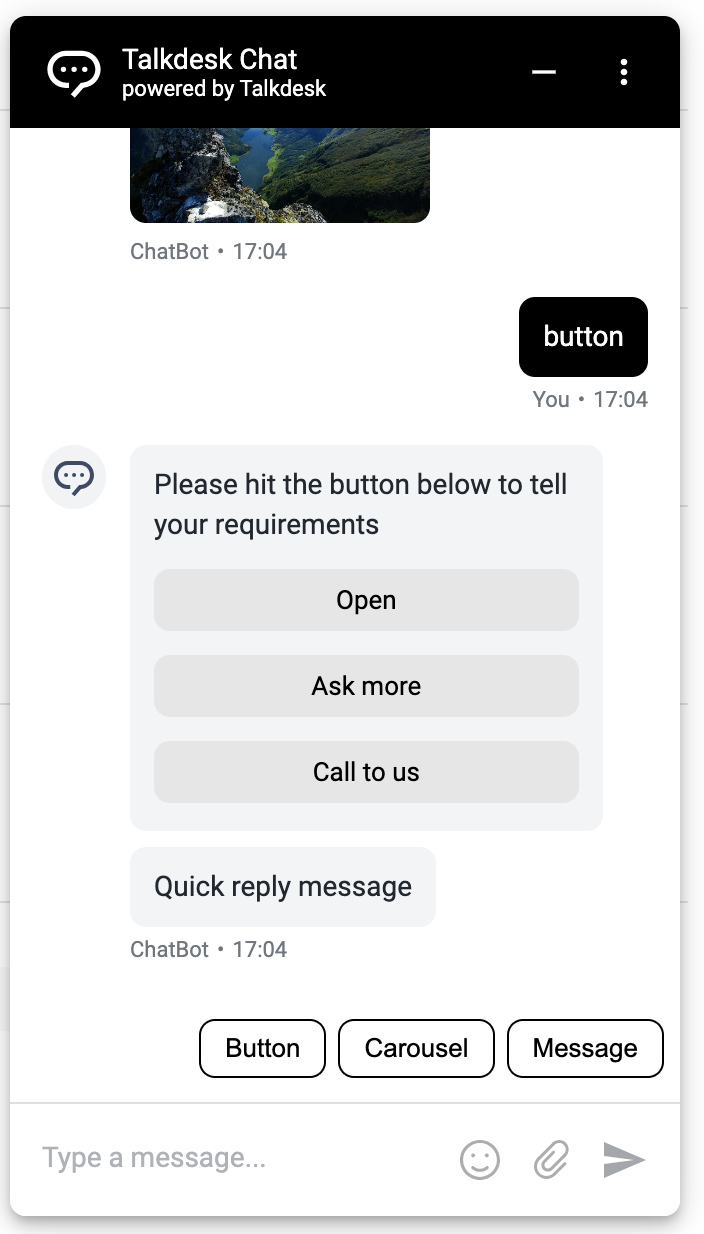
Maximize chat widget
The open method used for maximizing the chat widget by hitting the following icon.
It needs to be invoked after the initialization of the chat widget.
webchat.open()Minimize chat widget
The close method is used for minimizing the chat widget by hitting the minimize icon in the chat box header. It needs to be invoked after the initialization of the chat widget.
webchat.close()Destroy chat widget
The destroy method performs a cleanup of the chat widget by removing all associated UI elements—including iframes, the launcher button, and injected styles—while unbinding active event listeners to ensure optimal memory management. While this action terminates the active connection, the underlying conversation state is preserved on the server. Consequently, if the widget is re-initialized via the init method within 24 hours, the previous conversation can be restored for the user.
webchat.destroy()Reset chat widget
The reset method reverts the chat widget to its default initial state without removing it from the DOM. When invoked, it minimizes the widget window, clears the notification badge, and reloads the internal iframes to prepare for a fresh session. While the server-side conversation state remains intact, all local client-side cache is purged, preventing the current user from restoring the previous session. The active connection is terminated, and the widget is ready for a new conversation.
webchat.reset()Set context
The setContextParam method is used for transmitting customized key-value context to TD internal systems such as Studio Flow, for example. We can transmit the customer's using language or address to the agent. The customized context will be displayed in the Context tab of Conversation through Studio.
The
setContextParamcan be used to set default values for the Initial screen form in chat-widget. If we set default values for all the form controls of Initial screen, the Initial screen will be skipped before the conversation starts.However, please note that
setContextParamdoes not support multi-layer nested objects. Only flat key-value pairs or single-level objects should be used when setting context parameters.
webchat.setContextParam({
  "var1": "dummy value for var1",
  "var2": "dummy value var2",
  "field_name1": "dummy name",
  "field_email1": "[email protected]"
  ...
})
Pop-up close conversation window
The popupCloseConversation method is used to trigger the closing of the conversation pop-up window.
If this method is not called at the appropriate time, the chat widget JSSDK will not respond. The following conditions may cause it to have no effect:
- The conversation has not started.
- The conversation has already been closed.
- The chat WebSocket connection is disconnected.
- The JSSDK has not been initialized.
webchat.popupCloseConversation()End conversation
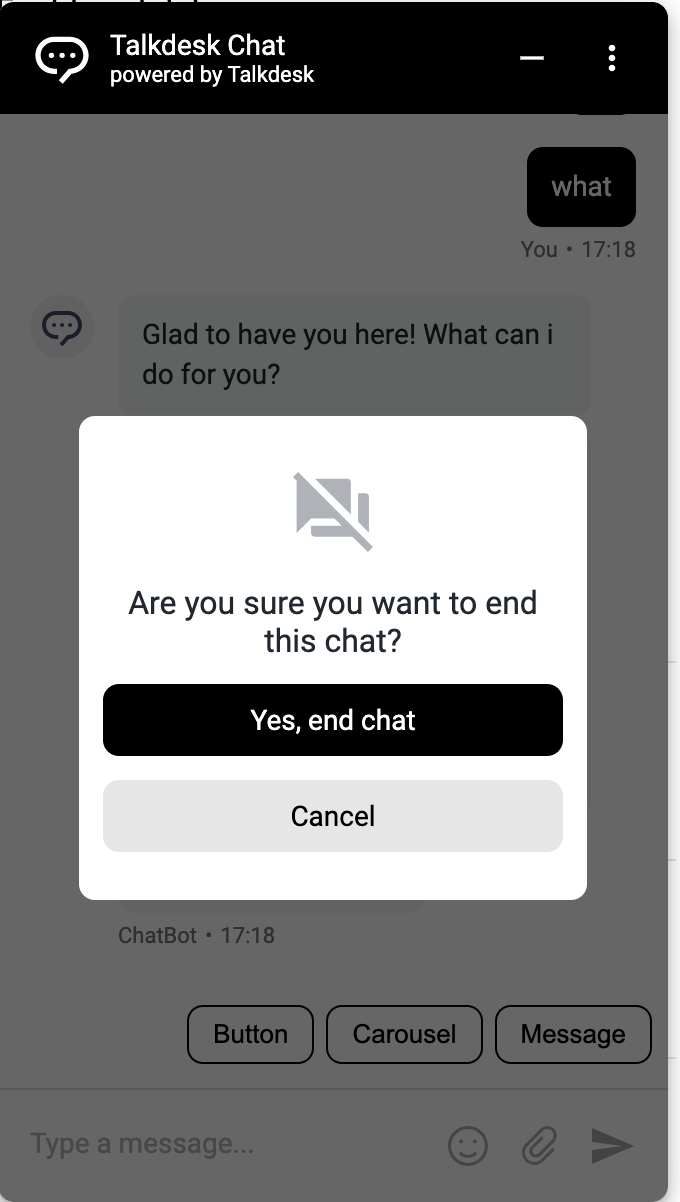
The end method programmatically terminates the active conversation, replicating the behavior of a user manually closing the chat but bypassing the standard confirmation prompt. This method returns a promise that resolves with { success: boolean, reason: string }.
If this method is not called at the appropriate time, the chat widget JSSDK will not respond. The following conditions may cause it to have no effect:
- The SDK must be initialized before calling
end. If init has not been called, the promise will resolve with{ success: false, reason: 'TalkdeskSDK not initialized' }.- If an
endcall is already in progress, subsequent calls will return the same pending promise instead of triggering a new request.- The contact person must be has the ongoing conversation with an active connection. Calling
endbefore the conversation is fully established will fail.- This method makes an asynchronous server-side call, so it takes time to complete. Avoid calling
endin browser close/unload events (e.g.,beforeunload), as the browser may terminate the page before the request finishes, resulting in the conversation not actually being closed..
webchat.end().then(function (result) {
  console.log(result) // { "success": true, "reason": <result.reason> }
})
Chat Widget Events
Initialization completed
The init event is used for doing something after the chat widget is initialized. It’s an asynchronous function and receives the customized configuration of the chat widget as arguments.
webchat.init(configs).then(function () {
  // Custom business logic after chat widget initialized
})
When chat is maximized
The onOpenWebchat event is used to do something after the chat widget is opened. It receives a callback as its argument to execute your customized logic.
webchat.onOpenWebchat = function () {
  // Custom business logic when chat widget is maximized
}
When chat is minimized
The onCloseWebchat event is used to do something after the chat widget is closed. It receives a callback as its argument to execute your customized logic.
webchat.onCloseWebchat = function () {
  // Custom business logic when chat widget is minimized
}
When the conversation starts
The onConversationStart event is used to do something after the chat conversation starts. It receives a callback as its argument to execute your customized logic.
webchat.onConversationStart = function () {
  // Custom business logic when the conversation starts
}
When the conversation ends
The onConversationEnded event is triggered when the conversation ends, such as when the contact person, agent, or virtual agent closes the conversation. It accepts a callback function to execute your custom logic.
webchat.onConversationEnded = function () {
  // Custom business logic when the conversation ends
}
When the conversation is cleared
The onConversationClear event is triggered when the contact person clicks the Start New Chat button to clear the current conversation. It accepts a callback function where you can define your business logic.
webchat.onConversationClear = function () {
  // Custom business logic when the conversation is cleared
}
Chat Widget Snippet Code Configuration
The snippet code is embedded in the customer’s website and can be customized according to the configuration you transmit.
<!-- Start of Talkdesk Code -->
<script>
  var webchat
  (function (window, document, node, props, configs) {
    if (window.TalkdeskChatSDK) {
      console.error("TalkdeskChatSDK already included")
      return
    }
    var divContainer = document.createElement("div")
    divContainer.id = node
    document.body.appendChild(divContainer)
    var src = "https://talkdeskchatsdk.talkdeskapp.com/v2/talkdeskchatsdk.js"
    var script = document.createElement("script")
    var firstScriptTag = document.getElementsByTagName("script")[0]
    script.type = "text/javascript"
    script.charset = 'UTF-8'
    script.id = "tdwebchatscript"
    script.src = src
    script.async = true
    firstScriptTag.parentNode.insertBefore(script, firstScriptTag)
    script.onload = function () {
      webchat = TalkdeskChatSDK(node, props)
      webchat.init(configs)
    }
  })(
    window,
    document,
    "tdWebchat",
    // the props
    {
      "touchpointId": "<customer td touchpointId>",
      "accountId": "",
      "region": "<customer td region>",
      "autoOpen": false
    },
    // the configs
    {
      "enableEmoji": true,
      "enableValidation": true,
      "enableUserInput": true,
      "enableAttachments": true,
      "enableResponsiveLayout": true,
      "enablePointMoveTriggerButton": false,
      "enableChatHeader": true,
      "languageCode": "",
      "styles": {
        "triggerButtonPositionRight": "10px",
        "triggerButtonPositionBottom": "20px"
        // TODO: Add more styles here
      }
    }
  )
</script>
<!-- End of Talkdesk Code -->| Field | Type | Required | Description |
|---|---|---|---|
| window | object | Yes | Browser built-in Window object |
| document | object | Yes | Browser built-in Document object |
| node | string | Yes | The target Dom to which chat-widget UI is mounted |
| props | See props configuration below for details | Yes | Chat-widget base configuration, such as service config, public methods |
| configs | See configs configuration below for details | Yes | Chat-widget customization settings |
props configuration
| Field | Type | Required | Default value | Description |
|---|---|---|---|---|
| touchpointId | string | Yes | - | Use to get the chat-widget touchpoint configuration |
| flowId | string | No | - | Deprecated Note: Keep this field only for compatibility, please better use touchpointId instead. |
| accountId | string | No | - | Deprecated Note: Keep this field only for compatibility, it won’t work if configured. |
| region | enum | Yes | - | The region of the TD endpoints gateway: td-us-1 td-eu-1 td-ca-1 td-ap-1 td-usfed-1 |
| enablePointMoveTriggerButton | boolean | No | false | Enable/disable drag and move for the chat launcher |
| languageCode | string | No | en-US | Using language: en-US pt-PT pt-BR es-ES de-DE fr-FR it-IT ar-SA ar-EG |
| autoOpen | boolean | No | false | Automatically open widget after initialization |
| optOutLimit | number | No | 86400 | Controls how long the component stays hidden after close; shows again when time’s up. |
configs configuration
| Field | Type | Required | Default value | Description |
|---|---|---|---|---|
| enableEmoji | boolean | No | true | Enable/disable the emoji capability |
| enableValidation | boolean | No | false | Enable/disable the validation of the email or phone number in the Initial screen |
| enableUserInput | boolean | No | true | Enable/disable the sending box |
| enableAttachments | boolean | No | true | Enable/disable sending/receiving attachment capability |
| enableResponsiveLayout | boolean | No | true | Enable/disable auto full-screen capability |
| enablePointMoveTriggerButton | boolean | No | false | Enable/disable drag and move for the chat launcher |
| enableChatHeader | boolean | No | true | Show/hidden chat widget header ui |
| enableLauncherButtonAutoFocus | boolean | No | false | Auto focus for trigger button |
| languageCode | string | No | en-US | Using language: en-US pt-PT pt-BR es-ES de-DE fr-FR it-IT ar-SA ar-EG |
| styles | object | No | - | See theme config below for details |
| enableSoundNotification | boolean | No | true | Enable/disable the sound notification |
Chat Widget Theme Configuration
The chat widget supports customizing themes to have a better UX for Customers.
Customizing the proactive chat
| Field | Type | Default value | Description |
|---|---|---|---|
| openFlyOutAudioUrl | string | - | Sound effect for opening the fly-out |
Customizing the chat widget launcher
Launcher
| Field | Type | Default value | Description |
|---|---|---|---|
| chatLauncherColor | string | # 1e0044 | The color for the chat launcher |
| chatHoverLauncherColor | string | # 172241 | The hover color for the chat launcher |
| triggerButtonWidth | string | 35px | Width of launcher icon. _Note: up to 64 px |
| triggerButtonHeight | string | 35px | Height of launcher icon. _Note: up to 64px |
| triggerButtonPositionRight | string | 30px | Distance of launcher icon to the right side of the window |
| triggerButtonPositionBottom | string | 40px | Distance of launcher icon to the bottom of the window |
| receiveMessageAudioURL | string | - | Custom audio URL for sound notification. |
Customizing the widget window
Widget window
| Field | Type | Default value | Description |
|---|---|---|---|
| chatIcon | string | sms.svg | Launcher icon. Note: Supports SVG, PNG, and JPG, better as SVG. For a round shape, it should have a transparent background. |
| chatTitle | string | Talkdesk Chat | Title for header. |
| chatTitleIcon | string | sms.svg | The icon at the left of header. |
| chatTitleIconWidth | string | 32px | Width for the icon at the left of header. |
| chatTitleIconHeight | string | 32px | Height for the icon at the left of header. |
| chatTitleTextColor | string | - | Font color for the title of header. |
| chatSubtitle | string | Powered by Talkdesk | Subtitle for header. |
| chatSubtitleTextColor | string |
| Font color for the subtitle of header. |
| chatCloseButtonColor | string |
| Color for the close button. |
| chatMinimizeButtonColor | string |
| Color for the minimize button. |
| chatContainerWidth | string | 335px | Width of the chat box. |
| chatContainerHeight | string | 600px | Height of chat box. |
| chatPositionBottom | string | 20px | Distance of chat box to the bottom of the window. |
| chatThemeColor | string |
| Background color for launcher and header. |
| chatHoverThemeColor | string |
| Color of the launcher background when hovering. |
| chatThemeMainFont | string | Roboto-Regular, sans-serif | Font of the subtitle, input box placeholder, chat messages, and notifications. Note: It supports web-safe fonts. If you wish to use a non-supported font, we recommend pre-installing the font on your website. |
| fontFamilyUrl | string | Talkdesk chat widget default font library | Specifies the URL of the primary font file used by the chat widget. |
| boldFontFamilyUrl | string | Talkdesk chat widget default font library | Specifies the URL of the bold font file used by the chat widget. |
| fontFamilyFormat | string | truetype | Specifies the format of the provided font files. Allowed values: |
Customizing the initial screen
Welcome message
| Field | Type | Default value | Description |
|---|---|---|---|
| welcomeMessageBackgroundColor | string | # 4D356A | Background color for the welcome message. |
| welcomeMessageTitleFontFamily | string | Roboto-Regular, sans-serif | Font for the title of the welcome message |
| welcomeMessageTitleFontSize | string | 24px | Font size for the title of the welcome message. |
| welcomeMessageTitleColor | string | # ffffff | Font color for the title of the welcome message. |
| welcomeMessageContentFontFamily | string | Roboto-Regular, sans-serif | Font for the content of the welcome message. |
| welcomeMessageContentFontSize | string | 16px | Font size for the content of the welcome message. |
| welcomeMessageContentColor | string | # ffffff | Font color for the content of the welcome message. |
Custom message
| Field | Type | Default value | Description |
|---|---|---|---|
| customMessageNoBubbleFontFamily | string | Roboto-Regular, sans-serif | Font of the custom message with no bubble. |
| customMessageNoBubbleFontSize | string | 14px | Font size of the custom message with no bubble. |
| customMessageNoBubbleColor | string | # 202830 | Font color of the custom message with no bubble. |
| customMessageBackgroundColor | string | # F2F4F5 | Background color of the custom message with bubble. |
| customMessageFontFamily | string | Roboto-Regular, sans-serif | Font of the custom message with bubble. |
| customMessageFontSize | string | 14px | Font size of the custom message with bubble. |
| customMessageColor | string | # 202830 | Font color of the custom message with bubble |
Custom field
| Field | Type | Default value | Description |
|---|---|---|---|
| customFieldLabelFontFamily | string | Roboto-Regular, sans-serif | Font for the label of the custom field. |
| customFieldLabelFontSize | string | 14px | Font size for the label of the custom field. |
| customFieldLabelColor | string |
| Font color for the label of custom field. |
| customFieldInputFontFamily | string | Roboto-Regular, sans-serif | Font for the input text of custom field. |
| customFieldInputFontSize | string | 14px | Font size for the input text of custom field. |
| customFieldInputColor | string |
| Font color for the input text of custom field. |
| customFieldInputBackgroundColor | string |
| Background color for custom field. |
| customFieldInputPlaceholder | string | Type | Partial placeholder for the custom field. |
| customFieldPhoneDescription | string | Include the country code, avoid spaces and/or symbols (e.g. +1123456789) | Phone number input Prompt user description Note: This item will only be displayed if enableValidation is set to true. |
| customFieldPhoneInvalidFormatMessage | string | please type a valid phone number | Phone number input Prompt user description Note: This item will only be displayed if enableValidation is set to true. |
| customFieldEmailInvalidFormatMessage | string | please type a valid email | Phone number input Prompt user description Note: This item will only be displayed if enableValidation is set to true. |
Custom dropdown
| Field | Type | Default value | Description |
|---|---|---|---|
| customDropdownLabelFontFamily | string | Roboto-Regular, sans-serif | Font for the custom dropdown label. |
| customDropdownLabelFontSize | string | 14px | Font size for custom dropdown label. |
| customDropdownLabelColor | string | # 202830 | Font color for custom dropdown label. |
| customDropdownInputFontFamily | string | Roboto-Regular, sans-serif | Font for custom dropdown input. |
| customDropdownInputFontSize | string | 14px | Font size for custom dropdown input. |
| customDropdownInputColor | string | # 202830 | Font color for custom dropdown input. |
| customDropdownInputBackgroundColor | string | # ffffff | Background color for custom dropdown. |
| customDropdownInputPlaceholder | string | Select | Placeholder for custom dropdown. |
Custom button
| Field | Type | Default value | Description |
|---|---|---|---|
| customButtonFontFamily | string | Roboto-Regular, sans-serif | Font of the label of a custom button. |
| customButtonFontSize | string | 14px | Font size of the label of a custom button. |
| customButtonColor | string | # 003FBD | Font color for the label of custom button. |
| customButtonBackgroundColor | string | # ffffff | Background color of a custom button. |
| customButtonBorderColor | string | # 003FBD | Border color of a custom button. |
| customButtonHeight | string | 32px | Height of a custom button. |
Customizing the conversation
Conversation
| Field | Type | Default value | Description |
|---|---|---|---|
| userTextColor | string | # ffffff | Font color of a message sent by a visitor. |
| userBackgroundColor | string | # 5405BD | Background color of a message sent by a visitor. |
| userAnchorTextColor | string | # E1CCFE | Font color of an unvisited hyperlink sent by a visitor. |
| userAnchorTextColorVisited | string | # B681FC | Font color of a visited hyperlink sent by a visitor. |
| userInputHeight | string | 56px | Minimum height of user message input box. |
| userInputSeparatorColor | string | # DFDFDF | Color of the separator above the input box. |
| chatPlaceholder | string | Type a message... | Placeholder of the input box. |
| endedChatMessage | string | End chat | System message text displayed at the end of conversation. |
Bot
Avatar
| Field | Type | Default value | Description |
|---|---|---|---|
| avatarForegroundColor | string | # 5C6784 | Foreground color of the default agent avatar. |
| avatarBackgroundColor | string | # EDF4FC | Background color of the default agent avatar. |
| avatarBorderColor | string | # EDF4FC | Border color of the default agent avatar. |
Button
| Field | Type | Default value | Description |
|---|---|---|---|
| buttonTextColor | string | # 005cde | Set the font color of all VA Buttons and buttons in the carousel component |
| buttonHoverTextColor | string | # 005cde | Set the font color of all VA Buttons and buttons in the carousel component when the mouse is moved into it |
| buttonBackgroundColor | string | rgb(237, 244, 252) | Set the background color of all VA Buttons and buttons in the carousel component |
| buttonHoverBackgroundColor | string | rgb(237, 244, 252) | Set the background color of all VA Buttons and buttons in the carousel component when the mouse is moved into it |
Start chat button
| Field | Type | Default value | Description |
|---|---|---|---|
| startChatButtonTextColor | string | # ffffff | Start new conversation button font color |
| startChatButtonHoverTextColor | string | # ffffff | The font color of the Start New Conversation button when the mouse is moved into it |
| startChatButtonBorderColor | string | # 1e0044 | Start new conversation button border color |
| startChatButtonHoverBorderColor | string | # 1e0044 | The color of the border when the mouse is moved into the Start New Conversation button |
| startChatButtonBackgroundColor | string | # 1e0044 | Start new conversation button background color |
| startChatButtonHoverBackgroundColor | string | # 1e0044 | The background color of the Start New Conversation button when the mouse is moved into it |
| startChatButtonLabel | string | Start new chat | Display copy in Start New Conversation button |
Quick reply
| Field | Type | Default value | Description |
|---|---|---|---|
| replyTextColor | string | # 005cde | Set the font color of all VA quick replay buttons |
| replyHoverTextColor | string | # edf4fc | Set the font color of all VA quick replay buttons when the mouse is moved into them |
| replyBorderColor | string | # 005cde | Set the border color of all VA quick replay buttons |
| replyBackgroundColor | string | transparent | Set the background color of all VA quick replay buttons |
Customizing the close conversation dialog
Dialog
| Field | Type | Default value | Description |
|---|---|---|---|
| chatConfirmButtonFontFamily | string | Roboto-Regular, sans-serif | Set the font color of all VA quick replay buttons |
| chatConfirmButtonFontSize | string | 14px | Set the font color of all VA quick replay buttons when the mouse is moved into them |
| chatConfirmButtonFontColor | string | # ffffff | Set the border color of all VA quick replay buttons |
| chatConfirmButtonBackgroundColor | string | # 3E048B | Set the background color of all VA quick replay buttons |
| chatCancelButtonFontFamily | string | Roboto-Regular, sans-serif | Font of the cancel button of the dialog box. |
| chatConfirmButtonEndChat | string | Yes, end chat | Label of the confirm button of the dialog box when the contact person tries to end the conversation. |
| chatConfirmButtonRetryEndChat | string | Try again | Label of the confirm button of the dialog box when an error occurs while attempting to end the conversation. |
| chatCancelButtonFontSize | string | 14px | Font size of the cancel button of the dialog box. |
| chatCancelButtonFontColor | string | # F2F4F5 | Font color of the cancel button of the dialog box. |
| chatCancelButtonEndChat | string | Cancel | Label of the cancel button of the dialog box when the contact person tries to end the conversation. |
| chatCancelButtonRetryEndChat | string | Dismiss | Label of the cancel button of the dialog box when an error occurs while attempting to end the conversation. |
Content Security Policy (CSP)
Content Security Policy (CSP) is an added layer of security that helps to detect and mitigate certain types of attacks, including Cross-Site Scripting (XSS) and data injection attacks. These attacks are used for everything from data theft to site defacement to malware distribution.
Most customers are using CSP to protect their website from attacks, and they will set strict rules for the third-party libs. So in order to run the chat-widget steadily, we need to provide a whitelist for the customer to avoid being intercepted.
Usually, the CSP tool will detect the src field in script, frame or the elements that have the attribute to decide whether to intercept.
About disabledunsafe-inlineIf your website's Content Security Policy (CSP) rules are stricter and require disabling the
unsafe-inlinecapability, you will need to modify the default chat touchpoint snippet code.
CSP Domain Description
Below is the description of the domains in CSP rules. Each domain plays a crucial role in enabling chat services by specifying trusted sources from which content can be loaded, ensuring both functionality and security for users in their respective regions.
| CSP Domains | Description |
|---|---|
| https://talkdeskchatsdk.talkdeskapp.com | TalkDesk Chat Widget JSSDK remote domain |
| https://api.talkdeskapp.com | TalkDesk Gateway domain for US region |
| https://api.talkdeskapp.eu | TalkDesk Gateway domain for EU region |
| https://api.talkdeskappca.com | TalkDesk Gateway domain for CA region |
| https://api.talkdeskapp-pubsec.com | TalkDesk Gateway domain for FedRAMP region Note: The domain is used for the FedRamp, if your website is not supported for FedRamp, you can ignore it. |
Chat Widget Scenario Best Practice Cases
1. Hide chat launcher icon and open chat-widget
In cases where you prefer not to display the default chat launcher icon and instead want to open the chat widget through a custom element on your web page like an icon, link, or menu, you can achieve this by following these steps:
- Hide the Chat Launcher Icon
Utilize the SDK's configuration options to ensure the default launcher icon is hidden from view. - Trigger the Chat Widget Using the webchat.open() API
Implement a custom trigger (e.g., button, menu item, or link) in your web application that calls the webchat.open() method to open the chat widget programmatically.
Example of the integrated code:
<button onclick="webchat && webchat.open()">your button</button>
<a href="javascript:void(0)" onclick="webchat && webchat.open()">your link</a>

<!-- Start of Talkdesk Code -->
    <script>
      var webchat;
      (function(window, document, node, props, configs) {
        if (window.TalkdeskChatSDK) {
          webchat.init(configs);
          function setContext() {
            webchat.setContextParam({
              // Pass the unique identifier of the contact person to Talkdesk.
              // Currently, only phone numbers with country code and email addresses are supported.
              "td_contact_person_identification": "[email protected]" // or "+1123456789"
            })
           }
        script.async = true;
        firstScriptTag.parentNode.insertBefore(script, firstScriptTag);
        script.onload = function() {
          webchat = TalkdeskChatSDK(node, props);
          webchat.init(configs);
        };
      })(
        window,
        document,
        "tdWebchat",
        { touchpointId: "<customer touchpointId>", accountId: "", region: "<customer td region>" },
        {
          enableValidation: false,
          enableEmoji: true,
          enableUserInput: true,
          enableAttachments: true,
          styles: {
            // Hide the chat launcher icon
            triggerButtonPositionBottom: "-65px",
            triggerButtonPositionRight: "-65px",
          },
        }
This allows the browser to safely execute the script without enabling`unsafe-inline`.

- Third, retrieve the snippet code from the server response dynamically, rather than hardcoding inline script content in your HTML. This ensures the nonce can be properly injected before rendering and keeps your implementation CSP-compliant.
2. Automatically open chat widget
The customer needs to automatically open TD chat every time the contact person visits the website. The following is the integration code.
Example of the integrated code:
<!-- Start of Talkdesk Code -->
    <script>
      var webchat;
      (function(window, document, node, props, configs) {
        if (window.TalkdeskChatSDK) {
          console.error("TalkdeskChatSDK already included");
          return;
        }
        var divContainer = document.createElement("div");
        divContainer.id = node;
        document.body.appendChild(divContainer);
        var src = "https://talkdeskchatsdk.talkdeskapp.com/v2/talkdeskchatsdk.js";
        var script = document.createElement("script");
        var firstScriptTag = document.getElementsByTagName("script")[0];
        script.type = "text/javascript";
        script.charset = "UTF-8";
        script.id = "tdwebchatscript";
        script.src = src;
        script.async = true;
        firstScriptTag.parentNode.insertBefore(script, firstScriptTag);
        script.onload = function() {
          webchat = TalkdeskChatSDK(node, props);
          webchat.init(configs);
        };
      })(
        window,
        document,
        "tdWebchat",
        {
          touchpointId: "<customer touchpointId>",
          accountId: "",
          region: "<customer td region>",
          autoOpen: true
        },
        { enableValidation: false, enableEmoji: true, enableUserInput: true, enableAttachments: true }
      );
    </script>
<!-- End of Talkdesk Code -->
3. Show/hide attachments or emojis
The attachments and emojis are controlled by transmitting the enableAttachments and enableEmoji fields in the configs of snippet code.
Example of the integrated code:
<!-- Start of Talkdesk Code -->
    <script>
      var webchat;
      (function(window, document, node, props, configs) {
        if (window.TalkdeskChatSDK) {
          console.error("TalkdeskChatSDK already included");
          return;
        }
        var divContainer = document.createElement("div");
        divContainer.id = node;
        document.body.appendChild(divContainer);
        var src = "https://talkdeskchatsdk.talkdeskapp.com/v2/talkdeskchatsdk.js";
        var script = document.createElement("script");
        var firstScriptTag = document.getElementsByTagName("script")[0];
        script.type = "text/javascript";
        script.charset = "UTF-8";
        script.id = "tdwebchatscript";
        script.src = src;
        script.async = true;
        firstScriptTag.parentNode.insertBefore(script, firstScriptTag);
        script.onload = function() {
          webchat = TalkdeskChatSDK(node, props);
          webchat.init(configs);
          /*
           * Send custom data from your website to TalkDesk!
           * If you would like to do it, you need to remove the following commented code and
           * modify the webchat.setContextParam parameters to pass in the data you need.
           */
           /*function setContext() {
             webchat.setContextParam({ "var1": "value1", "var2": "value2", "var3": 100 })
           }
           // Send data when the chat conversation is initiated
           webchat.onConversationStart = function() {
             setContext()
           }
           // Send data when the chat widget is open
           webchat.onOpenWebchat = function() {
             setContext()
           }*/
        };
      })(
        window,
**4. Automatically fullscreen chat widget**

If the screen's width is lower than 600px or the height is lower than 620px, the chat widget will be resized to full-screen while enabling `enableResponsiveLayout`, but it won't be set to full-screen at any time if `enableResponsiveLayout` is disabled.

Example of the integrated code:

```html
<!-- Start of Talkdesk Code -->
    <script>
      var webchat;
      );
    </script>
<!-- End of Talkdesk Code -->
4. Automatically fullscreen chat widget
If the screen’s width is lower than 600px or the height is lower than 620px, the chat widget will be resized to full-screen while enabling the enableResponsiveLayout, but we’ll not set it to full-screen for the chat widget at any time if enableResponsiveLayout is disabled.
Example of the integrated code:
<!-- Start of Talkdesk Code -->
    <script>
      var webchat;
      (function(window, document, node, props, configs) {
        if (window.TalkdeskChatSDK) {
          console.error("TalkdeskChatSDK already included");
          return;
        }
        var divContainer = document.createElement("div");
        divContainer.id = node;
        document.body.appendChild(divContainer);
        var src = "https://talkdeskchatsdk.talkdeskapp.com/v2/talkdeskchatsdk.js";
        var script = document.createElement("script");
        var firstScriptTag = document.getElementsByTagName("script")[0];
        script.type = "text/javascript";
        script.charset = "UTF-8";
        script.id = "tdwebchatscript";
        script.src = src;
        script.async = true;
        firstScriptTag.parentNode.insertBefore(script, firstScriptTag);
        script.onload = function() {
          webchat = TalkdeskChatSDK(node, props);
          webchat.init(configs);
        };
      })(
        window,
        document,
        "tdWebchat",
        { touchpointId: "<customer touchpointId>", accountId: "", region: "<customer td region>" },
        {
          enableValidation: false,
          enableEmoji: true,
          enableUserInput: true,
          enableAttachments: true,
          enableResponsiveLayout: true
        }
      );
    </script>
<!-- End of Talkdesk Code -->
It may not be good to disable the full-screen capability entirely. For example, the automatic full-screen capability is still needed on some mobile devices, but you may not want it on a PC. The following is an example.
Example of the integrated code:
<!-- Start of Talkdesk Code -->
    <script>
      var webchat;
      (function(window, document, node, props, configs) {
        if (window.TalkdeskChatSDK) {
          console.error("TalkdeskChatSDK already included");
          return;
        }
        var divContainer = document.createElement("div");
        divContainer.id = node;
        document.body.appendChild(divContainer);
        var src = "https://talkdeskchatsdk.talkdeskapp.com/v2/talkdeskchatsdk.js";
        var script = document.createElement("script");
        var firstScriptTag = document.getElementsByTagName("script")[0];
        script.type = "text/javascript";
        script.charset = "UTF-8";
        script.id = "tdwebchatscript";
        script.src = src;
        script.async = true;
        firstScriptTag.parentNode.insertBefore(script, firstScriptTag);
        script.onload = function() {
          webchat = TalkdeskChatSDK(node, props);
          webchat.init(configs);
        };
      })(
        window,
        document,
**5. Transmit custom context to studio flow**

Use the `setContextParam` method to transmit useful information to the Conversations App. The method collects the data and transmits it to Studio flow, which sends the data to the Context card in the Conversations App according to the configuration in the Studio context. Here are the steps on how to display the context in the context card of the Conversations App.

Example of the integrated code:

```html
<!-- Start of Talkdesk Code -->
    <script>
      var webchat;
      );
    </script>
<!-- End of Talkdesk Code -->
5. Transmit custom context to studio flow
We can use the setContextParam method to transmit some useful information to the Conversations App. The method will collect the data and then transmit it to Studio flow, Studio will send the data to the Context card in the Conversations App according to the configuration in the Studio context. Here are the steps on how to display the context in the context card of the Conversations App.
Example of the integrated code:
<!-- Start of Talkdesk Code -->
    <script>
      var webchat;
      (function(window, document, node, props, configs) {
        if (window.TalkdeskChatSDK) {
          console.error("TalkdeskChatSDK already included");
          return;
        }
        var divContainer = document.createElement("div");
        divContainer.id = node;
        document.body.appendChild(divContainer);
        var src = "https://talkdeskchatsdk.talkdeskapp.com/v2/talkdeskchatsdk.js";
        var script = document.createElement("script");
        var firstScriptTag = document.getElementsByTagName("script")[0];
        script.type = "text/javascript";
        script.charset = "UTF-8";
        script.id = "tdwebchatscript";
        script.src = src;
        script.async = true;
        firstScriptTag.parentNode.insertBefore(script, firstScriptTag);
        script.onload = function() {
          webchat = TalkdeskChatSDK(node, props);
          webchat.init(configs);
          webchat.setContextParam({
            "contact_email": "[email protected]",
            "contact_name": "dummy",
          })
       };
      })(
        window,
        document,
        "tdWebchat",
        { touchpointId: "<customer touchpointId>", accountId: "", region: "<customer td region>" },
        { enableValidation: false, enableEmoji: true, enableUserInput: true, enableAttachments: true }
      );
    </script>
<!-- End of Talkdesk Code -->
Step 1: Add a new argument in the Initial step component in studio flow, you can add the context transmitted by the customer.
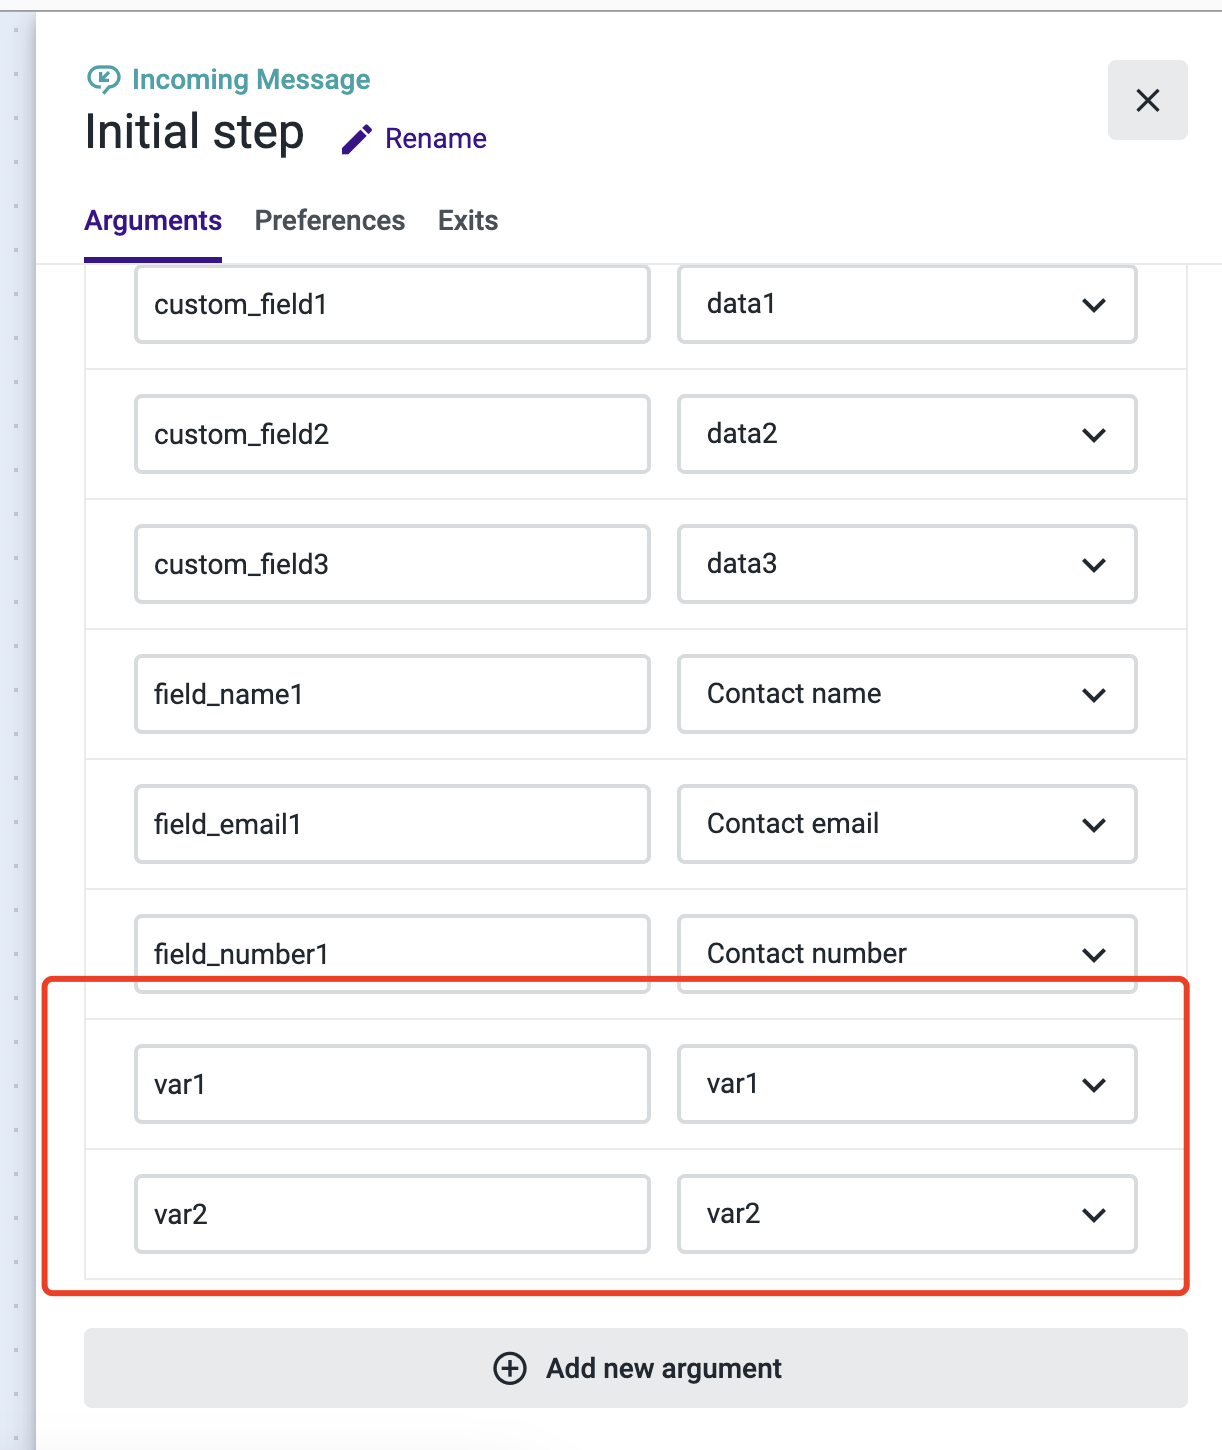
Step 2: Select the new context you already created in step 1 and save it.
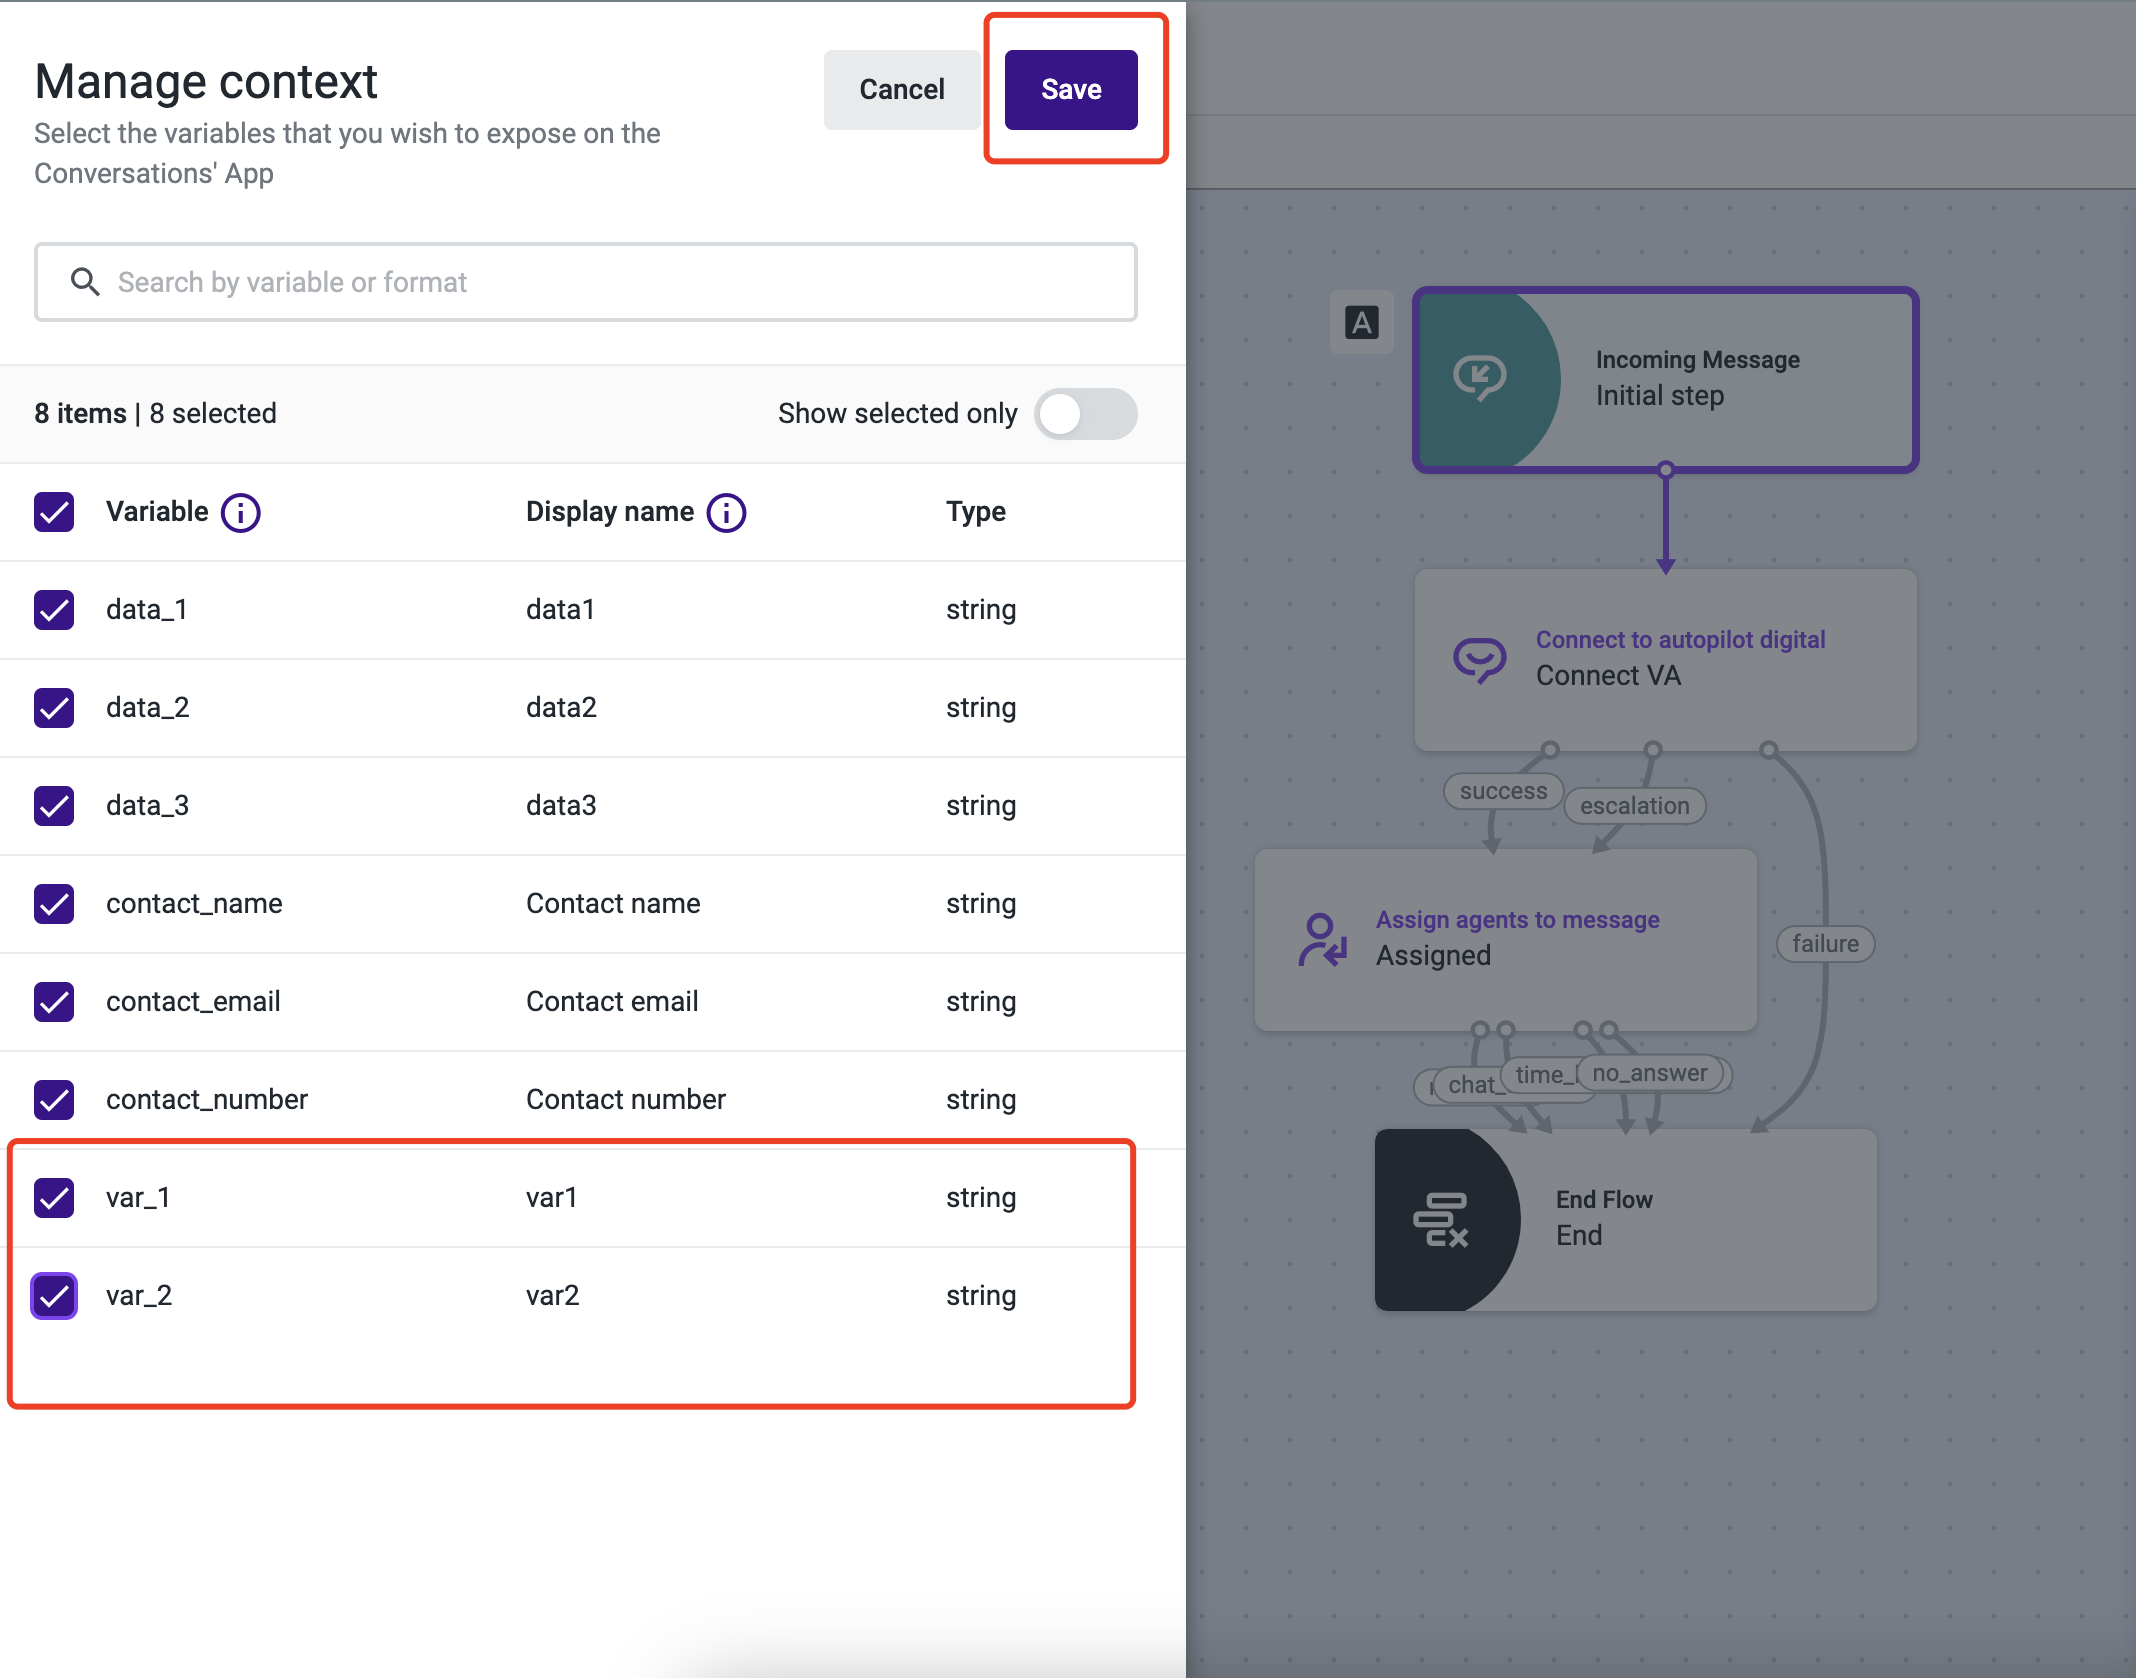
Step 3: Go to the Conversations App to check the data in the Context card at the right hand of the page.
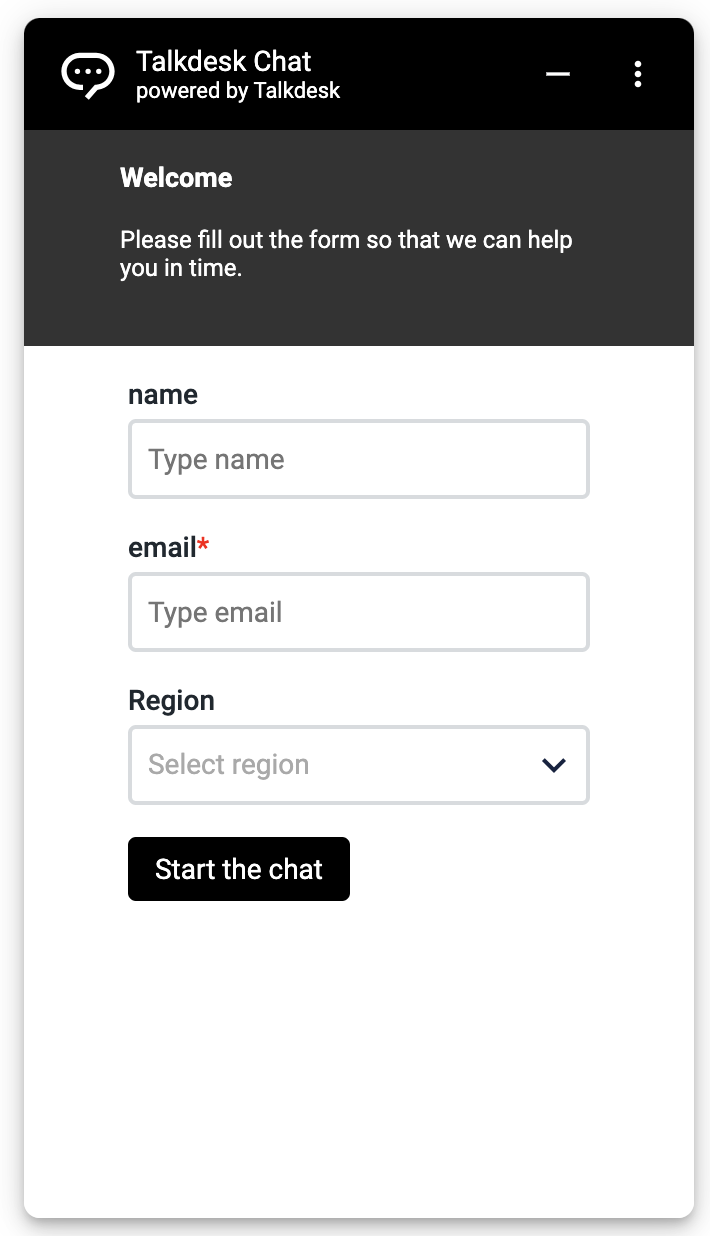
6. Set pre-filled values for the fields on the Initial screen
The Chat Widget JavaScript SDK allows you to dynamically set pre-filled values for the fields on the initial form. This functionality is useful in scenarios where contact person information is already stored in an external system. For instance, if your system maintains such as the contact person's name and email address information, these can be pre-fill into the chat widget fields.
If pre-filled values are provided for ALL fields on the initial form, the data will be automatically submitted to the TalkDesk system when the chat begins.
In this case, the chat widget will bypass the initial form stage, allowing the conversation to start immediately without user input.
Example of the integrated code
<!-- Start of Talkdesk Code -->
    <script>
      var webchat;
      (function(window, document, node, props, configs) {
        if (window.TalkdeskChatSDK) {
          console.error("TalkdeskChatSDK already included");
          return;
        }
        var divContainer = document.createElement("div");
        divContainer.id = node;
        document.body.appendChild(divContainer);
        var src = "https://talkdeskchatsdk.talkdeskapp.com/v2/talkdeskchatsdk.js";
        var script = document.createElement("script");
        var firstScriptTag = document.getElementsByTagName("script")[0];
        script.type = "text/javascript";
        script.charset = "UTF-8";
        script.id = "tdwebchatscript";
        script.src = src;
        script.async = true;
        firstScriptTag.parentNode.insertBefore(script, firstScriptTag);
        script.onload = function() {
           webchat.onOpenWebchat = function() {
             setContext()
           }
        };

            webchat.setContextParam({
              "field_email1": "[email protected]",
              "field_number1": "+1",
            })
           }
           // Send data when the chat conversation is initiated
           webchat.onConversationStart = function() {
             setContext()
           }
           // Send data when the chat widget is open
           webchat.onOpenWebchat = function() {
             setContext()
-          }*/
+          }
        };
      })(
        window,
        document,
        "tdWebchat",
        { touchpointId: "<customer touchpointId>", accountId: "", region: "<customer td region>" },
        { enableValidation: false, enableEmoji: true, enableUserInput: true, enableAttachments: true }
      );
    </script>
<!-- End of Talkdesk Code -->
7. Support internationalization and layout
The chat widget allows for multi-language support by configuring the languageCode field. By setting this field, customers can specify the language of the chat interface using standard international language codes. For instance: en-US for English (United States), pt-PT for Portuguese (Portugal).
The default layout direction of the chat widget is Left-to-Right (LTR). It is not necessary to manually set this value for LTR languages, as it is automatically configured based on the language code provided.
For languages that require a Right-to-Left (RTL) layout, such as Arabic, the layout direction is also set automatically. When a language code corresponding to an RTL language is specified (e.g., ar-SA or ar-EG), the chat widget will adjust its layout direction accordingly, providing a seamless user experience for RTL language speakers.
When the languageCode field is set to empty, it will automatically set the browser's language.
If automatic identification or pass-through configuration parameters are not supported, it will be fall back to en-US
<!-- Start of Talkdesk Code -->
    <script>
      var webchat;
      (function(window, document, node, props, configs) {
        if (window.TalkdeskChatSDK) {
          console.error("TalkdeskChatSDK already included");
          return;
        }
        var divContainer = document.createElement("div");
        divContainer.id = node;
        document.body.appendChild(divContainer);
        var src = "https://talkdeskchatsdk.talkdeskapp.com/v2/talkdeskchatsdk.js";
        var script = document.createElement("script");
        var firstScriptTag = document.getElementsByTagName("script")[0];
        script.type = "text/javascript";
        script.charset = "UTF-8";
        script.id = "tdwebchatscript";
        script.src = src;
        script.async = true;
        firstScriptTag.parentNode.insertBefore(script, firstScriptTag);
        script.onload = function() {
          webchat = TalkdeskChatSDK(node, props);
          webchat.init(configs);
        };
      })(
        window,
        document,
        "tdWebchat",
        { touchpointId: "<customer touchpointId>", accountId: "", region: "<customer td region>" },
        {
          enableValidation: false,
          enableEmoji: true,
          enableUserInput: true,
          enableAttachments: true,
          languageCode: "pt-PT", // Supported languageCodes: en-US pt-PT pt-BR es-ES de-DE fr-FR it-IT ar-SA ar-EG
        }
      );
    </script>
<!-- End of Talkdesk Code -->
8. Drag and move chat launcher
The "Drag and Move Chat Launcher" feature enhances the user experience by addressing the need for flexibility and unobstructed access to application information on PC and mobile devices. The ability to move the chat widget, especially within the mobile application for the following reasons:
Customizable Positioning: Users want the flexibility to reposition the chat launcher to a location on their screen that best suits their preferences and usage patterns. This ensures that the chat widget does not interfere with the personal viewing experience.
Unobstructed Access: The current fixed position of the chat widget has been reported to block important application information, which can hinder the user experience by obscuring critical content. Allowing users to move the chat widget ensures that all essential information remains visible and accessible, improving overall usability and satisfaction.
The enablePointMoveTriggerButton is used to turn on the drag and move of the chat launcher, and the value of this field is false by default.
Example of the integrated code:
<!-- Start of Talkdesk Code -->
    <script>
      var webchat;
      (function(window, document, node, props, configs) {
        if (window.TalkdeskChatSDK) {
          console.error("TalkdeskChatSDK already included");
          return;
        }
        var divContainer = document.createElement("div");
        divContainer.id = node;
        document.body.appendChild(divContainer);
        var src = "https://talkdeskchatsdk.talkdeskapp.com/v2/talkdeskchatsdk.js";
        var script = document.createElement("script");
        var firstScriptTag = document.getElementsByTagName("script")[0];
        script.type = "text/javascript";
        script.charset = "UTF-8";
        script.id = "tdwebchatscript";
        script.src = src;
        script.async = true;
        firstScriptTag.parentNode.insertBefore(script, firstScriptTag);
        script.onload = function() {
          webchat = TalkdeskChatSDK(node, props);
          webchat.init(configs);
        };
      })(
        window,
        document,
        "tdWebchat",
        { touchpointId: "<customer touchpointId>", accountId: "", region: "<customer td region>" },
        {
          enableValidation: false,
          enableEmoji: true,
          enableUserInput: true,
          enablePointMoveTriggerButton: true
        }
      );
    </script>
<!-- End of Talkdesk Code -->
If you only wish to drag and move the chat launcher on mobile, you can specify the value of this field. The following is an example of the integrated code:
<!-- Start of Talkdesk Code -->
    <script>
      var webchat;
      (function(window, document, node, props, configs) {
        if (window.TalkdeskChatSDK) {
          console.error("TalkdeskChatSDK already included");
          return;
        }
        var divContainer = document.createElement("div");
        divContainer.id = node;
        document.body.appendChild(divContainer);
        var src = "https://talkdeskchatsdk.talkdeskapp.com/v2/talkdeskchatsdk.js";
        var script = document.createElement("script");
        var firstScriptTag = document.getElementsByTagName("script")[0];
        script.type = "text/javascript";
        script.charset = "UTF-8";
        script.id = "tdwebchatscript";
        script.src = src;
        script.async = true;
        firstScriptTag.parentNode.insertBefore(script, firstScriptTag);
        script.onload = function() {
          webchat = TalkdeskChatSDK(node, props);
          webchat.init(configs);
        };
      })(
        window,
        document,
        "tdWebchat",
        { touchpointId: "<customer touchpointId>", accountId: "", region: "<customer td region>" },
        {
          enableValidation: false,
          enableEmoji: true,
          enableUserInput: true,
          enablePointMoveTriggerButton: true
        }
      );
    </script>
<!-- End of Talkdesk Code -->
9. Use chat jssdk with require.js
If you need to use it with require.js, you need to modify the chat touchpoint snippet code slightly.
Example of the integrated code:
<script type="text/javascript" src="https://dummy/require.js"></script>
<script>
  // configuration talkdesk remote js to require.js
  require.config({
    paths: {
      "talkdeskChatSDK": "https://talkdeskchatsdk.talkdeskapp.com/v2/talkdeskchatsdk"
    },
    shim: {
      "talkdeskChatSDK": {
         exports: "TalkdeskChatSDK"
      }
    }
  })
</script>

<script>
  var webchat;
  require(["talkdeskChatSDK"], function(TalkdeskChatSDK) {
      // td snippet code start
      (function(window, document, node, props, configs) {
        var divContainer = document.createElement("div");
        divContainer.id = node;
        document.body.appendChild(divContainer);
        webchat = TalkdeskChatSDK(node, props);
        webchat.init(configs);
        /*
        * Send custom data from your website to TalkDesk!
        * If you would like to do it, you need to remove the following commented code and
        * modify the webchat.setContextParam parameters to pass in the data you need.
        */
        /*function setContext() {
          webchat.setContextParam({ "var1": "value1", "var2": "value2", "var3": 100 })
        }
        // Send data when the chat conversation is initiated
        webchat.onConversationStart = function() {
          setContext()
        }
        // Send data when the chat widget is open
        webchat.onOpenWebchat = function() {
          setContext()
        }*/
      })(
        window,
        document,
        "tdWebchat",
        { touchpointId: "<customer touchpointId>", accountId: "", region: "<customer td region>" },
        { enableValidation: false, enableEmoji: true, enableUserInput: true, enableAttachments: true }
      );
      // td snippt code end
  })
</script>
10. When your website needs to log out or reset the chat widget in other scenarios
Example of the integrated code:
<!--Simulate a button on your website that requires logging out or resetting the chat widget-->
<button onclick="webchat && webchat.reset()">Reset chat widget</button>
<button onclick="webchat && webchat.reset()">Log out</button>
<button id="btn">Other scenarios</button>


<!-- Start of Talkdesk Code -->
    <script>
      var webchat;
      (function(window, document, node, props, configs) {
        if (window.TalkdeskChatSDK) {
          console.error("TalkdeskChatSDK already included");
          return;
        }
        var divContainer = document.createElement("div");
        divContainer.id = node;
        document.body.appendChild(divContainer);
        var src = "https://talkdeskchatsdk.talkdeskapp.com/v2/talkdeskchatsdk.js";
        var script = document.createElement("script");
        var firstScriptTag = document.getElementsByTagName("script")[0];
        script.type = "text/javascript";
        script.charset = "UTF-8";
        script.id = "tdwebchatscript";
        script.src = src;
        script.async = true;
        firstScriptTag.parentNode.insertBefore(script, firstScriptTag);
        script.onload = function() {
          webchat = TalkdeskChatSDK(node, props);
          webchat.init(configs);
        };
      })(
        window,
        document,
        "tdWebchat",
        { touchpointId: "<customer touchpointId>", accountId: "", region: "<customer td region>" },
        {
          enableValidation: false,
          enableEmoji: true,
          enableUserInput: true,
        }
      );
    </script>
<!-- End of Talkdesk Code -->

<!--Simulate your website's custom call using javascript-->
<script>
  document.getElementById("btn").onclick = function () {
    if (webchat) {
      webchat.reset()
    }
  }
</script>
11. Create and Identify a Contact Automatically
Customers can use the setContextParam method with the td_contact_person_identification field provided by the JSSDK to automatically create or identify a contact by passing the contact person's phone number (including country code) or email address. For more information, please refer to Talkdesk Digital Engagement Chat Channel for Administrators.
The contact information must be passed using the
td_contact_person_identificationfield, which currently supports the following formats:Email: e.g., [email protected]
Phone Number (with Country Code): e.g.,
+1123456789
<!-- Start of Talkdesk Code -->
    <script>
      var webchat;
      (function(window, document, node, props, configs) {
        if (window.TalkdeskChatSDK) {
          console.error("TalkdeskChatSDK already included");
          return;
        }
        var divContainer = document.createElement("div");
        divContainer.id = node;
        document.body.appendChild(divContainer);
        var src = "https://talkdeskchatsdk.talkdeskapp.com/v2/talkdeskchatsdk.js";
        var script = document.createElement("script");
        var firstScriptTag = document.getElementsByTagName("script")[0];
        script.type = "text/javascript";
        script.charset = "UTF-8";
        script.id = "tdwebchatscript";
        script.src = src;
        script.async = true;
        firstScriptTag.parentNode.insertBefore(script, firstScriptTag);
        script.onload = function() {
          webchat = TalkdeskChatSDK(node, props);
          webchat.init(configs);
          /*
           * Send custom data from your website to TalkDesk!
           * If you would like to do it, you need to remove the following commented code and
           * modify the webchat.setContextParam parameters to pass in the data you need.
           */
-          /*function setContext() {
+          function setContext() {
             webchat.setContextParam({
+             // Here, the unique identifier of the contact person is passed to talkdesk. Currently, only phone numbers with country code and email addresses are supported. Please choose one to pass.
+              "td_contact_person_identification": "[email protected]" // or "+1123456789"
             })
           }
           // Send data when the chat conversation is initiated
           webchat.onConversationStart = function() {
             setContext()
           }
           // Send data when the chat widget is open
           webchat.onOpenWebchat = function() {
             setContext()
-          }*/
+          }
        };
      })(
        window,
        document,
        "tdWebchat",
        { touchpointId: "<customer touchpointId>", accountId: "", region: "<customer td region>" },
        { enableValidation: false, enableEmoji: true, enableUserInput: true, enableAttachments: true }
      );
    </script>
<!-- End of Talkdesk Code -->
12. Customize Sound Notification
The Sound Notification feature helps users stay informed by playing a sound when key chat events occur. This improves real-time engagement and ensures users are aware of updates without needing to monitor the chat window continuously.
Sound notifications are triggered when:
A new message is received (from the system, agent, autopilot, or a post-chat survey)
An agent starts handling the chat (either initially or via transfer)
Default Behavior:
Enabled by default — no setup required.
If not needed, this feature can be disabled via configuration.
The following optional parameters are available in the SDK:
enableSoundNotification<boolean>: Enables or disables sound notifications.receiveMessageAudioUrl <string>: Custom audio URL. If not set, a default system sound will be used.
Supported Custom Audio Formats:
The receiveMessageAudioUrl allows customers to provide a custom audio URL for notification sounds. To ensure smooth playback, the following common audio formats are supported:
- MP3 (MPEG Audio Layer 3)
- WAV (Waveform Audio File Format)
- OGG (Ogg Vorbis)
- AAC (Advanced Audio Codec)
- M4A (MPEG-4 Audio)
Example of the integrated code:
<!-- Start of Talkdesk Code -->
    <script>
      var webchat;
      (function(window, document, node, props, configs) {
        if (window.TalkdeskChatSDK) {
          console.error("TalkdeskChatSDK already included");
          return;
        }
        var divContainer = document.createElement("div");
        divContainer.id = node;
        document.body.appendChild(divContainer);
        var src = "https://talkdeskchatsdk.talkdeskapp.com/v2/talkdeskchatsdk.js";
        var script = document.createElement("script");
        var firstScriptTag = document.getElementsByTagName("script")[0];
        script.type = "text/javascript";
        script.charset = "UTF-8";
        script.id = "tdwebchatscript";
        script.src = src;
        script.async = true;
        firstScriptTag.parentNode.insertBefore(script, firstScriptTag);
        script.onload = function() {
          webchat = TalkdeskChatSDK(node, props);
          webchat.init(configs);
          /*
           * Send custom data from your website to TalkDesk!
           * If you would like to do it, you need to remove the following commented code and
           * modify the webchat.setContextParam parameters to pass in the data you need.
           */
           /*function setContext() {
             webchat.setContextParam({ "var1": "value1", "var2": "value2", "var3": 100 })
           }
           // Send data when the chat conversation is initiated
           webchat.onConversationStart = function() {
             setContext()
           }
           // Send data when the chat widget is open
           webchat.onOpenWebchat = function() {
             setContext()
           }*/
        };
      })(
        window,
        document,
        "tdWebchat",
        { "touchpointId": "85278efd2c37480a8f4b48feb04cf2d4", "accountId": "", "region": "td-us-1" },
        {
          "enableEmoji": true,
          "enableAttachments": true,
          "enableSoundNotification": true,
          "styles": {
            "receiveMessageAudioUrl": "https://my-customized-sound.mp3"
          }
        }
      );
    </script>
<!-- End of Talkdesk Code -->
13. Customize Remote Font Configuration
The Talkdesk Chat Widget JS-SDK supports injecting remote custom font files via configuration. You can use this feature to customize the font family used by the widget UI.
The remote font server must return appropriate CORS headers, for example:
Access-Control-Allow-Origin: *
Example of the integrated code:
<!-- Start of Talkdesk Code -->
    <script>
      var webchat;
      (function(window, document, node, props, configs) {
        if (window.TalkdeskChatSDK) {
          console.error("TalkdeskChatSDK already included");
          return;
        }
        var divContainer = document.createElement("div");
        divContainer.id = node;
        document.body.appendChild(divContainer);
        var src = "https://talkdeskchatsdk.talkdeskapp.com/v2/talkdeskchatsdk.js";
        var script = document.createElement("script");
        var firstScriptTag = document.getElementsByTagName("script")[0];
        script.type = "text/javascript";
        script.charset = "UTF-8";
        script.id = "tdwebchatscript";
        script.src = src;
        script.async = true;
        firstScriptTag.parentNode.insertBefore(script, firstScriptTag);
        script.onload = function() {
          webchat = TalkdeskChatSDK(node, props);
          webchat.init(configs);
        };
      })(
        window,
        document,
        "tdWebchat",
        { touchpointId: "<customer touchpointId>", accountId: "", region: "<customer td region>" },
        {
          enableValidation: false,
          enableEmoji: true,
          enableUserInput: true,
          styles: {
            "fontFamilyUrl": "https://dummy.com/customer.ttf", // If not set, the default font family from the Talkdesk chat widget SDK is used
            "boldFontFamilyUrl": "https://dummy.com/customer-bold.ttf", // Optional. If not set, it will use fontFamilyUrl
            "fontFamilyFormat": "truetype" // Optional. Default is truetype. One of: truetype, opentype, woff, woff2
          }
        }
      );
    </script>
<!-- End of Talkdesk Code -->
14. Chat Widget Secure CSP Mode Integration with disabled unsafe-inline CSP
When your website enforces a strict Content Security Policy (CSP) with unsafe-inline disabled, the default Chat Widget JS-SDK snippet will not work because it dynamically creates inline <style> tags and injects CSS. This behavior is blocked in secure CSP environments.
To deploy the Chat Widget successfully under this configuration, follow these best practices:
- First, do not rely on inline style injection. Instead, load the dedicated remote Chat Widget JavaScript and CSS files separately to ensure all assets are delivered from trusted external sources and comply with CSP restrictions.
- Second, implement nonce-based script execution. Your server must generate a unique nonce for each request and:
- Include it in the CSP header under
script-src - Inject it into the
<script>tag that loads the widget snippet - Apply it consistently wherever required by the widget resources
- Include it in the CSP header under
This allows the browser to safely execute the script without enablingunsafe-inline.
- Third, retrieve the snippet code from the server response dynamically, rather than hardcoding inline script content in your HTML. This ensures the nonce can be properly injected before rendering and keeps your implementation CSP-compliant.
- Fourth, configure your CSP to allow the correct regional endpoint. Sample configurations are typically based on the
td-us-1region. If your account is hosted in a different region, you must update theconnect-srcwith the URL corresponding to your region.
Below are sample implementations (e.g., Go, Node.js, Next.js, PHP, Ruby, and Java) that demonstrate how to generate a nonce and inject the snippet securely. When using these samples, you must replace the Touchpoint ID with your own values before deployment.
package main

import (
	"crypto/rand"
	"encoding/base64"
	"fmt"
	"net/http"
)

func generateNonce(length int) (string, error) {
	bytes := make([]byte, length)
	_, err := rand.Read(bytes)
	if err != nil {
		return "", err
	}
	return base64.StdEncoding.EncodeToString(bytes), nil
}

func handler(w http.ResponseWriter, r *http.Request) {
	nonce, err := generateNonce(16)
	if err != nil {
		http.Error(w, "Failed to generate nonce", http.StatusInternalServerError)
		return
	}

	// CSP using nonce to allow controlled inline script and style
	csp := fmt.Sprintf(
        "default-src 'self'; "+
        "script-src 'self' 'nonce-%s' https://talkdeskchatsdk.talkdeskapp.com; "+
		"style-src 'self' 'nonce-%s' https://talkdeskchatsdk.talkdeskapp.com; "+
		"connect-src 'self' https://api.talkdeskapp.com; "+
		"frame-src https://talkdeskchatsdk.talkdeskapp.com;",
		nonce,
		nonce,
	)

	w.Header().Set("Content-Security-Policy", csp)
	w.Header().Set("Content-Type", "text/html; charset=utf-8")

	html := fmt.Sprintf(`<!DOCTYPE html>
<html>
<head>
  <meta charset="UTF-8">
  <title>Chat Widget SDK with CSP Nonce</title>
</head>
<body>
  <!-- Start of Talkdesk Code -->
  <link nonce="%s" rel="stylesheet" href="https://talkdeskchatsdk.talkdeskapp.com/v2/talkdeskchatstyle.css" />
  <div id="tdWebchat"></div>
  <script nonce="%s" src="https://talkdeskchatsdk.talkdeskapp.com/v2/talkdeskchatcspsdk.js" type="text/javascript"></script>
  <script nonce="%s">
    var webchat;
    (function(window, document, node, props, configs) {
      webchat = TalkdeskChatSDK(node, props);
      webchat.init(configs);
      /*
        * Send custom data from your website to TalkDesk!
        * If you would like to do it, you need to remove the following commented code and
        * modify the webchat.setContextParam parameters to pass in the data you need.
      */
      /*function setContext() {
        webchat.setContextParam({ "var1": "value1", "var2": "value2", "var3": 100 })
      }
      // Send data when the chat conversation is initiated
      webchat.onConversationStart = function() {
        setContext()
      }
      // Send data when the chat widget is open
      webchat.onOpenWebchat = function() {
        setContext()
      }*/
    })(
      window,
      document,
      "tdWebchat",
      { touchpointId: "<touchpointId>", accountId: "", region: "td-us-1" },
      { enableValidation: false, enableEmoji: true, enableUserInput: true, enableAttachments: true }
    );
  </script>
  <!-- End of Talkdesk Code -->
</body>
</html>`, nonce, nonce, nonce)

	_, _ = w.Write([]byte(html))
}

func main() {
	http.HandleFunc("/", handler)
	fmt.Println("Listening on http://localhost:8080")
	http.ListenAndServe(":8080", nil)
}import http from 'http'
import crypto from 'crypto'
const PORT = 8080
// Generate a cryptographically secure nonce
function generateNonce(length = 16) {
return crypto.randomBytes(length).toString('base64')
}
const server = http.createServer((req, res) => {
const nonce = generateNonce()
// CSP header using nonce to allow controlled inline scripts and styles
const csp = [
"default-src 'self'",
`script-src 'self' 'nonce-${nonce}' https://talkdeskchatsdk.talkdeskapp.com`,
`style-src 'self' 'nonce-${nonce}' https://talkdeskchatsdk.talkdeskapp.com`,
"connect-src 'self' https://api.talkdeskapp.com",
"frame-src https://talkdeskchatsdk.talkdeskapp.com"
].join('; ')
res.setHeader('Content-Security-Policy', csp)
res.setHeader('Content-Type', 'text/html; charset=utf-8')
res.writeHead(200)
const html = `<!DOCTYPE html>
<html>
<head>
<meta charset="UTF-8" />
<title>Chat Widget SDK with CSP Nonce</title>
</head>
<body>
<!-- Start of Talkdesk Code -->
<link nonce="${nonce}" rel="stylesheet" href="https://talkdeskchatsdk.talkdeskapp.com/v2/talkdeskchatstyle.css" />
<div id="tdWebchat"></div>
<script nonce="${nonce}" src="https://talkdeskchatsdk.talkdeskapp.com/v2/talkdeskchatcspsdk.js" type="text/javascript"></script>
<script nonce="${nonce}">
var webchat;
(function(window, document, node, props, configs) {
webchat = TalkdeskChatSDK(node, props);
webchat.init(configs);
/*
* Send custom data from your website to Talkdesk.
* If you want to do this, uncomment the code below and
* modify the webchat.setContextParam parameters.
*/
/*
function setContext() {
webchat.setContextParam({ "var1": "value1", "var2": "value2", "var3": 100 })
}
webchat.onConversationStart = function() {
setContext()
}
webchat.onOpenWebchat = function() {
setContext()
}
*/
})(
window,
document,
"tdWebchat",
{ touchpointId: "<touchpointId>", accountId: "", region: "td-us-1" },
{ enableValidation: false, enableEmoji: true, enableUserInput: true, enableAttachments: true }
);
</script>
<!-- End of Talkdesk Code -->
</body>
</html>`
res.end(html)
})
server.listen(PORT, () => {
console.log(`Listening on http://localhost:${PORT}`)
})// source code public demo link -> https://codesandbox.io/p/devbox/csp-mode-t8s7pm?file=%2Fapp%2FtalkdeskChatWidgetLoader.tsx
// middleware.ts
import { NextResponse, NextRequest } from "next/server";
// Generate a cryptographically secure nonce
function generateNonce(length = 16) {
const nonceArray = new Uint8Array(16);
crypto.getRandomValues(nonceArray);
return btoa(String.fromCharCode(...nonceArray));
}
export default function middleware(request: NextRequest) {
const nonce = generateNonce();
const requestHeaders = new Headers(request.headers);
requestHeaders.set("x-nonce", nonce);
const response = NextResponse.next({
request: { headers: requestHeaders },
});
const csp = [
"default-src 'self'",
`script-src 'self' 'nonce-${nonce}' https://talkdeskchatsdk.talkdeskapp.com`,
`style-src 'self' 'nonce-${nonce}' https://talkdeskchatsdk.talkdeskapp.com`,
"connect-src 'self' https://api.talkdeskapp.com",
"frame-src https://talkdeskchatsdk.talkdeskapp.com",
].join("; ");
response.headers.set("Content-Security-Policy", csp);
return response;
}
export const config = {
matcher: [
"/((?!api|_next/static|_next/image|favicon.ico|sitemap.xml|robots.txt).*)",
],
};
// talkdeskChatWidgetLoader.tsx
"use client";
import Script from "next/script";
declare global {
interface Window {
TalkdeskChatSDK?: (
node: string,
props: { touchpointId: string; region: string }
) => { init: (configs: Record<string, unknown>) => Promise<boolean> };
}
}
export function TalkdeskChatWidgetLoader({
nonce,
touchpointId,
injectorId = "tdWebchat",
region,
configs = {
enableValidation: true,
enableEmoji: true,
enableUserInput: true,
enableAttachments: true,
},
}: {
touchpointId: string;
region: string;
injectorId?: string;
configs?: Record<string, unknown>;
nonce?: string;
}) {
const handleOnLoad = () => {
if (!window.TalkdeskChatSDK) return;
const webchat = window.TalkdeskChatSDK(injectorId, {
touchpointId,
region,
});
webchat.init(configs);
};
return (
<>
<link
nonce={nonce}
rel="stylesheet"
suppressHydrationWarning
href="https://talkdeskchatsdk.talkdeskapp.com/v2/talkdeskchatstyle.css"
/>
<div id={injectorId} />
<Script
strategy="afterInteractive"
nonce={nonce}
src="https://talkdeskchatsdk.talkdeskapp.com/v2/talkdeskchatcspsdk.js"
onLoad={handleOnLoad}
/>
</>
);
}
// layout.tsx
import { headers } from "next/headers";
import { TalkdeskChatWidgetLoader } from "./talkdeskChatWidgetLoader";
export default async function RootLayout({
children,
}: Readonly<{
children: React.ReactNode;
}>) {
const nonce = (await headers()).get("x-nonce") ?? undefined;
return (
<html lang="en">
<body>
{children}
<TalkdeskChatWidgetLoader
touchpointId="<your touchpointId>"
region="td-us-1"
nonce={nonce}
/>
</body>
</html>
);
}<?php
const PORT = 8080;
// Generate a cryptographically secure nonce
function generateNonce(int $length = 16): string {
return base64_encode(random_bytes($length));
}
$nonce = generateNonce();
// CSP header using nonce to allow controlled inline scripts and styles
$csp = implode('; ', [
"default-src 'self'",
"script-src 'self' 'nonce-$nonce' https://talkdeskchatsdk.talkdeskapp.com",
"style-src 'self' 'nonce-$nonce' https://talkdeskchatsdk.talkdeskapp.com",
"connect-src 'self' https://api.talkdeskapp.com",
"frame-src https://talkdeskchatsdk.talkdeskapp.com"
]);
header("Content-Security-Policy: $csp");
header("Content-Type: text/html; charset=utf-8");
http_response_code(200);
$html = <<<HTML
<!DOCTYPE html>
<html>
<head>
<meta charset="UTF-8" />
<title>Chat Widget SDK with CSP Nonce</title>
</head>
<body>
<!-- Start of Talkdesk Code -->
<link nonce="$nonce" rel="stylesheet" href="https://talkdeskchatsdk.talkdeskapp.com/v2/talkdeskchatstyle.css" />
<div id="tdWebchat"></div>
<script nonce="$nonce" src="https://talkdeskchatsdk.talkdeskapp.com/v2/talkdeskchatcspsdk.js" type="text/javascript"></script>
<script nonce="$nonce">
var webchat;
(function(window, document, node, props, configs) {
webchat = TalkdeskChatSDK(node, props);
webchat.init(configs);
/*
* Send custom data from your website to Talkdesk.
* If you want to do this, uncomment the code below and
* modify the webchat.setContextParam parameters.
*/
/*
function setContext() {
webchat.setContextParam({ "var1": "value1", "var2": "value2", "var3": 100 })
}
webchat.onConversationStart = function() {
setContext()
}
webchat.onOpenWebchat = function() {
setContext()
}
*/
})(
window,
document,
"tdWebchat",
{ touchpointId: "<touchpointId>", accountId: "", region: "td-us-1" },
{ enableValidation: false, enableEmoji: true, enableUserInput: true, enableAttachments: true }
);
</script>
<!-- End of Talkdesk Code -->
</body>
</html>
HTML;
echo $html;require 'webrick'
require 'securerandom'
require 'base64'
PORT = 8080
# Generate a cryptographically secure nonce
def generate_nonce(length = 16)
Base64.strict_encode64(SecureRandom.random_bytes(length))
end
server = WEBrick::HTTPServer.new(Port: PORT)
server.mount_proc '/' do |req, res|
nonce = generate_nonce
# CSP header using nonce to allow controlled inline scripts and styles
csp = [
"default-src 'self'",
"script-src 'self' 'nonce-#{nonce}' https://talkdeskchatsdk.talkdeskapp.com",
"style-src 'self' 'nonce-#{nonce}' https://talkdeskchatsdk.talkdeskapp.com",
"connect-src 'self' https://api.talkdeskapp.com",
"frame-src https://talkdeskchatsdk.talkdeskapp.com"
].join('; ')
res['Content-Security-Policy'] = csp
res['Content-Type'] = 'text/html; charset=utf-8'
res.status = 200
html = <<~HTML
<!DOCTYPE html>
<html>
<head>
<meta charset="UTF-8" />
<title>Chat Widget SDK with CSP Nonce</title>
</head>
<body>
<!-- Start of Talkdesk Code -->
<link nonce="#{nonce}" rel="stylesheet" href="https://talkdeskchatsdk.talkdeskapp.com/v2/talkdeskchatstyle.css" />
<div id="tdWebchat"></div>
<script nonce="#{nonce}" src="https://talkdeskchatsdk.talkdeskapp.com/v2/talkdeskchatcspsdk.js" type="text/javascript"></script>
<script nonce="#{nonce}">
var webchat;
(function(window, document, node, props, configs) {
webchat = TalkdeskChatSDK(node, props);
webchat.init(configs);
/*
* Send custom data from your website to Talkdesk.
* If you want to do this, uncomment the code below and
* modify the webchat.setContextParam parameters.
*/
/*
function setContext() {
webchat.setContextParam({ "var1": "value1", "var2": "value2", "var3": 100 })
}
webchat.onConversationStart = function() {
setContext()
}
webchat.onOpenWebchat = function() {
setContext()
}
*/
})(
window,
document,
"tdWebchat",
{ touchpointId: "<touchpointId>", accountId: "", region: "td-us-1" },
{ enableValidation: false, enableEmoji: true, enableUserInput: true, enableAttachments: true }
);
</script>
<!-- End of Talkdesk Code -->
</body>
</html>
HTML
res.body = html
end
trap('INT') { server.shutdown }
puts "Listening on http://localhost:#{PORT}"
server.start// Add template dependency
<dependency>
<groupId>org.springframework.boot</groupId>
<artifactId>spring-boot-starter-thymeleaf</artifactId>
</dependency>
// Add html template
src/main/resources/
└── templates/
└── index.html
<!DOCTYPE html>
<html>
<head>
<meta charset="UTF-8" />
<title>Chat Widget SDK with CSP Nonce</title>
</head>
<body>
<!-- Start of Talkdesk Code -->
<link th:attr="nonce=${nonce}" rel="stylesheet" href="https://talkdeskchatsdk.talkdeskapp.com/v2/talkdeskchatstyle.css" />
<div id="tdWebchat"></div>
<script th:attr="nonce=${nonce}" src="https://talkdeskchatsdk.talkdeskapp.com/v2/talkdeskchatcspsdk.js" type="text/javascript"></script>
<script th:attr="nonce=${nonce}">
var webchat;
(function(window, document, node, props, configs) {
webchat = TalkdeskChatSDK(node, props);
webchat.init(configs);
/*
* Send custom data from your website to Talkdesk.
* If you want to do this, uncomment the code below and
* modify the webchat.setContextParam parameters.
*/
/*
function setContext() {
webchat.setContextParam({ "var1": "value1", "var2": "value2", "var3": 100 })
}
webchat.onConversationStart = function() {
setContext()
}
webchat.onOpenWebchat = function() {
setContext()
}
*/
})(
window,
document,
"tdWebchat",
{ touchpointId: "<your touchpointId>", accountId: "", region: "td-us-1" },
{ enableValidation: false, enableEmoji: true, enableUserInput: true, enableAttachments: true }
);
</script>
<!-- End of Talkdesk Code -->
</body>
</html>
// Generate a cryptographically secure nonce
private String generateNonce(int length) {
byte[] bytes = new byte[length];
new SecureRandom().nextBytes(bytes);
return Base64.getEncoder().encodeToString(bytes);
}
// Controller
@GetMapping("/")
public String index(Model model, HttpServletResponse response) {
String nonce = generateNonce(16);
String csp = String.join("; ",
"default-src 'self'",
"script-src 'self' 'nonce-" + nonce + "' https://talkdeskchatsdk.talkdeskapp.com",
"style-src 'self' 'nonce-" + nonce + "' https://talkdeskchatsdk.talkdeskapp.com",
"connect-src 'self' https://api.talkdeskapp.com",
"frame-src https://talkdeskchatsdk.talkdeskapp.com"
);
response.setHeader("Content-Security-Policy", csp);
model.addAttribute("nonce", nonce);
return "index";
}Limitations
Fly-out position with custom trigger buttons: The fly-out is anchored to the default widget trigger button and currently does not support custom trigger buttons. As a result, if a custom trigger is used, the fly-out may appear misaligned.
Updated 3 months ago