Panels
A Panel is a group of cards with an app-like customized layout. The cards can be built by you or system cards available through the card library. It’s possible to reorder and resize them to your liking.
Creating a Panel
To create a Panel, follow the steps below:
1 - Log in to your Talkdesk account and navigate to Workspace Designer (Figure 1 - 1).
2 - Click Panels (Figure 1 - 2).
3 - From the Panels page, click the Create panel (Figure 1 - 3) button.
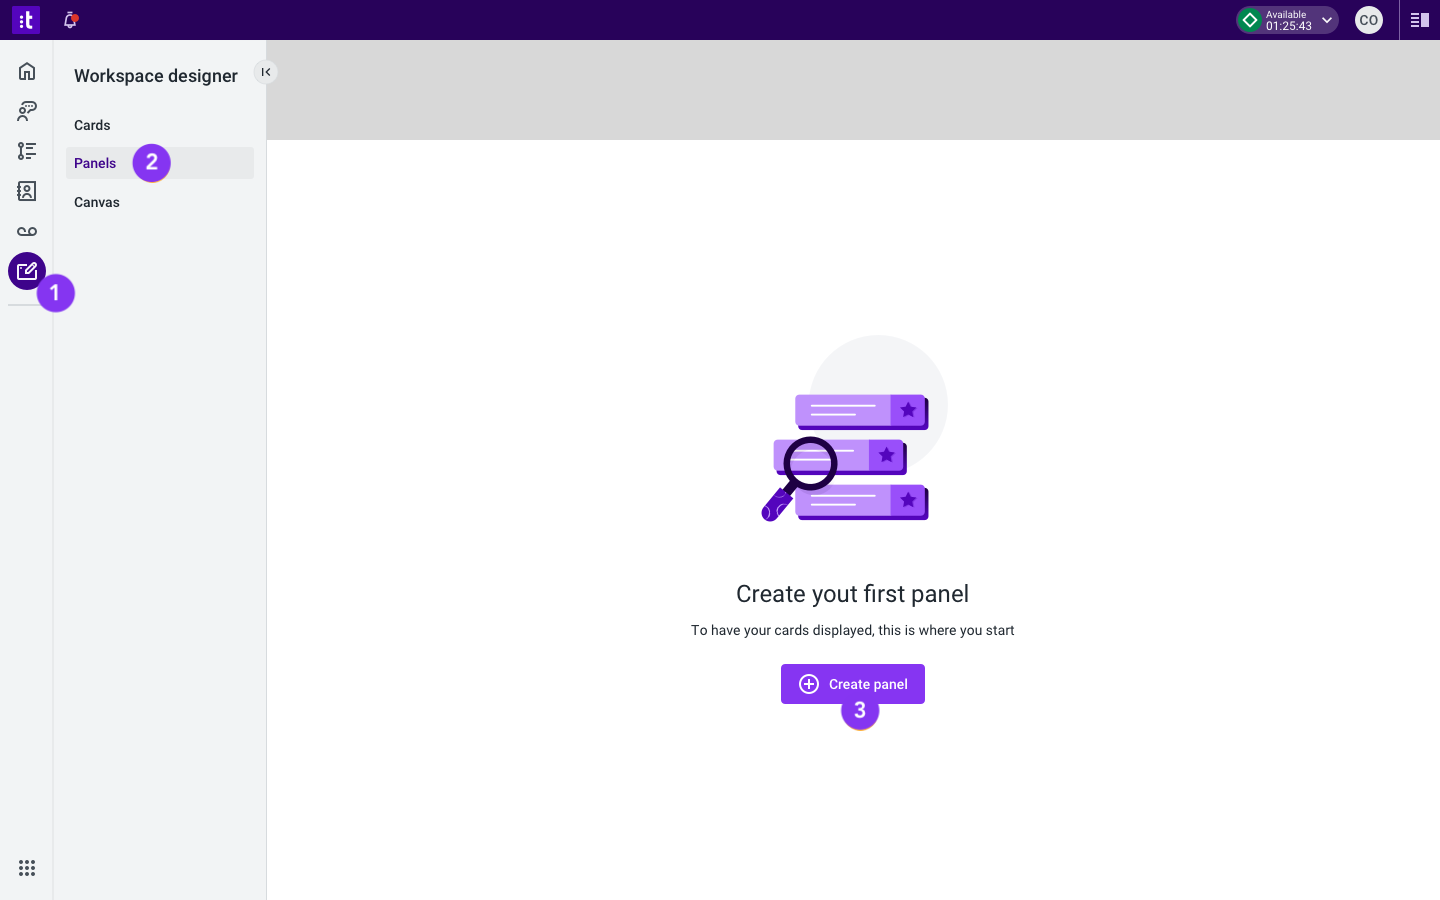
Figure 1 - Create panel button in Workspace Designer
This will open up a box with two fields, that you must fill out as described below:
1 - Provide a name (Figure 2 - 4) for the panel.
2 - Enter an optional description (Figure 2 - 5) for the panel.
3 - Click the Create (Figure 2 - 6) button to finalize the process and proceed to the configuration.
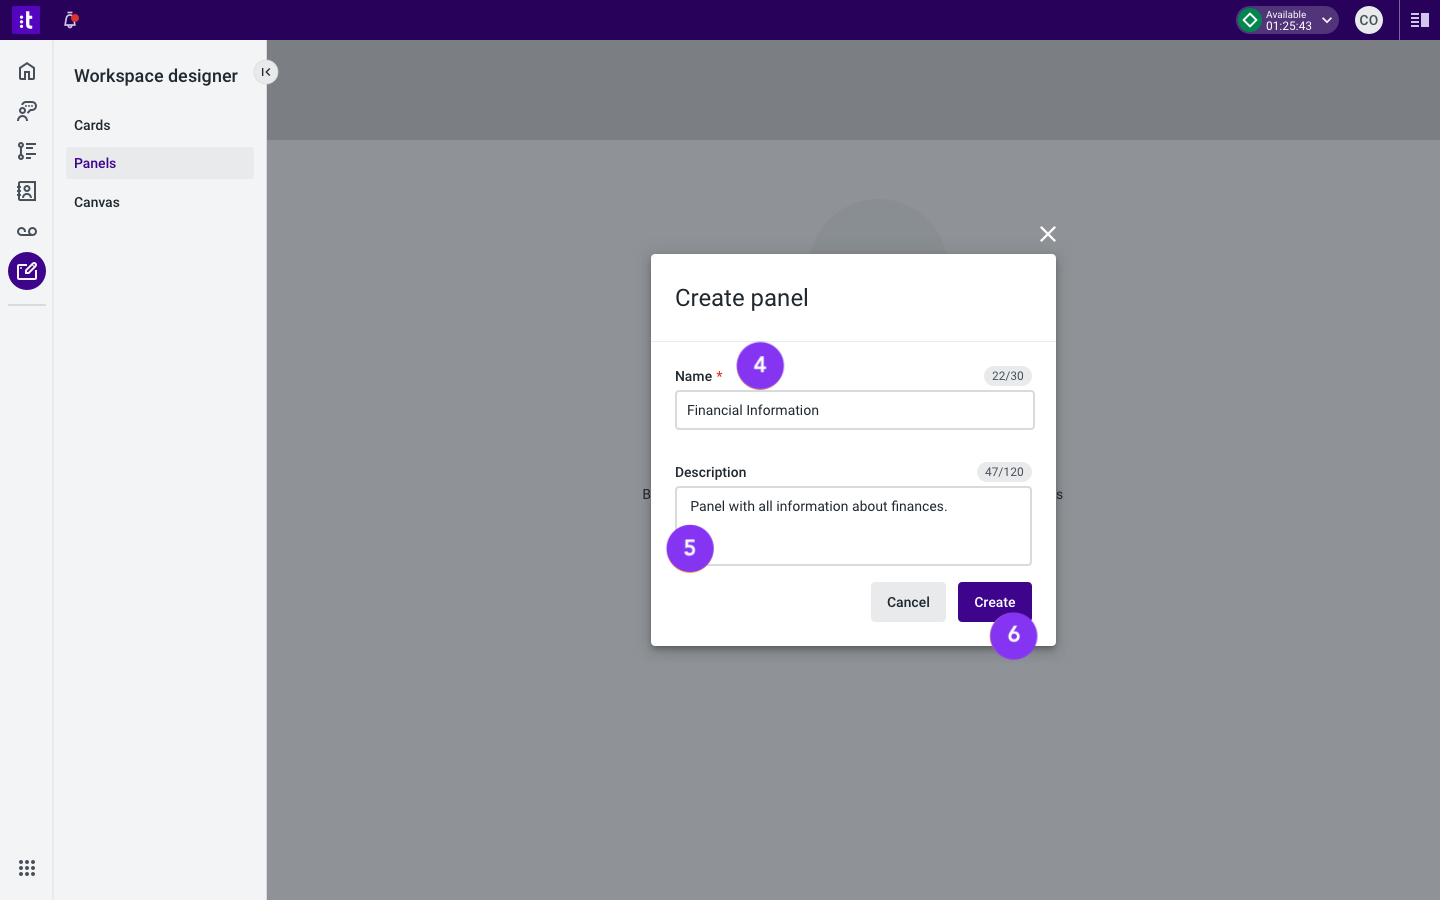
Figure 2 - Create panel modal
Editing a Panel
To edit a Panel, follow the steps below:
1 - Navigate to Workspace Designer (Figure 3 - 1).
2 - Click the Panels menu item (Figure 3 - 2).
3 - Click the desired Panel's Edit button (Figure 3 - 3) on the panel list.
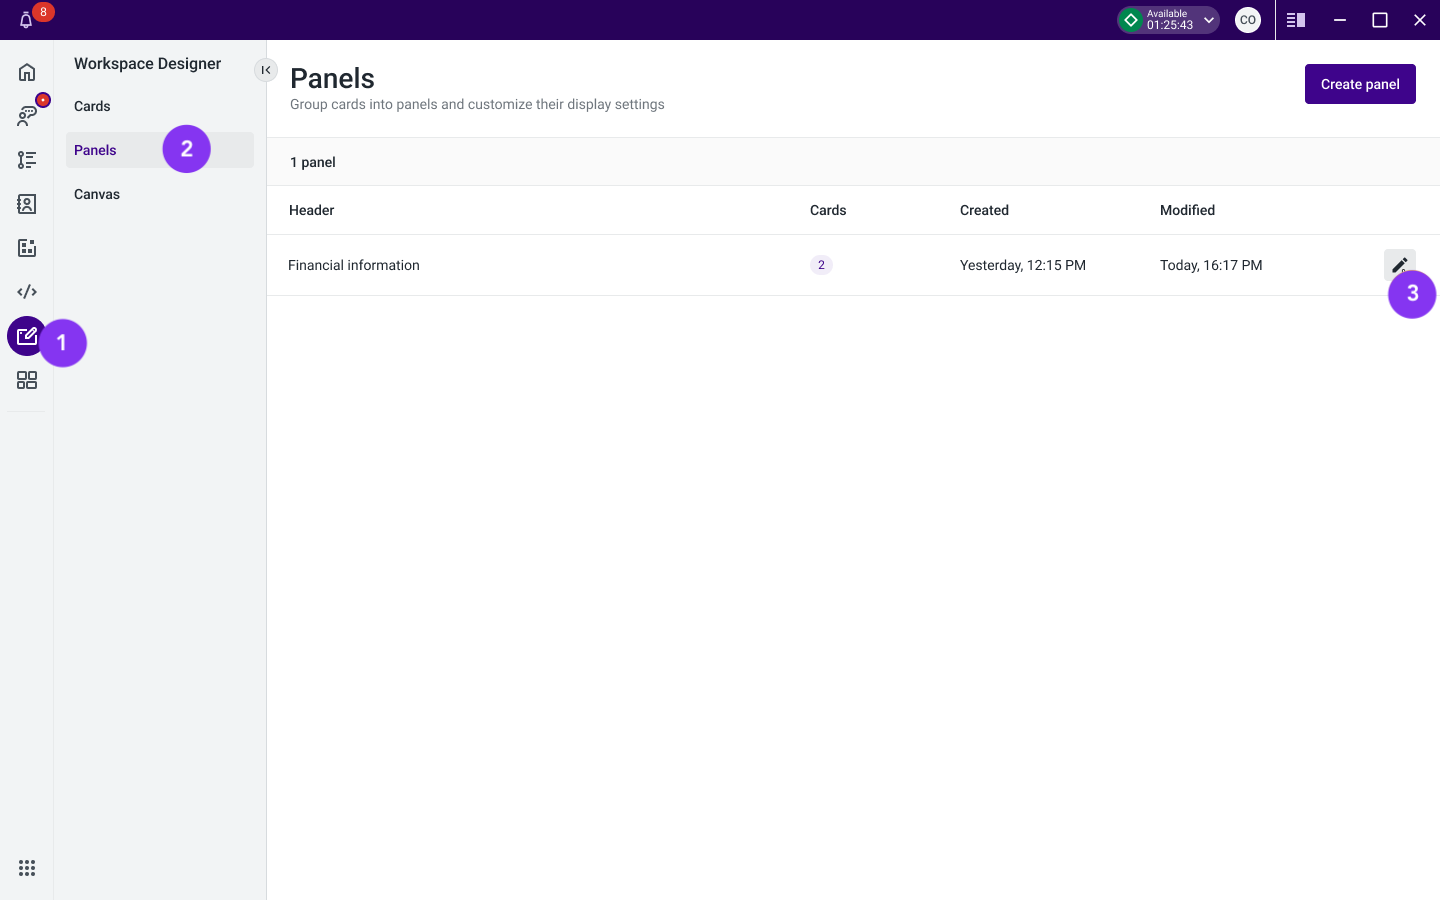
Figure 3 - Panels list in Workspace Designer
Customizing the Display Settings
Adding cards
Click the Add card (Figure 4 - 1) button. You will see a side panel with a tab (Figure 4 - 2) showing the cards you've created. Add the desired card(s) to the panel by clicking the corresponding Plus (+) (Figure 4 - 3) button.
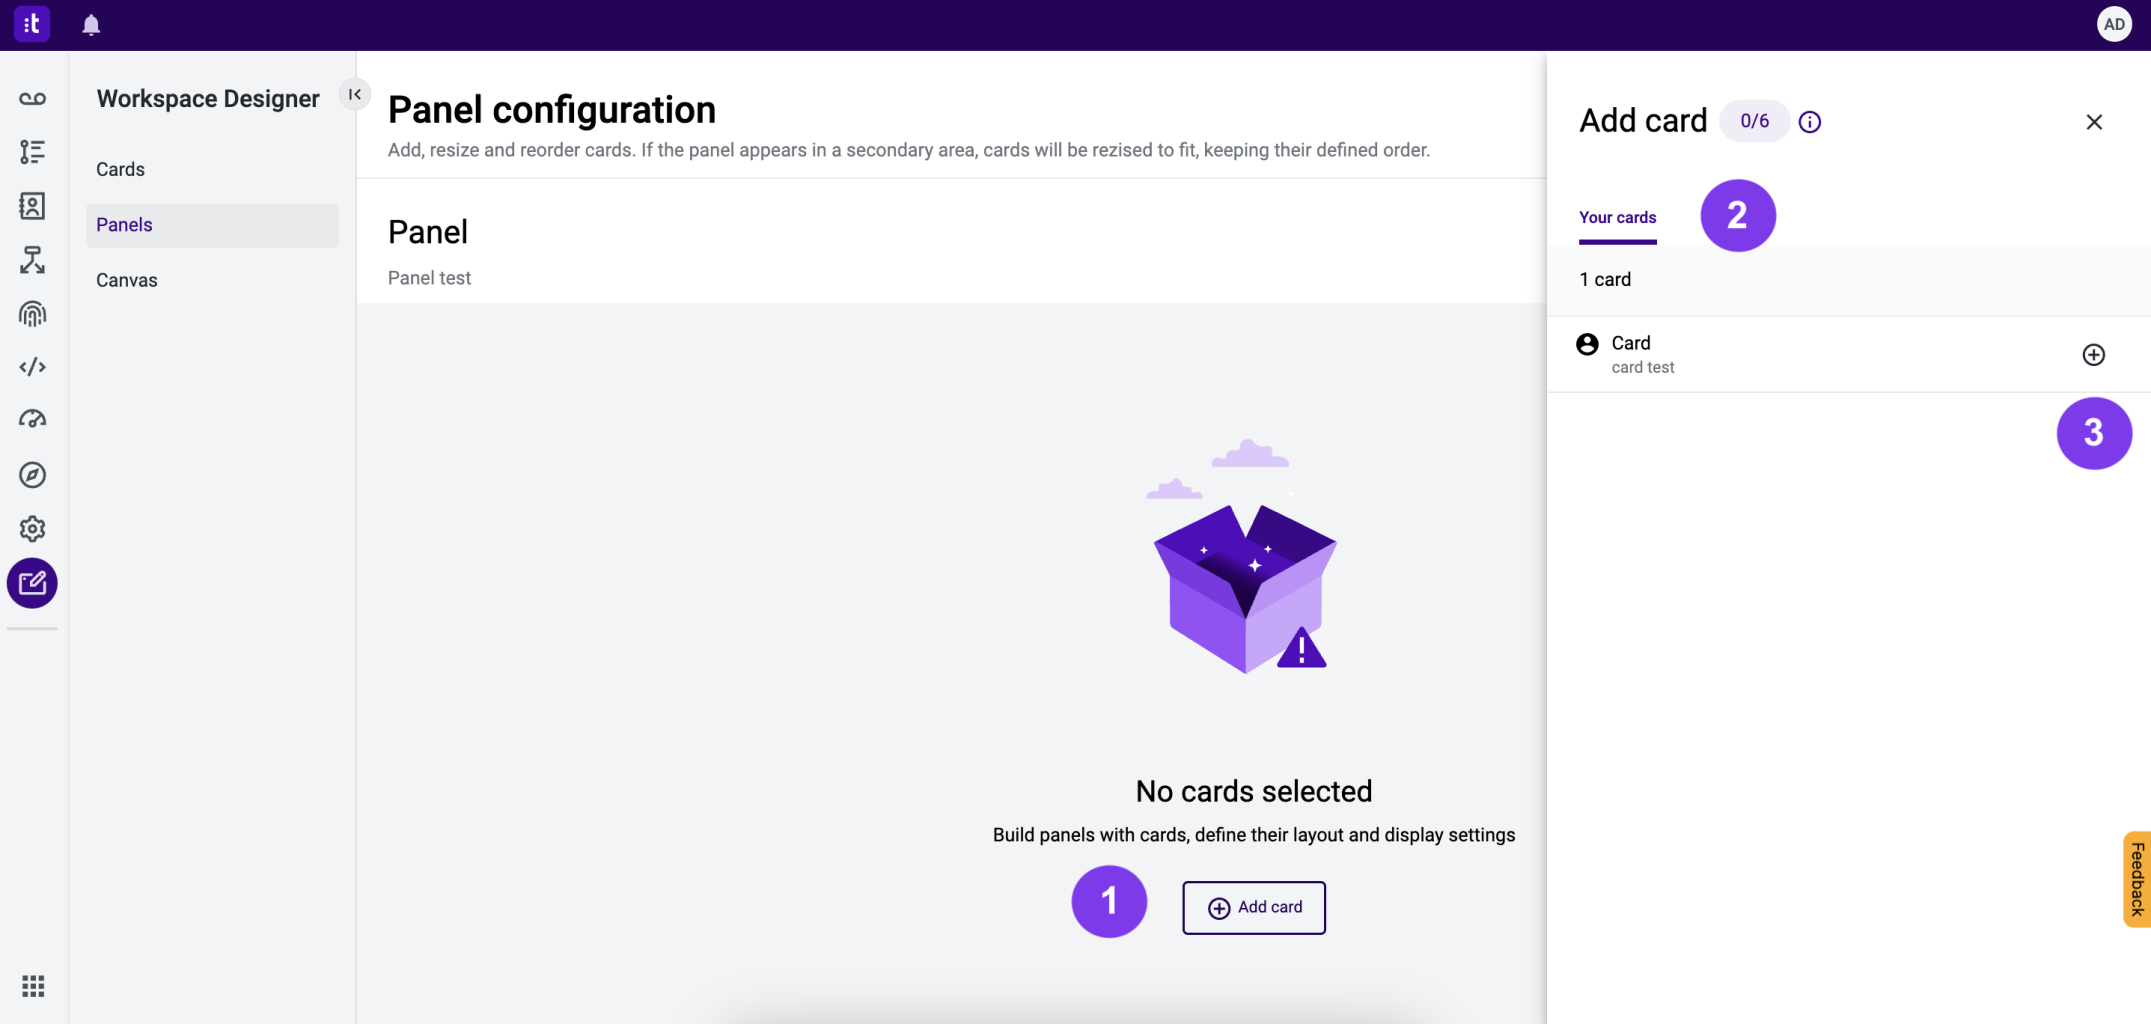
Figure 4 - Adding cards to the panel
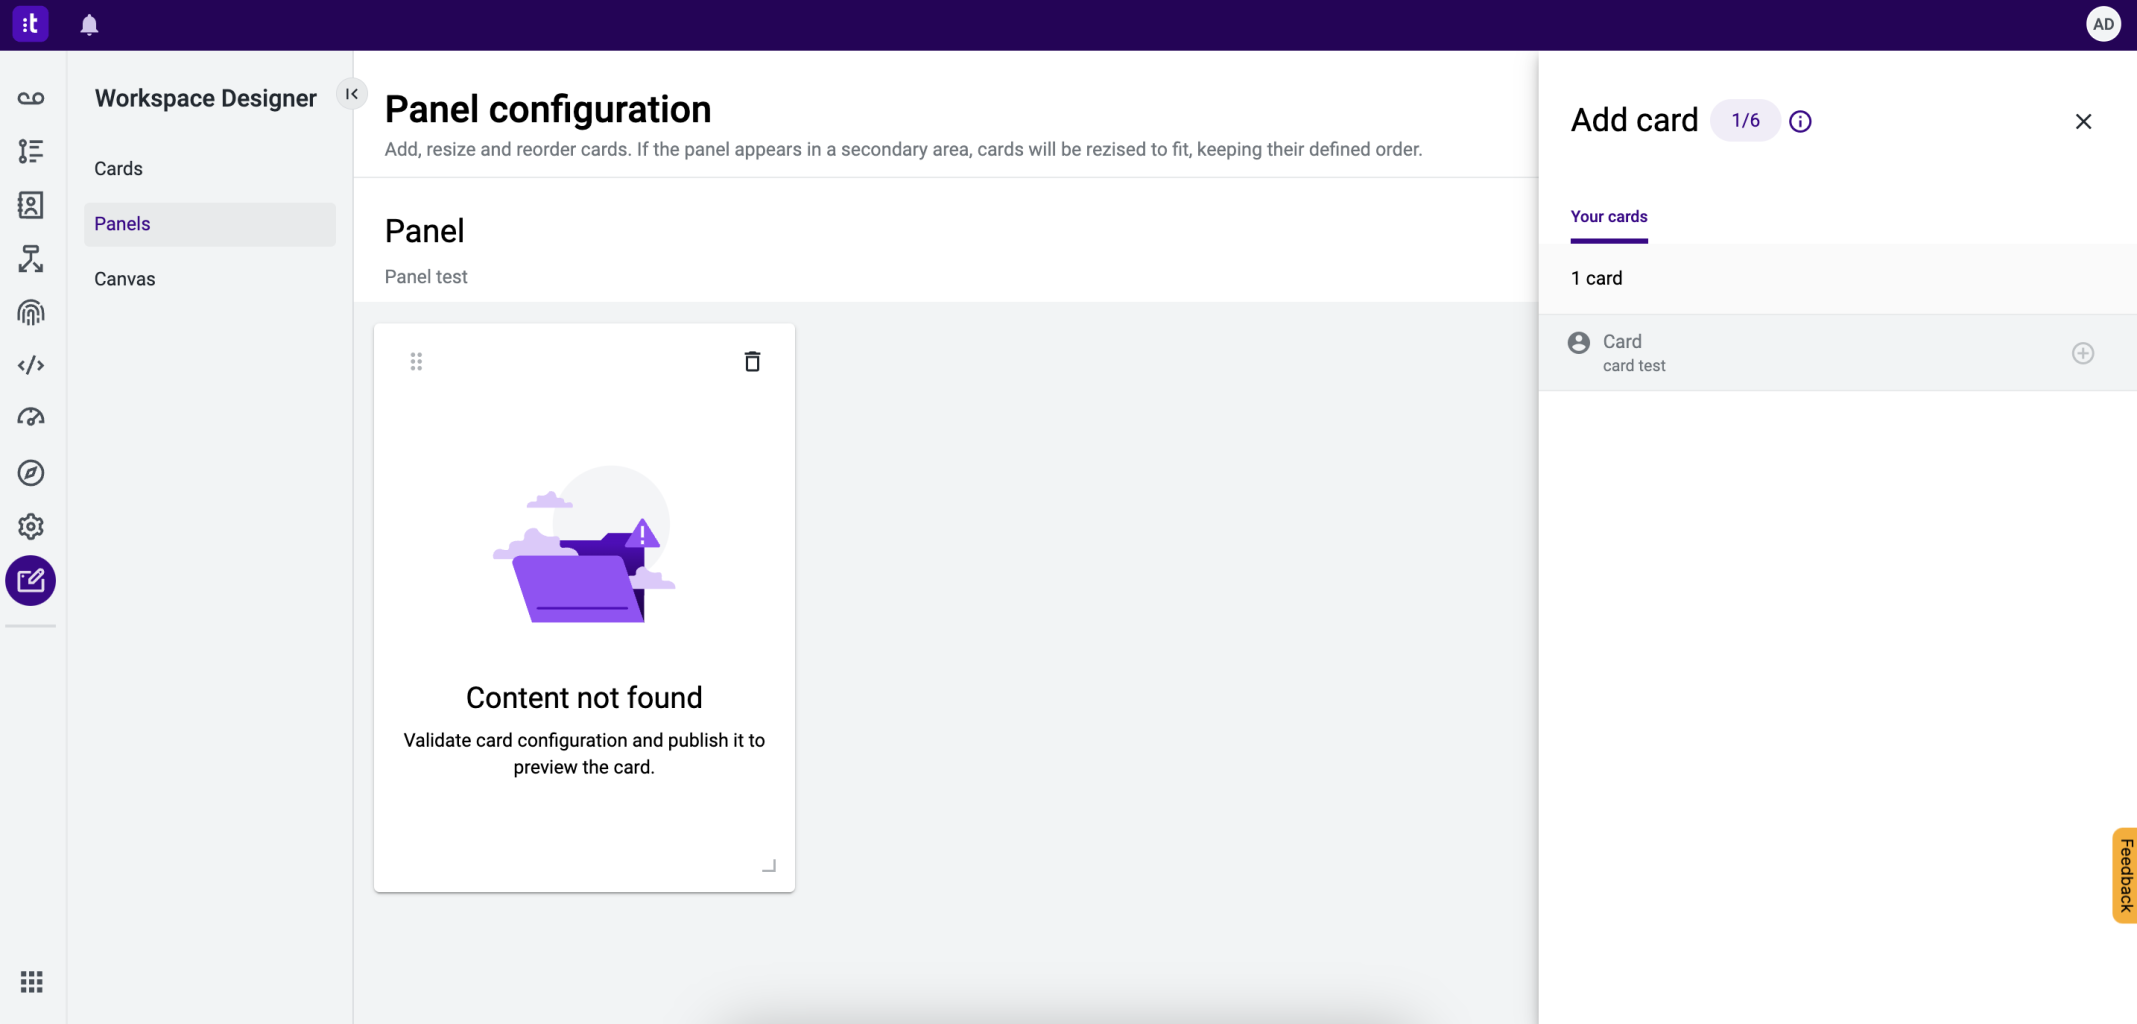
Figure 5 - Card added to the panel
Resizing cards
To resize a card, use the bottom-right icon (Figure 6 - 1). Click and drag to resize the card to the preferred size.
Cards use a grid, so it’s only possible to increase/decrease the size in predefined steps.
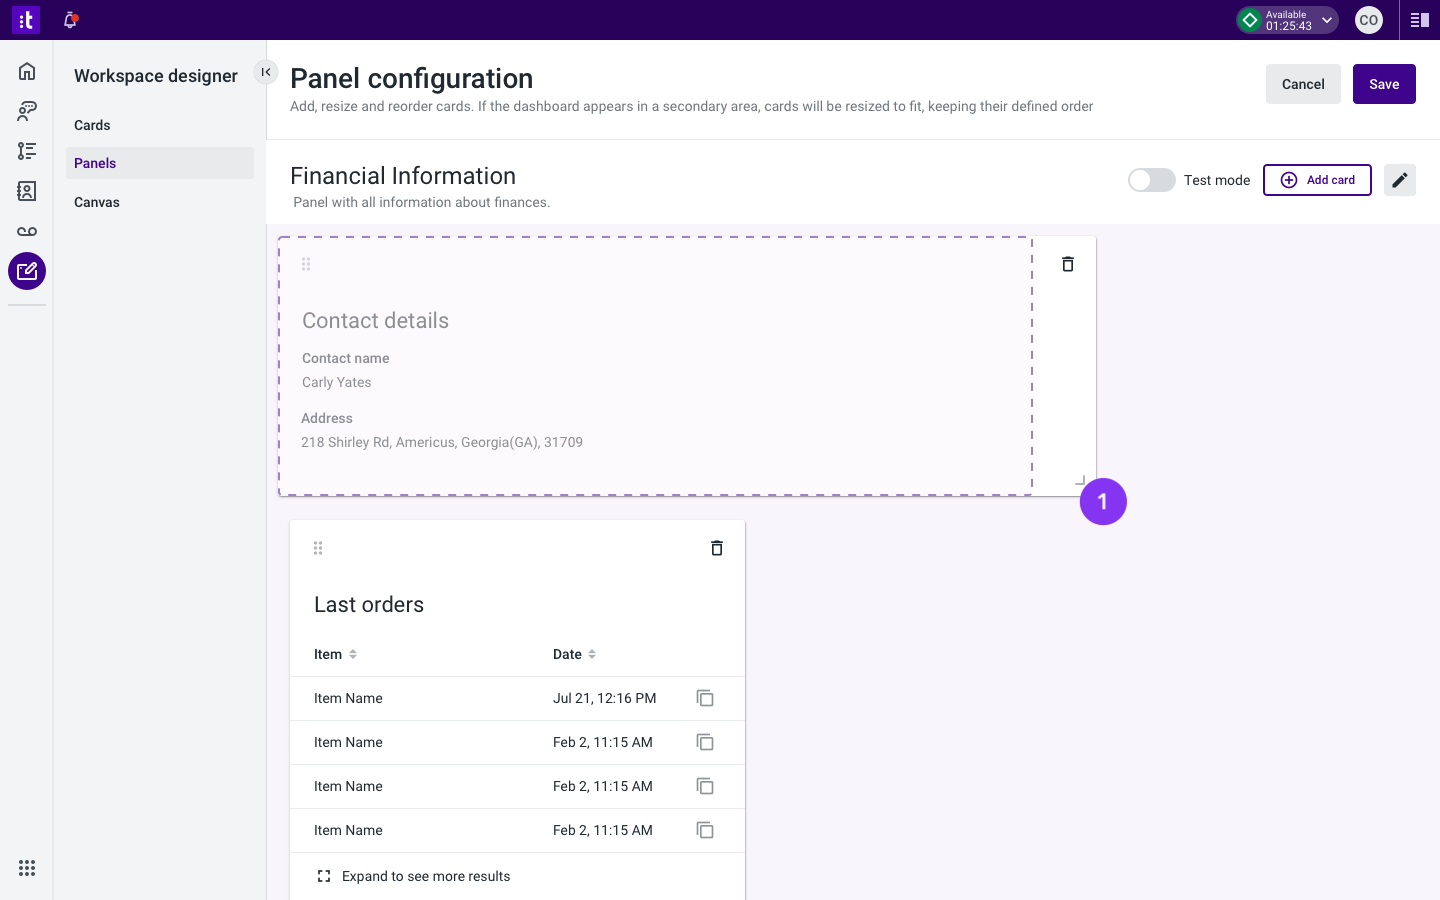
Figure 6 - Resizing a card in the panel
Reordering cards
To reorder a card, use the icon at the card’s top-left (Figure 7 - 1). Click and drag to move the card to the preferred place.
Cards use a grid, so it’s only possible to increase/decrease the size in predefined steps.
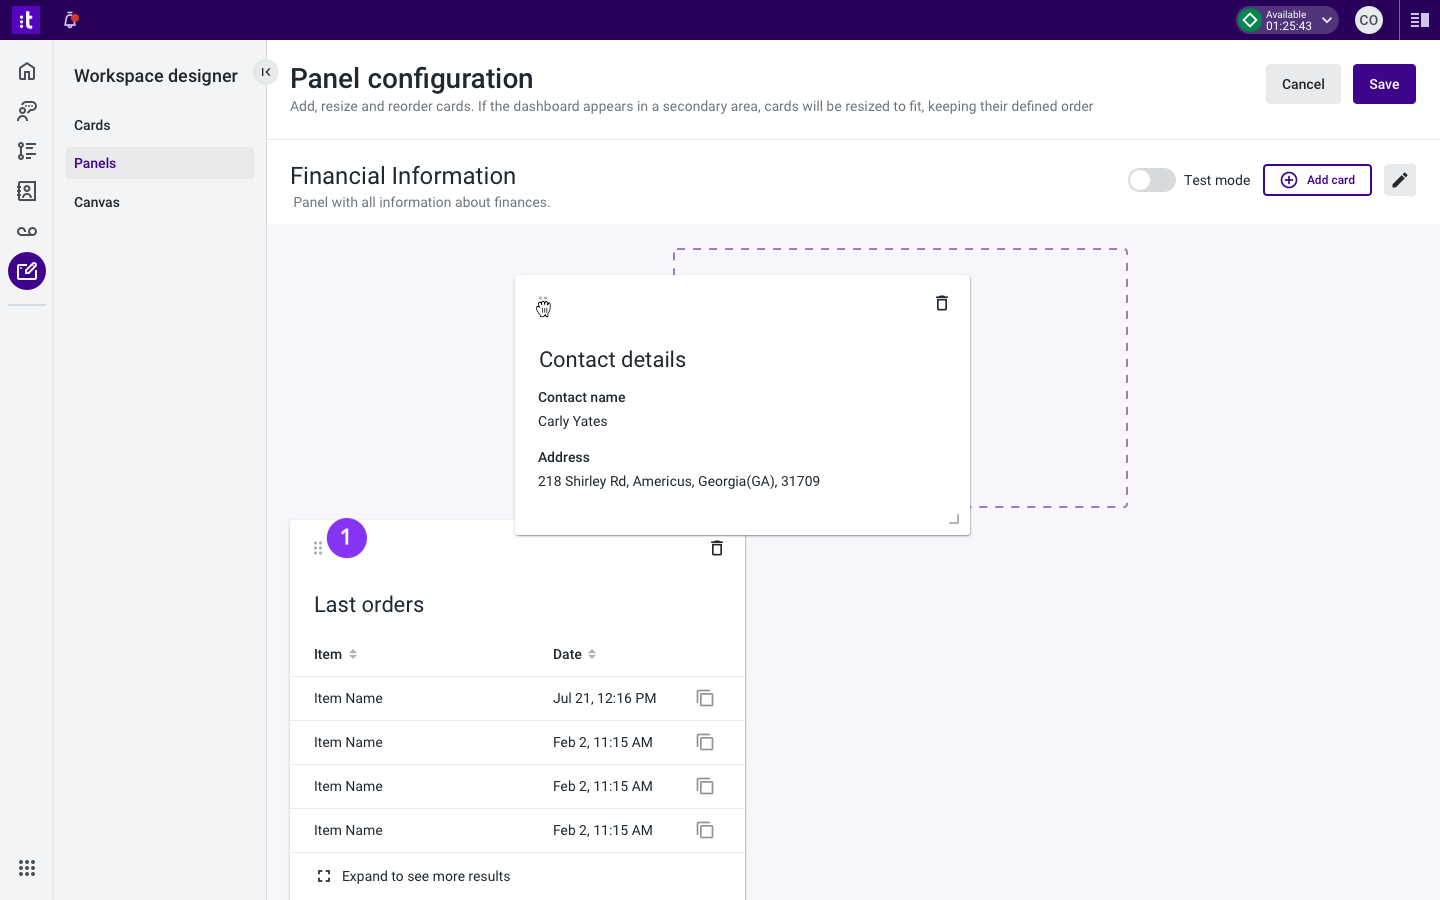
Figure 7 - Reordering a card in the panel
TroubleshootingIf you have questions or technical issues, please open a ticket using this form.
Updated about 1 month ago