SCIM User Management for OKTA
SCIM User Management for OKTA
This page details the configuration steps required to establish a connection between the SCIM Application in OKTA and Talkdesk. Please carefully review the following page before beginning the setup process: SCIM API
Creating the SCIM Application in OKTA
-
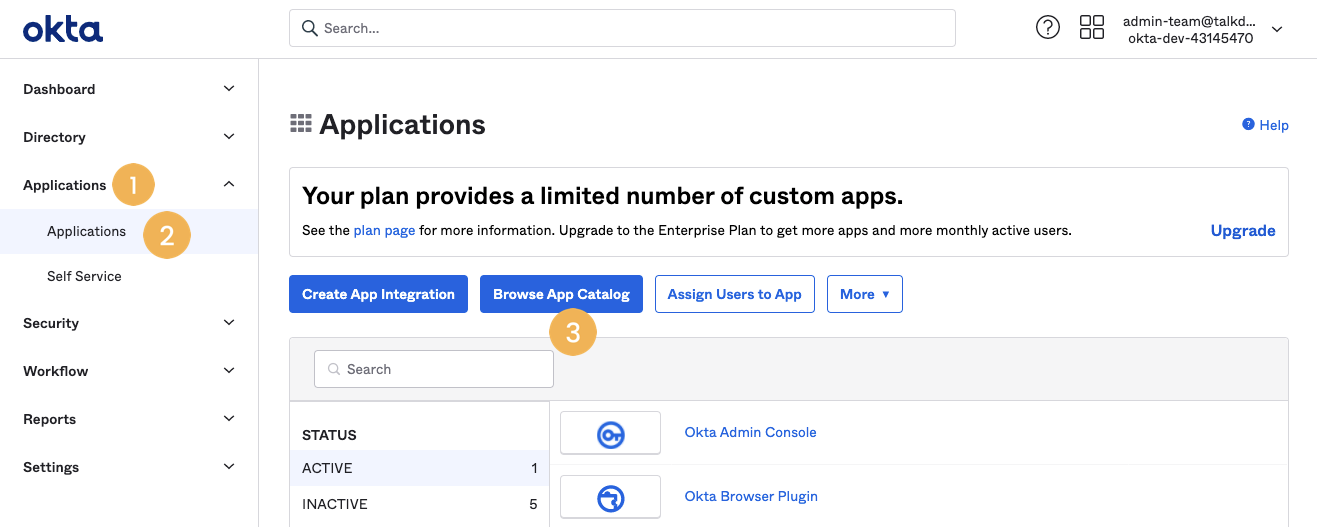
Log in and go to Applications [1] > Applications [2] > Browse App Catalog [3].
-
Search for "(OAuth Bearer Token) Governance with SCIM 2.0" and click "Add Integration".
-
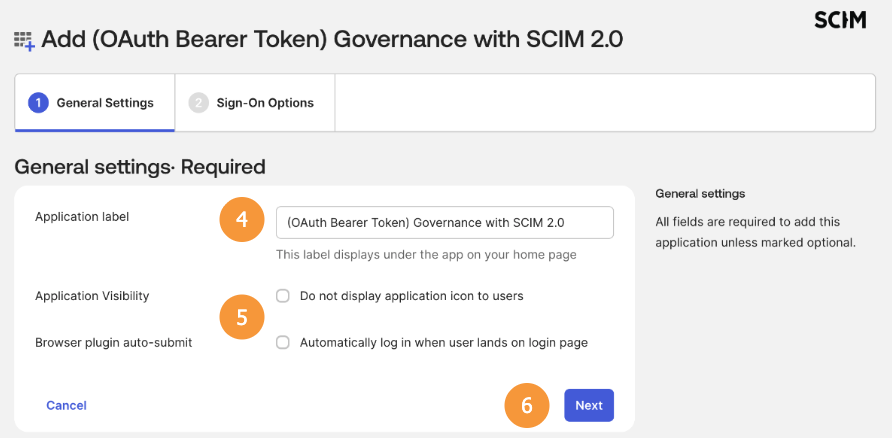
Give the application a name (i.e. "SCIM 2.0 Test App") [4] and deselect any options [5]; default values should be ok.
-
Click Next [6].
-
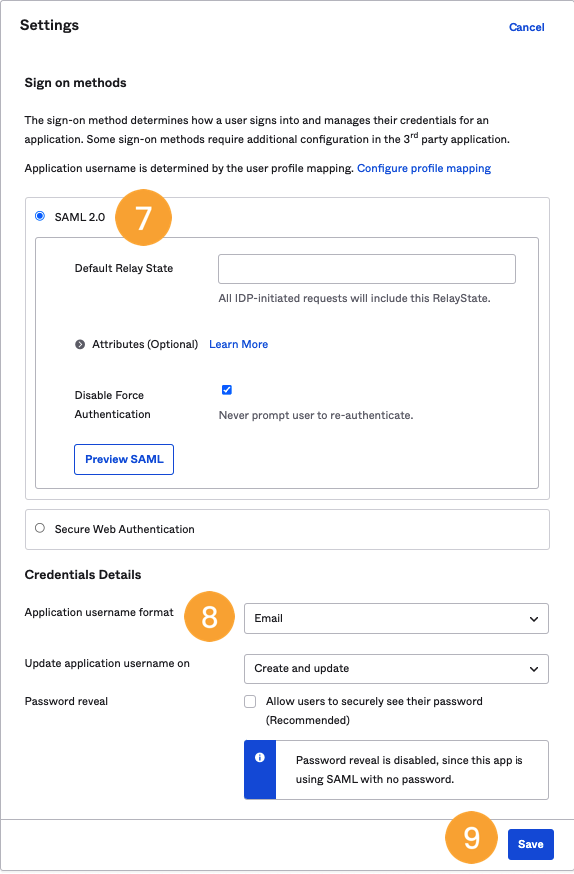
On "Sign on methods", select SAML 2.0 [7].
-
In the "Application username format" field under "Credentials Details", select Email [8] and click Save [9].
Configuring the Provisioning
- Enter the application we created in the first step in Applications > Applications > SCIM 2.0 Test App.
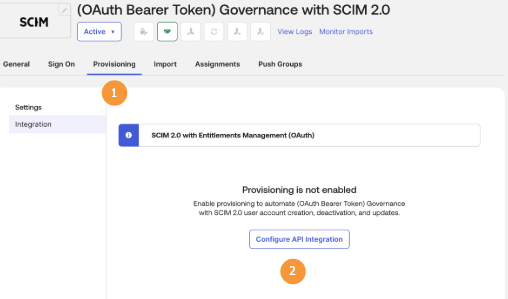
- Go to the Provisioning tab [1] and click on Configure API Integration [2].
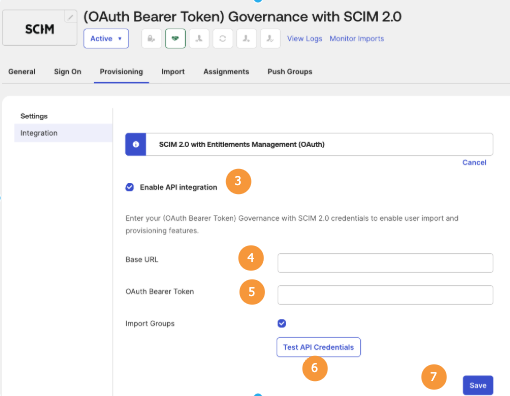
-
Tick the option "Enable API integration" [3].
-
Enter
https://api.talkdeskapp.com/scim/v2in the "SCIM 2.0 Base Url" field [4].- The base URL (i.e. api.talkdeskapp.com) is determined by your account instance's region. To view the available options, please check the following page: App and Talkdesk Regions
-
Then, type in the STS generated token in the "OAuth Bearer Token" field [5]. For additional information on generating an STS Token, please visit this article.
-
Click on Test API Credentials [6] to ensure it works, and click on Save [7].
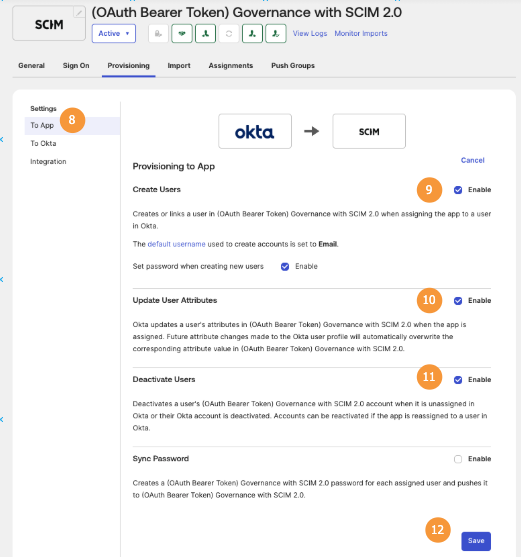
-
On the left-hand side menu, go to Settings > To App [8] and click "Edit". Then, tick the "Enable" flags in "Create Users" [9], "Update User Attributes" [10], and "Deactivate Users" [11]. Save the changes [12].
-
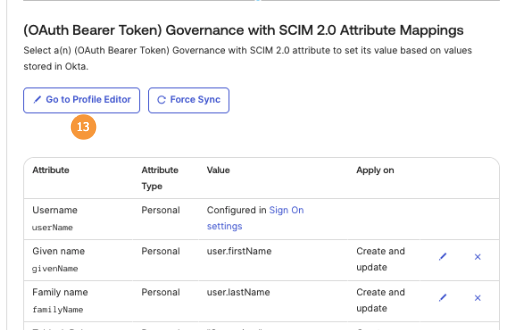
Scroll down on the same page and ensure that only supported fields are present in the mappings.
- For a comprehensive list of supported fields, please visit: Create User
- Some fields are mapped by default and need to be removed (i.e. Honorific prefix).
- The mandatory fields are
userName,givenName, and `familyName
-
Alternatively, to assign the
active,externalId,role, or theteamto the user during the SCIM Provisioning process, click on the option Go to Profile Editor [13], click on "+ Add Attribute", and enter the following information:
Active
| Field | Type |
|---|---|
| Data type | boolean |
| Display name | active |
| Variable name | active |
| External name | active |
| External namespace | urn:ietf:params:scim:schemas:core:2.0:User |
| Enum | unchecked |
| Attribute required | unchecked |
| Attribute type | Personal |
| Mutability | READ_WRITE |
Note: If the active field is not mapped, Talkdesk will try to create the user with active=true.
External Id
| Field | Type |
|---|---|
| Data type | string |
| Display name | External ID |
| Variable name | talkdeskExternalId (externalId is a reserved variable name on Okta) |
| External name | externalId |
| External namespace | urn:ietf:params:scim:schemas:core:2.0:User |
| Enum | unchecked |
| Attribute required | unchecked |
| Attribute type | Personal |
| Mutability | READ_WRITE |
Role
| Field | Type |
|---|---|
| Data type | string |
| Display name | Talkdesk Role |
| Variable name | rolesString |
| External name | rolesString |
| External namespace | urn:ietf:params:scim:schemas:extension:talkdesk:2.0:User |
| Enum | unchecked |
| Attribute required | unchecked |
| Attribute type | Personal |
| Mutability | READ_WRITE |
Note: The field value must contain a role name that already exists in your Talkdesk Account and has been previously created.
If the Role field is not mapped, Talkdesk will create the user with the default Role Agent.
Team
| Field | Type |
|---|---|
| Data type | string |
| Display name | Talkdesk Team |
| Variable name | teamsString |
| External name | teamsString |
| External namespace | urn:ietf:params:scim:schemas:extension:talkdesk:2.0:User |
| Enum | unchecked |
| Attribute required | unchecked |
| Attribute type | Personal |
| Mutability | READ_WRITE |
Note: The field value must contain a team name that already exists in your Talkdesk Account and has been previously created.
If the Team field is not mapped, Talkdesk will not assign the user to any team.
Enabling Attributes for Application Provisioning
-
After configuring the fields in the Profile Editor, enable them for application provisioning. Navigate to Applications > Applications > SCIM 2.0 Test App.
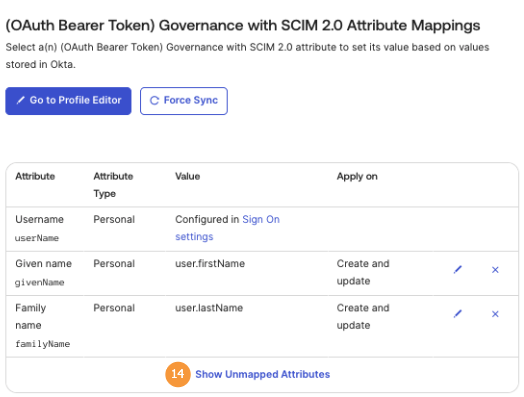
-
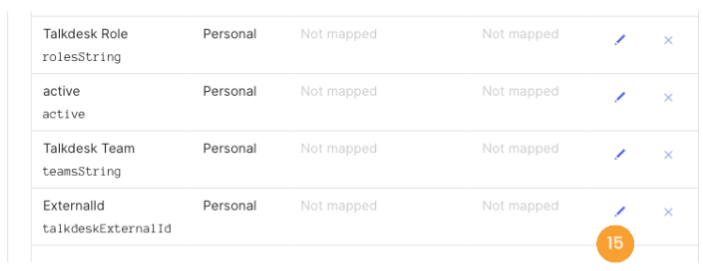
Go to the Provisioning tab, scroll down, and click on Show Unmapped Attributes [14].
-
To configure each attribute mapping, click the corresponding pencil icon [15].
-
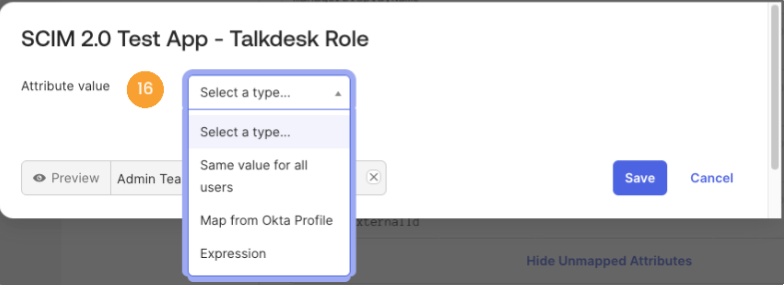
Configure the mapping for each attribute in the Attribute value [16] field. Choose whether to apply it to "Create" operations or "Create and update" operations.
-
To ensure the
externalIdcontains the user's Okta ID, configure the Attribute value with the following expression:user.getInternalProperty("id").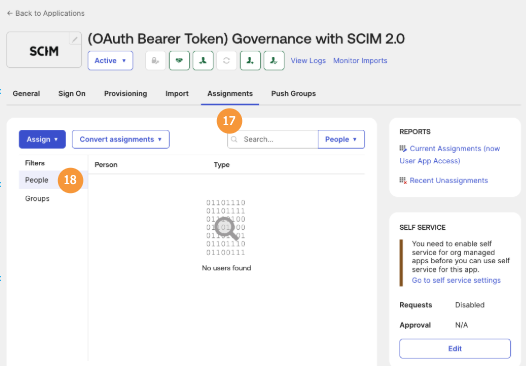
-
-
Finally, go to Assignments [17], click on the People section [18], and use the search field to select the people or groups to be provisioned in SCIM.
Updated about 2 months ago