Fetch Data
The Fetch Data component allows you to retrieve contact, queues, and team data directly from Talkdesk without the need to configure additional Talkdesk Connections™.
The Fetch Data component presents different information to the user based on the data type.
Common Use Cases
Showing a Different Panel Based on the Queues
In this case, the user queues are being fetched, and by using a split flow component, it is determined if the user belongs to a support or sales ring group. Based on those conditions, a specific panel is presented to the user (Figure 1).
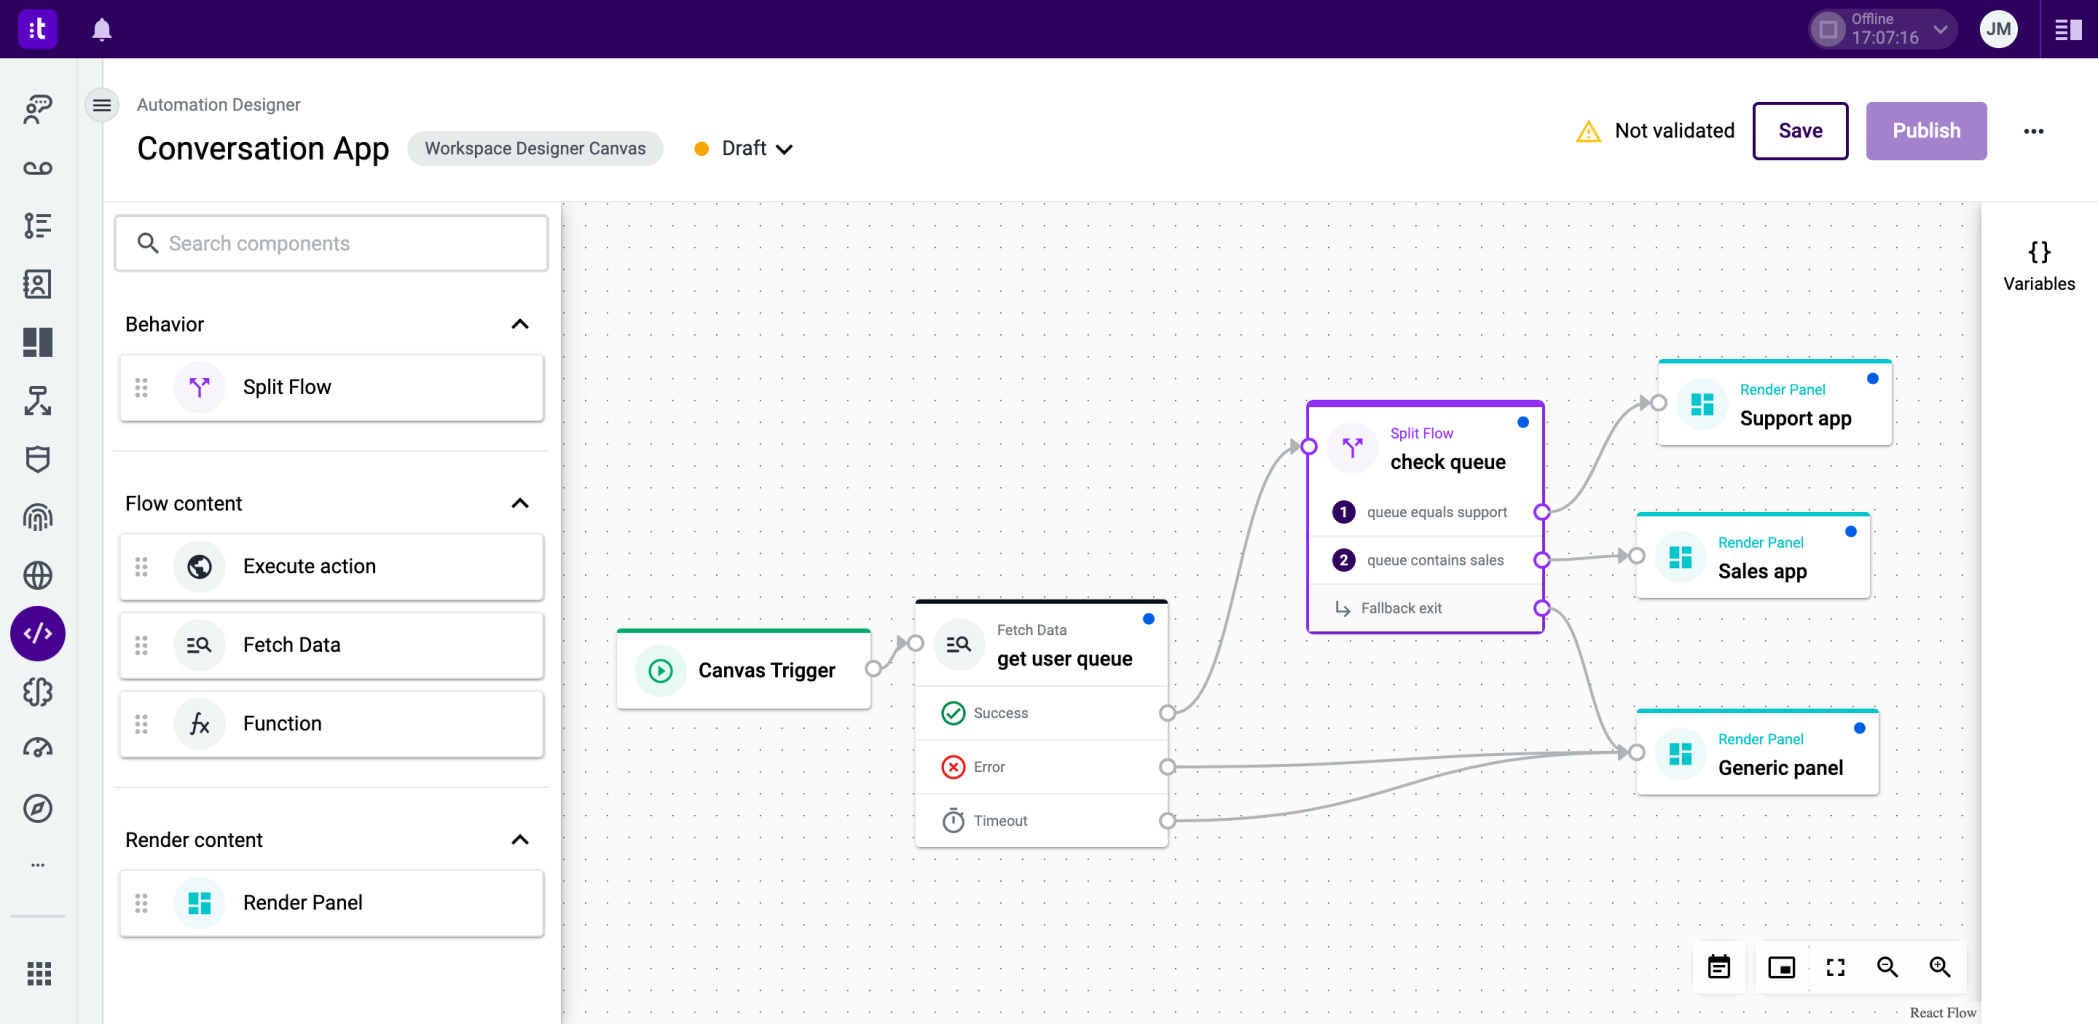
Figure 1 - Showing different panels based on the queue
Showing Different Information on a Card Based on a Company Segment
Here, contact information is being fetched, specifically the company data, and by using a Split Flow component, it is verified if the contact belongs to a company from a specific segment. Based on those conditions, different information on the card is presented to the user (Figure 2).
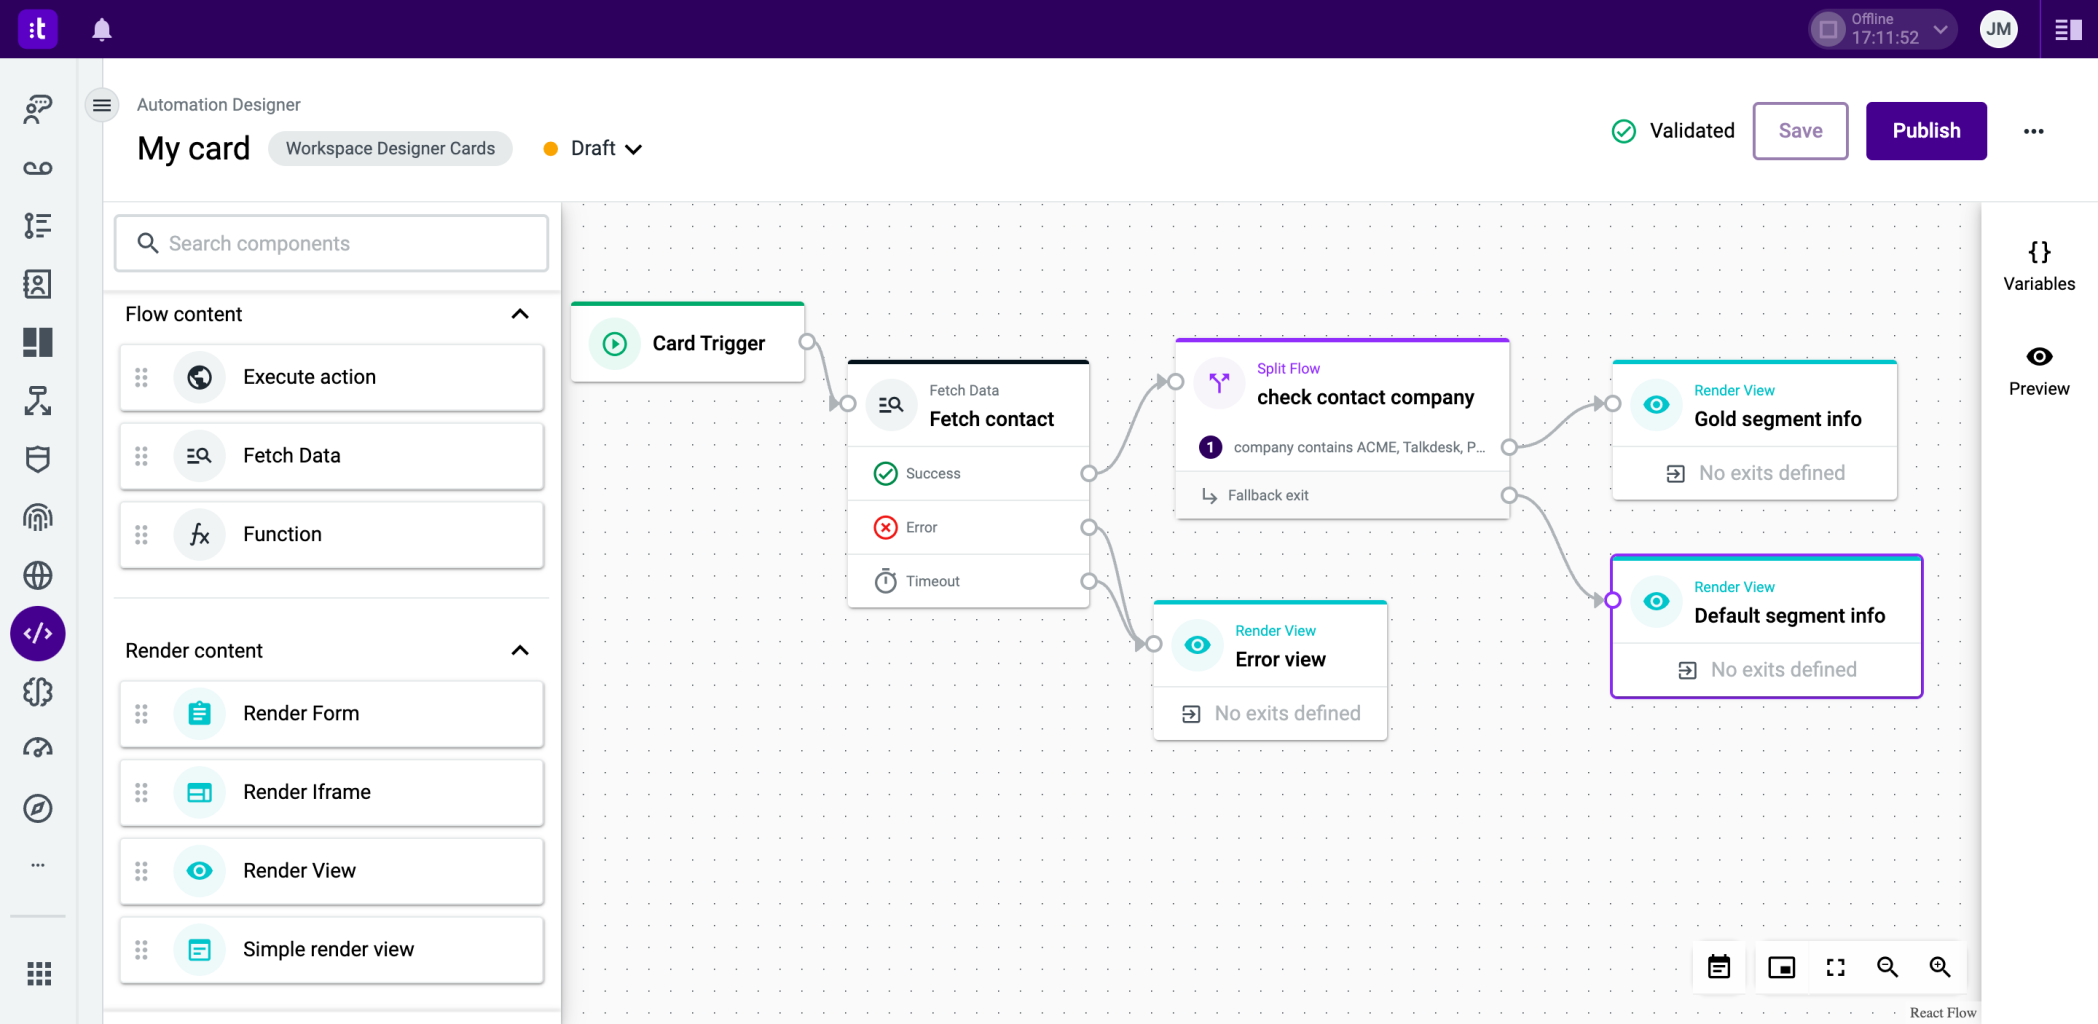
Figure 2 - Showing different information to the user
Data Types
The Fetch Data component retrieves three types of information:
- Contact: data about a specific contact.
- Queues: queue data from a user.
- Role: user role name.
- Team: team data from a user.
Each data type has its own set of fields and a clear objective, as explained below.
Similarly to the Execute Action component, the Fetch Data component has three different exits:
- Success: when the data is successfully fetched.
- Error: when the component can't fetch the data due to an API error.
- Timeout: when the component can't fetch the data in 30 seconds.
Like other components, a mandatory Component name (Figure 3 - 1) is required.
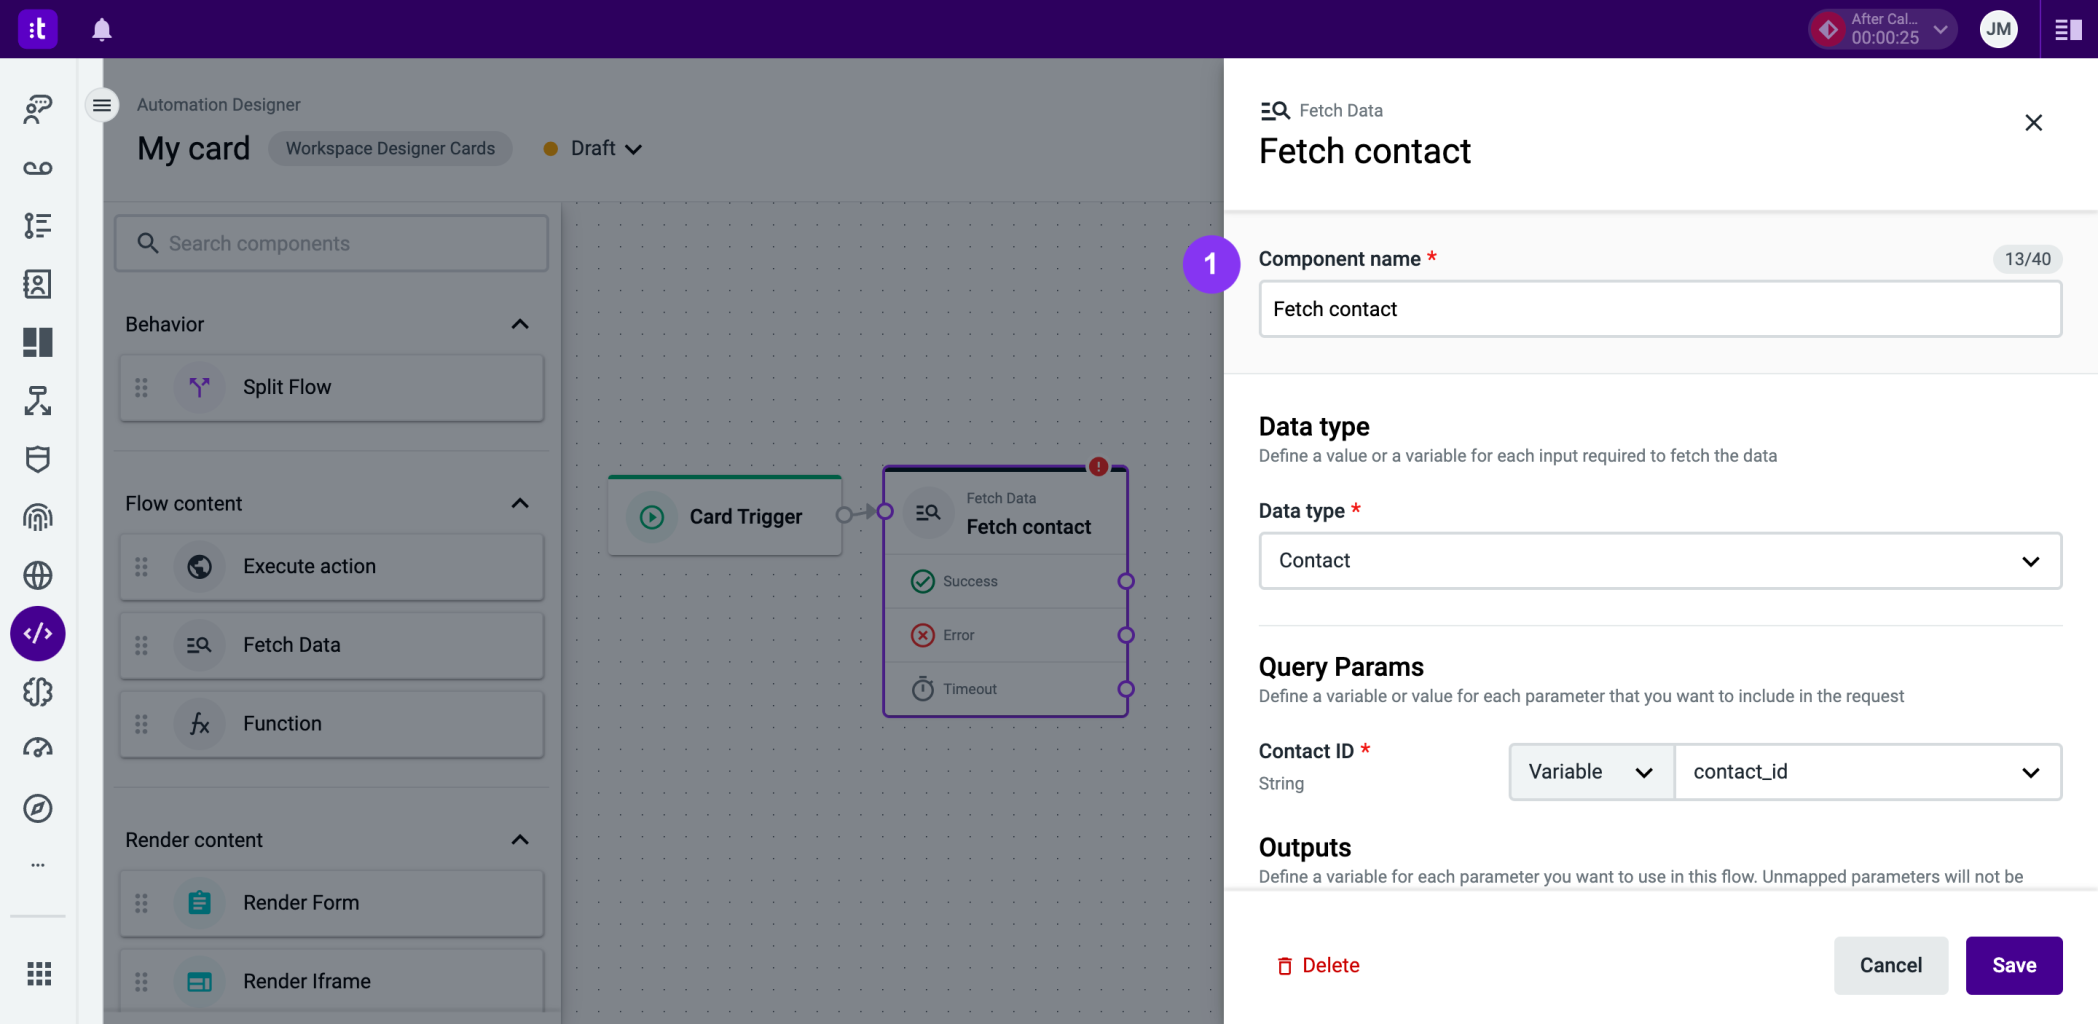
Figure 3 - Fetch data settings
Contact
The Contact data type accepts a contact ID (Figure 4 - 1) and returns the Contact Name (Figure 4 - 2), Company (Figure 4 - 3), and Phones (Figure 4 - 4).
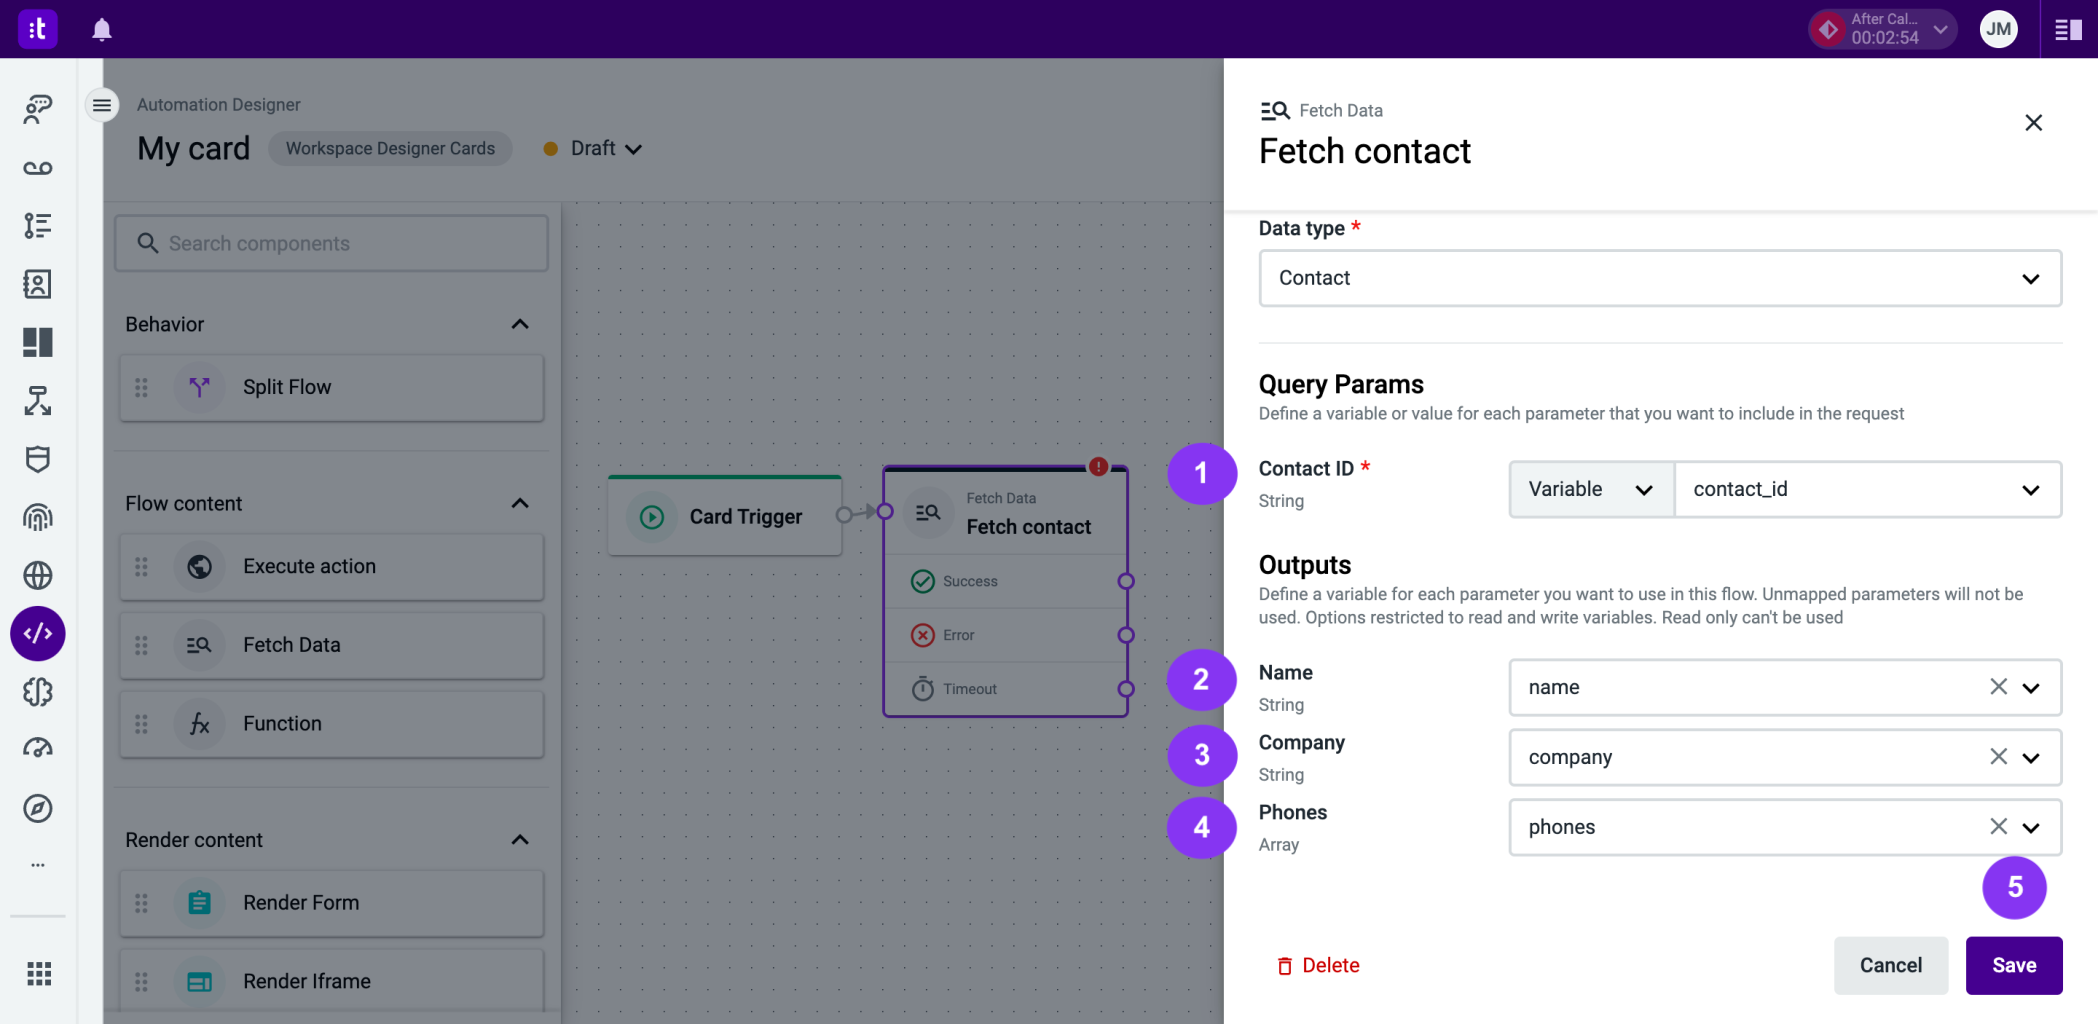
Figure 4 - Contact data settings
There’s a system variable available - contact_id - that will always be populated with the associated contact during an interaction. If multiple contacts are found, the variable will remain empty until a contact is associated with the interaction.
Phones is an array of objects composed of a label and a number, as exemplified below:
[
 {
   label: "Lorem",
   number: "+12025550122"
 },
 {
   label: "Ipsum",
   number: "+12025550140"
 }
]
Once you've completed filling out all the form fields, click the Save button (Figure 4 - 5).
Queues
The Queues data type (also known as Ring Groups) accepts a User ID (Figure 5 - 1) and returns Queues (Figure 5 - 2).
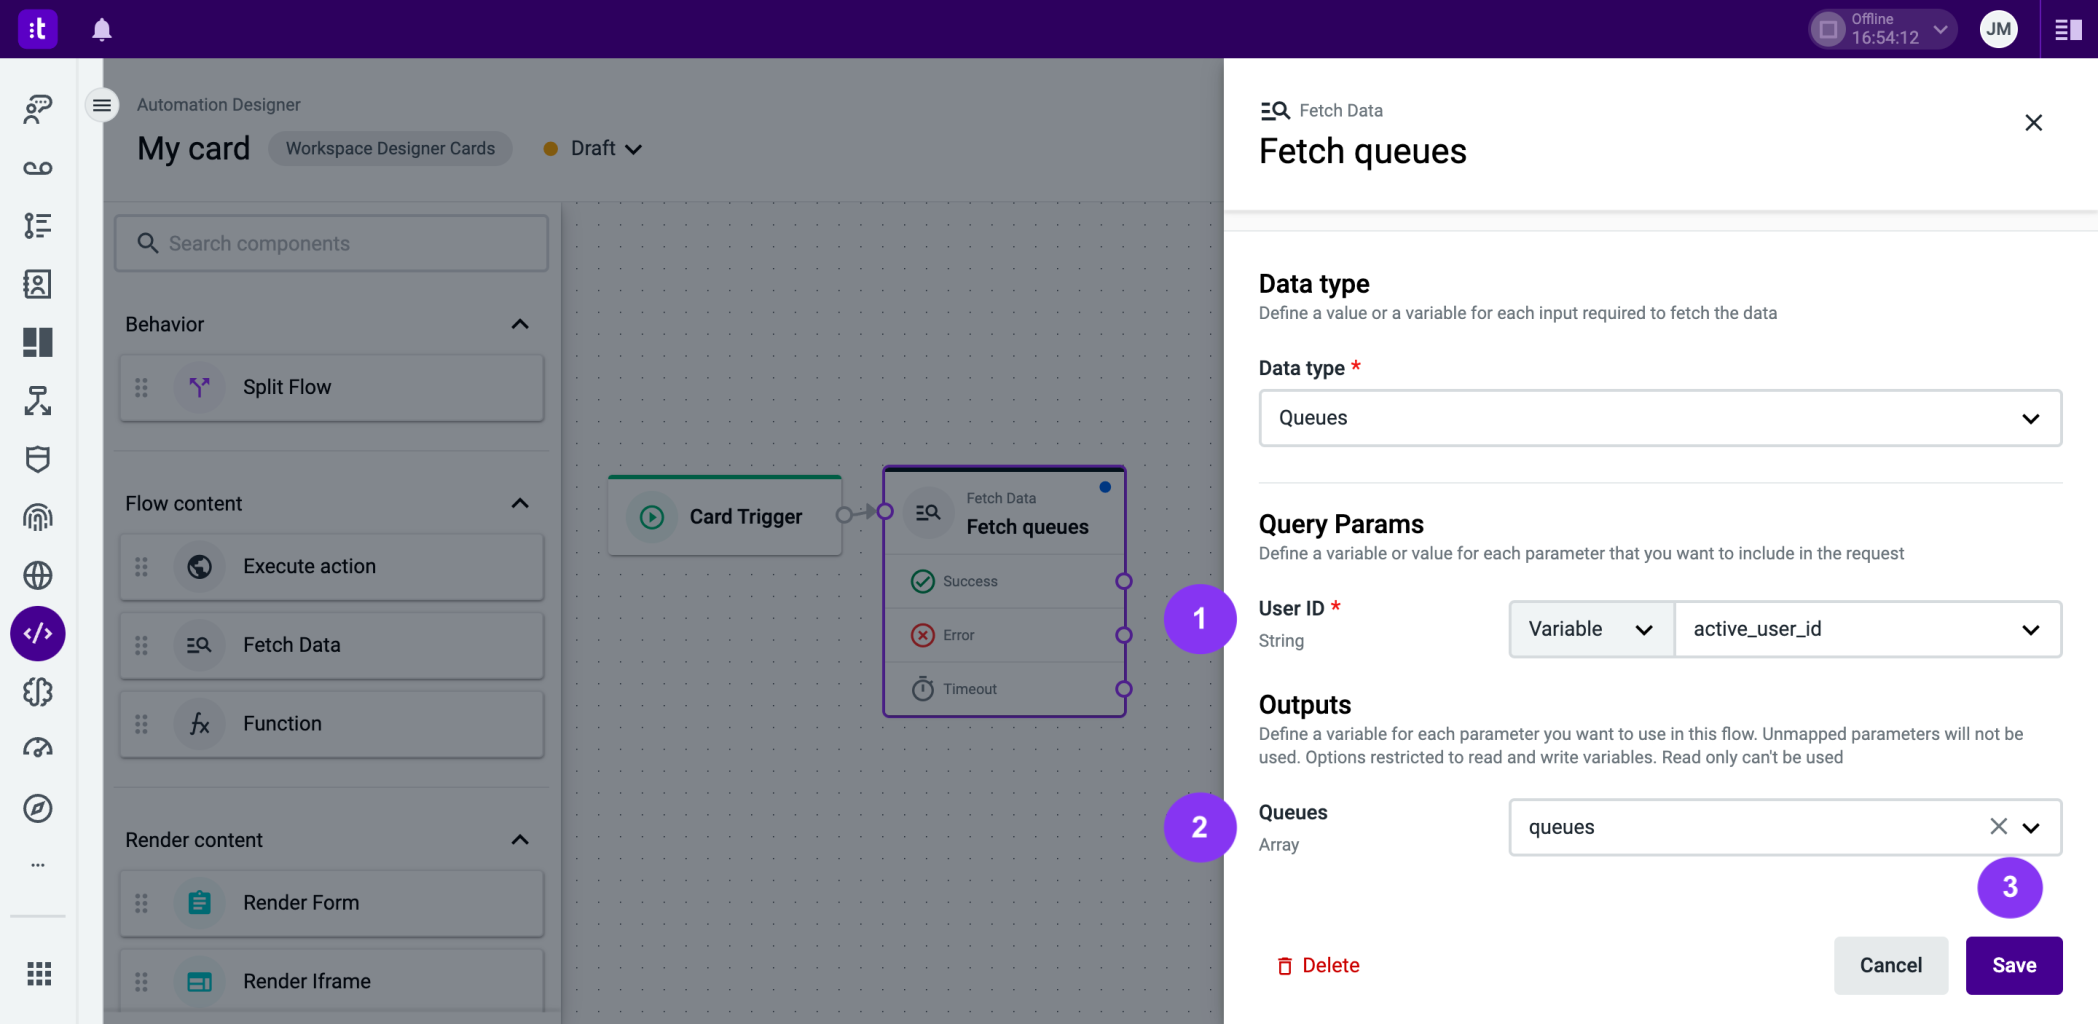
Figure 5 - Queues data settings
There’s a system variable available - active_user_id - that will always be populated with the current User ID.
Queues is an array of strings, each string being the queue name, as exemplified below:
["agents","support","my ring group"]Once you've completed filling out all the form fields, click the Save button (Figure 5 - 3).
Team
The Team data type accepts a User ID (Figure 6 - 1) and returns the team's Name (Figure 6 - 2), the team's Status (Figure 6 - 2), and the team's Timezone (Figure 6 - 4).
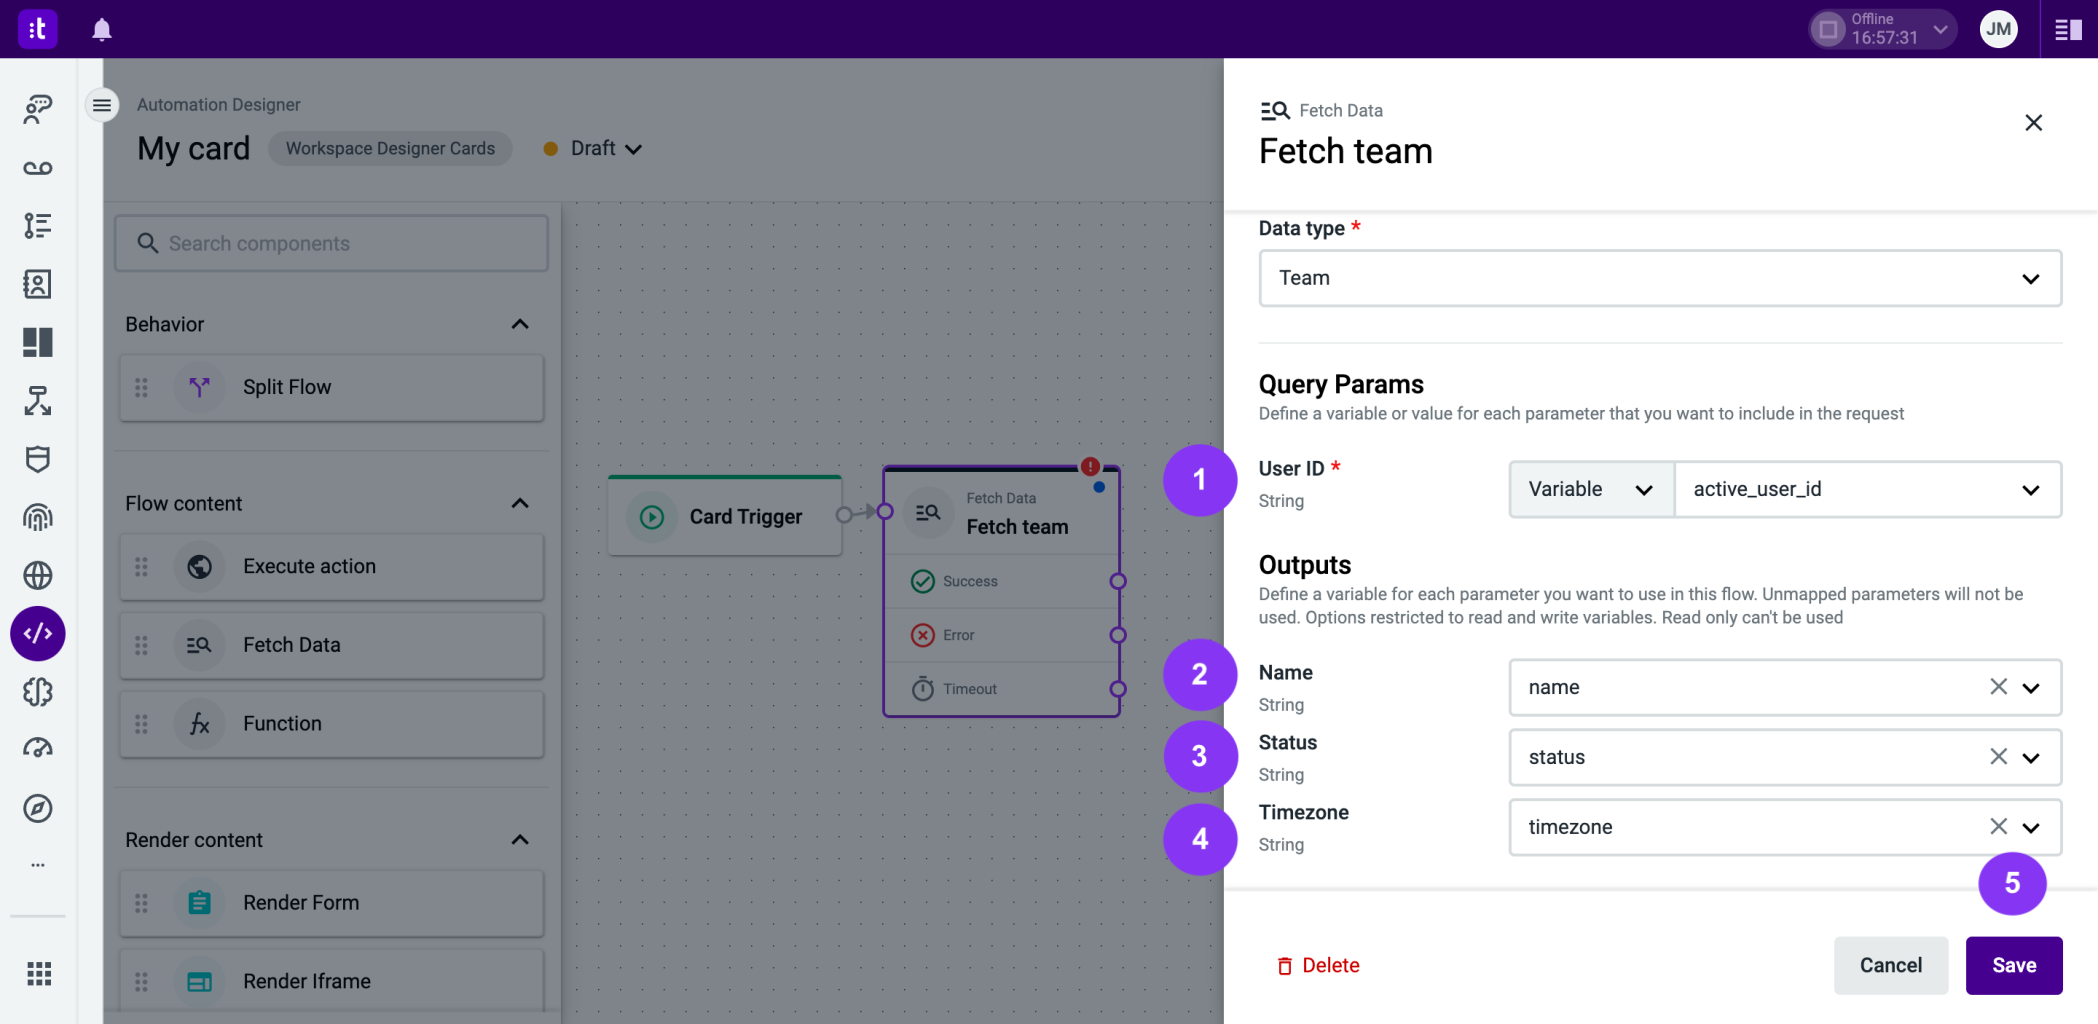
Figure 6 - Team data settings
There’s a system variable available - active_user_id - that will always be populated with the current User ID.
Below you can find an example of the output:
Name: "My awesome team"
Status: "active"
Timezone: "Europe/Lisbon"
Once you've completed filling out all the form fields, click the Save button (Figure 6 - 5).
Role
The Role data type (Figure 7 - 1) accepts a User ID (Figure 7 - 2) query parameter and returns the role name (user_role_name; Figure 7 - 3).
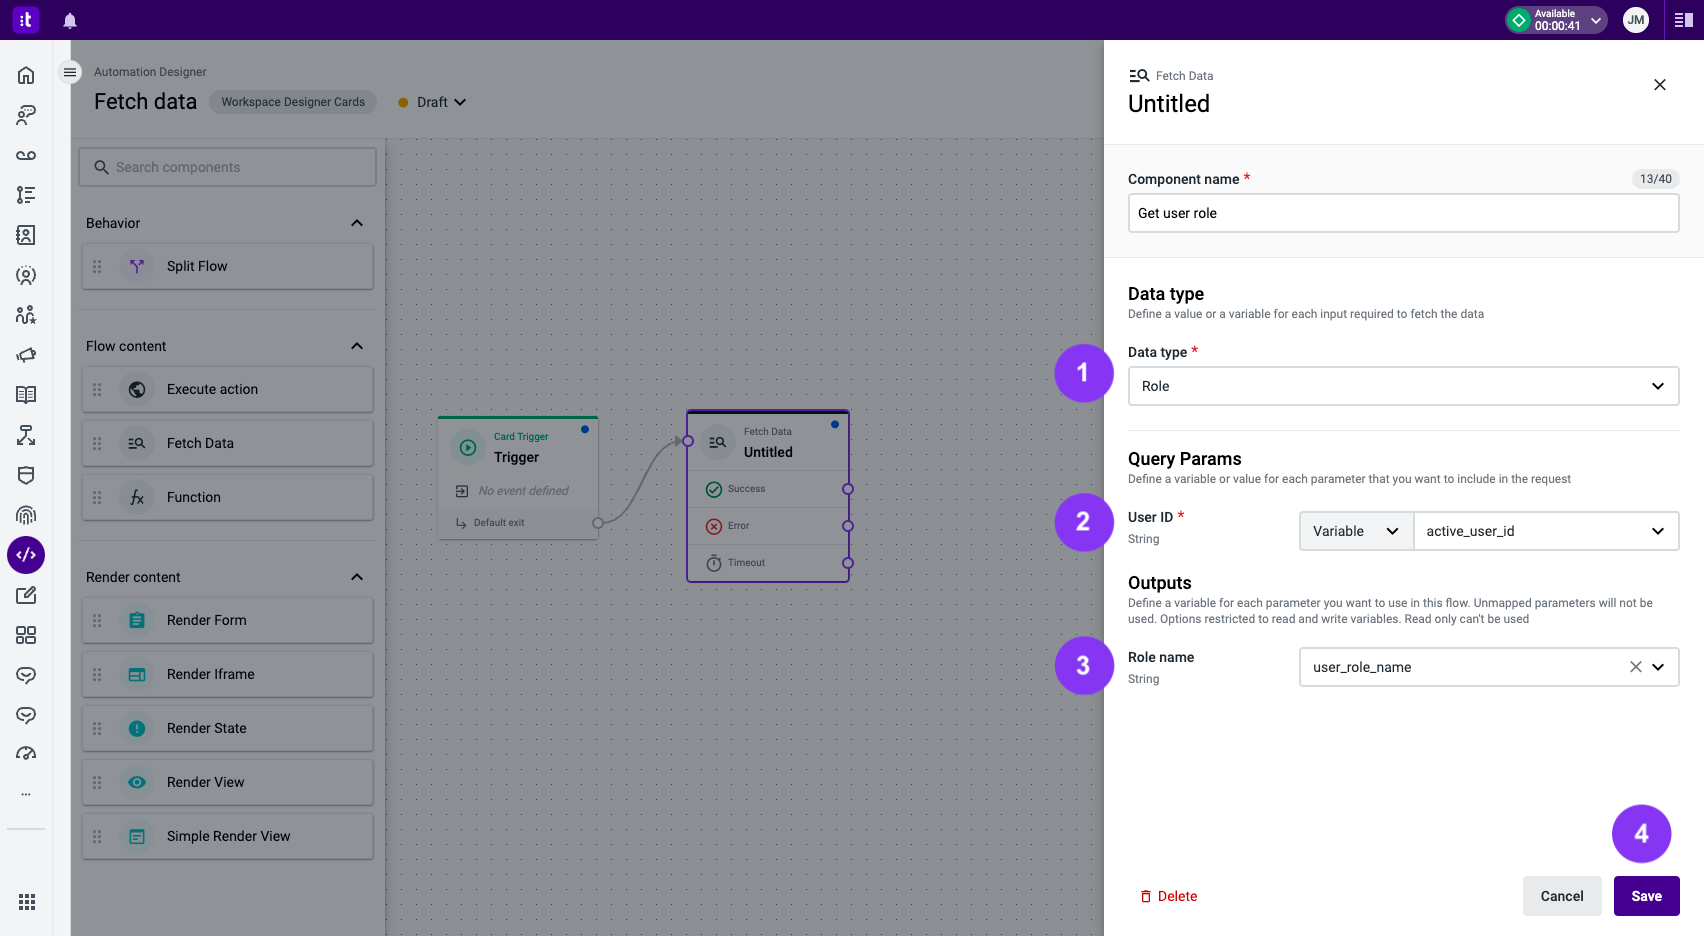
Figure 7 - Role data settings
The system variable available -
active_user_id- that will always be populated with the current User ID.
Below you can find an example of the output:
Role: "Agent"Once you've completed filling out all the form fields, click the Save button (Figure 7 - 4).
TroubleshootingIf you have questions or technical issues, please open a ticket using this form.
Updated 6 months ago