Render State
The Render State component allows you to easily configure different states that will be displayed throughout the flow. There are five different types: Empty, Error, Not Found, Success, and Warning (Figure 1 - 2).
Like other components, a mandatory Component name (Figure 1 - 1) is required.
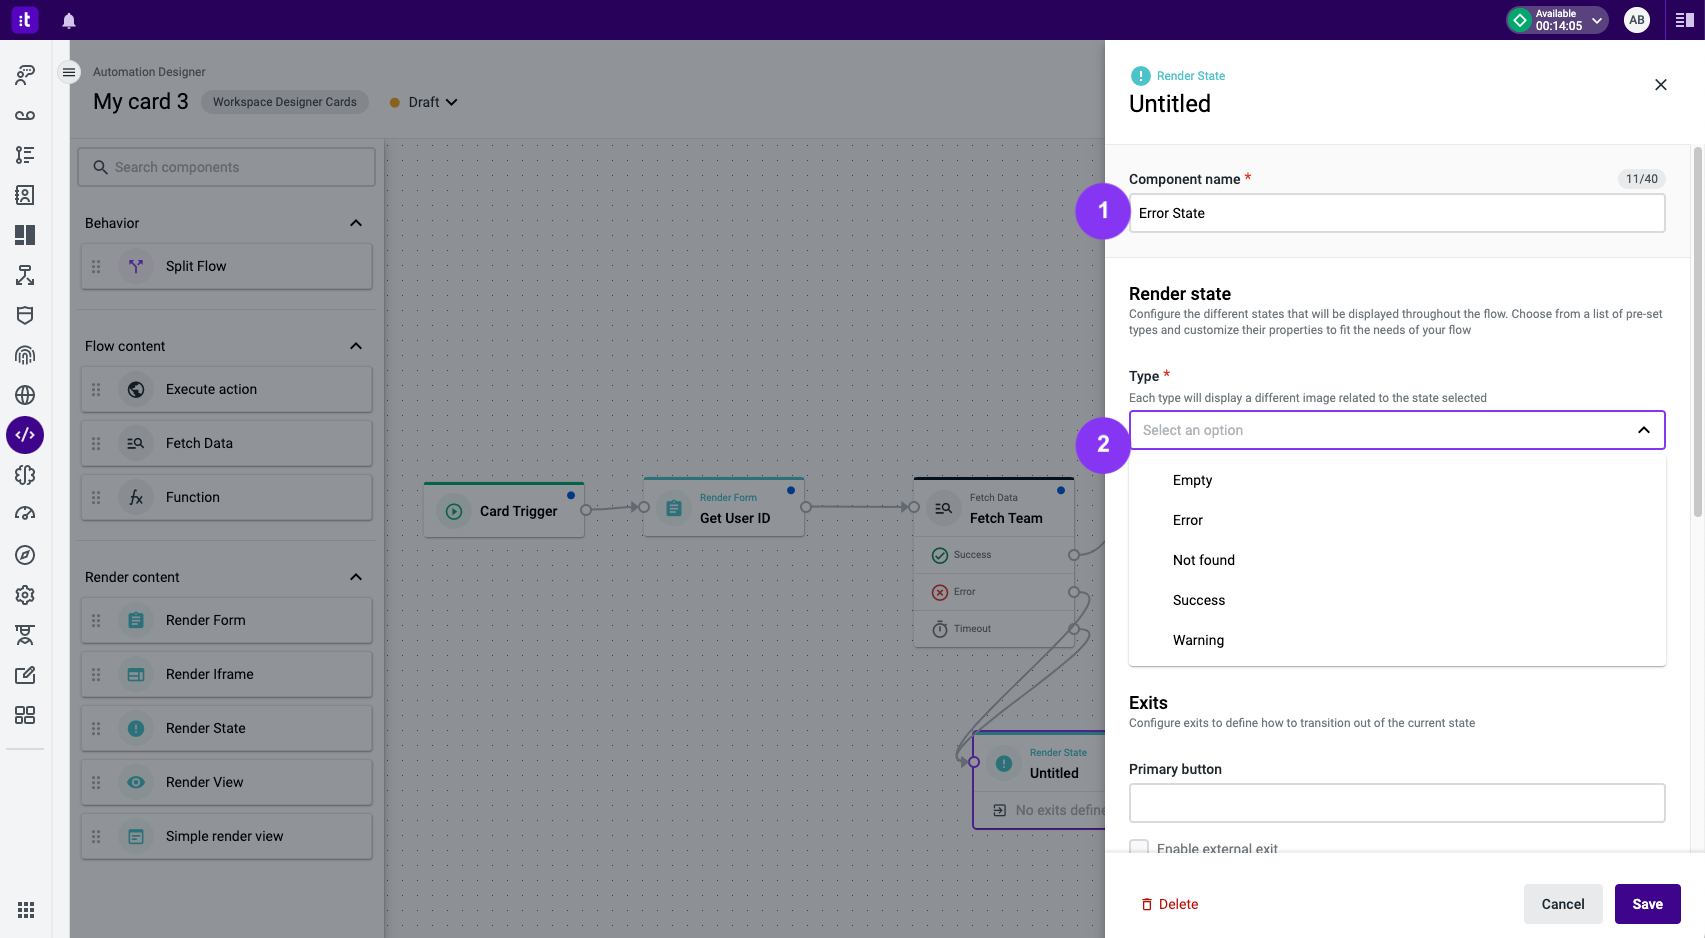
Figure 1 - Render State settings
Each state type has its own image, but all of them share the same configuration. You will be able to define a title (mandatory field; Figure 2 - 1) and a description (Figure 2 - 2) for the state, as well as add up to two exits (Figure 2 - 3).
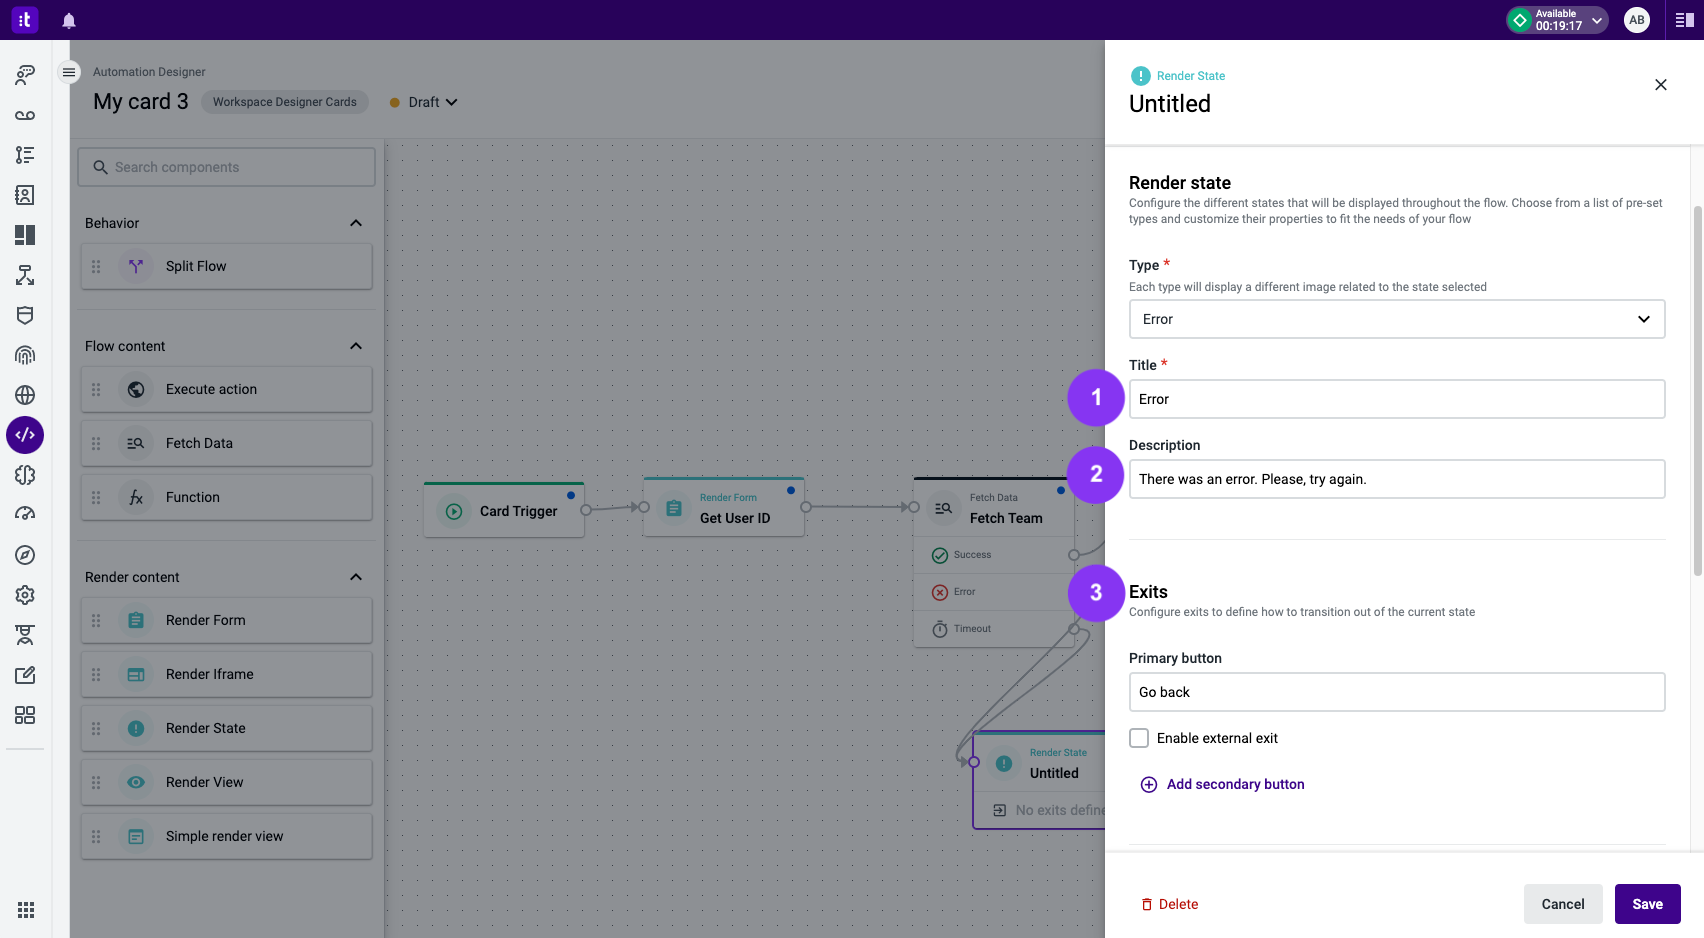
Figure 2 - Error state settings
Having exits in the Render State component is optional. However, it is possible to create two different types of exits, which will be represented by buttons:
- An exit that can be connected to another component in the automation flow (Figure 3 - 1).
- An exit that will redirect the agent to an external URL (Figure 3 - 2), which will open in a new window when the button is clicked.
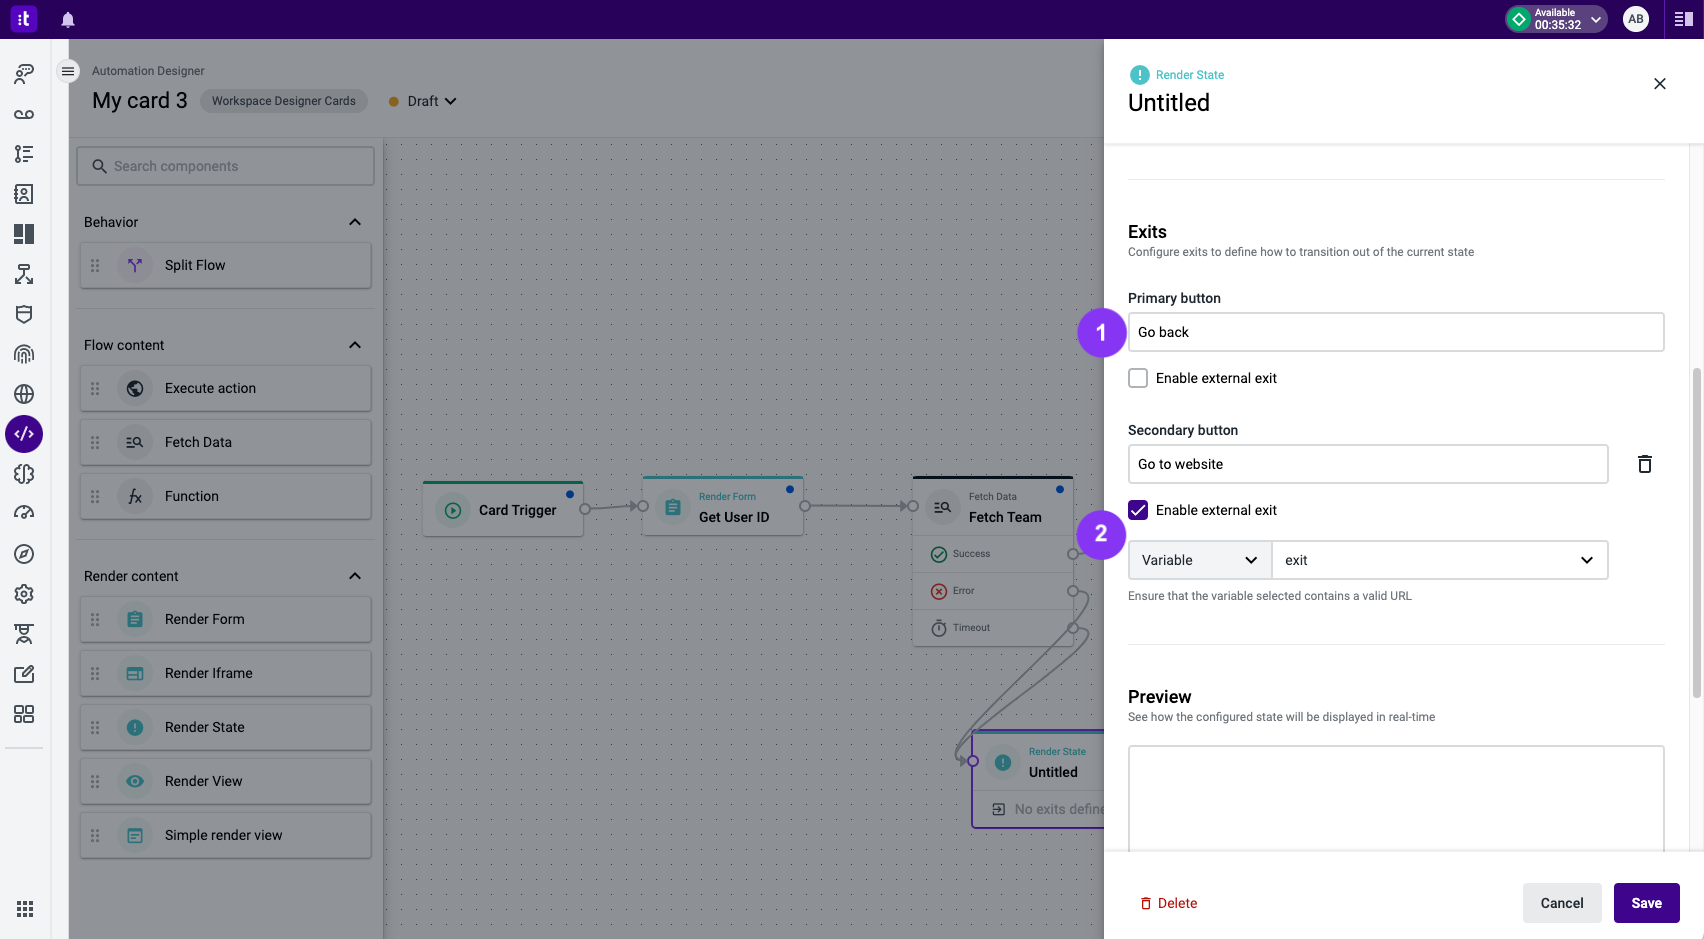
Figure 3 - Exits definition
To enable the external exit, it is possible to choose on the dropdown between a value or a variable. In the first scenario, the URL must be inserted in the text box next to the dropdown (Figure 4 - 1).
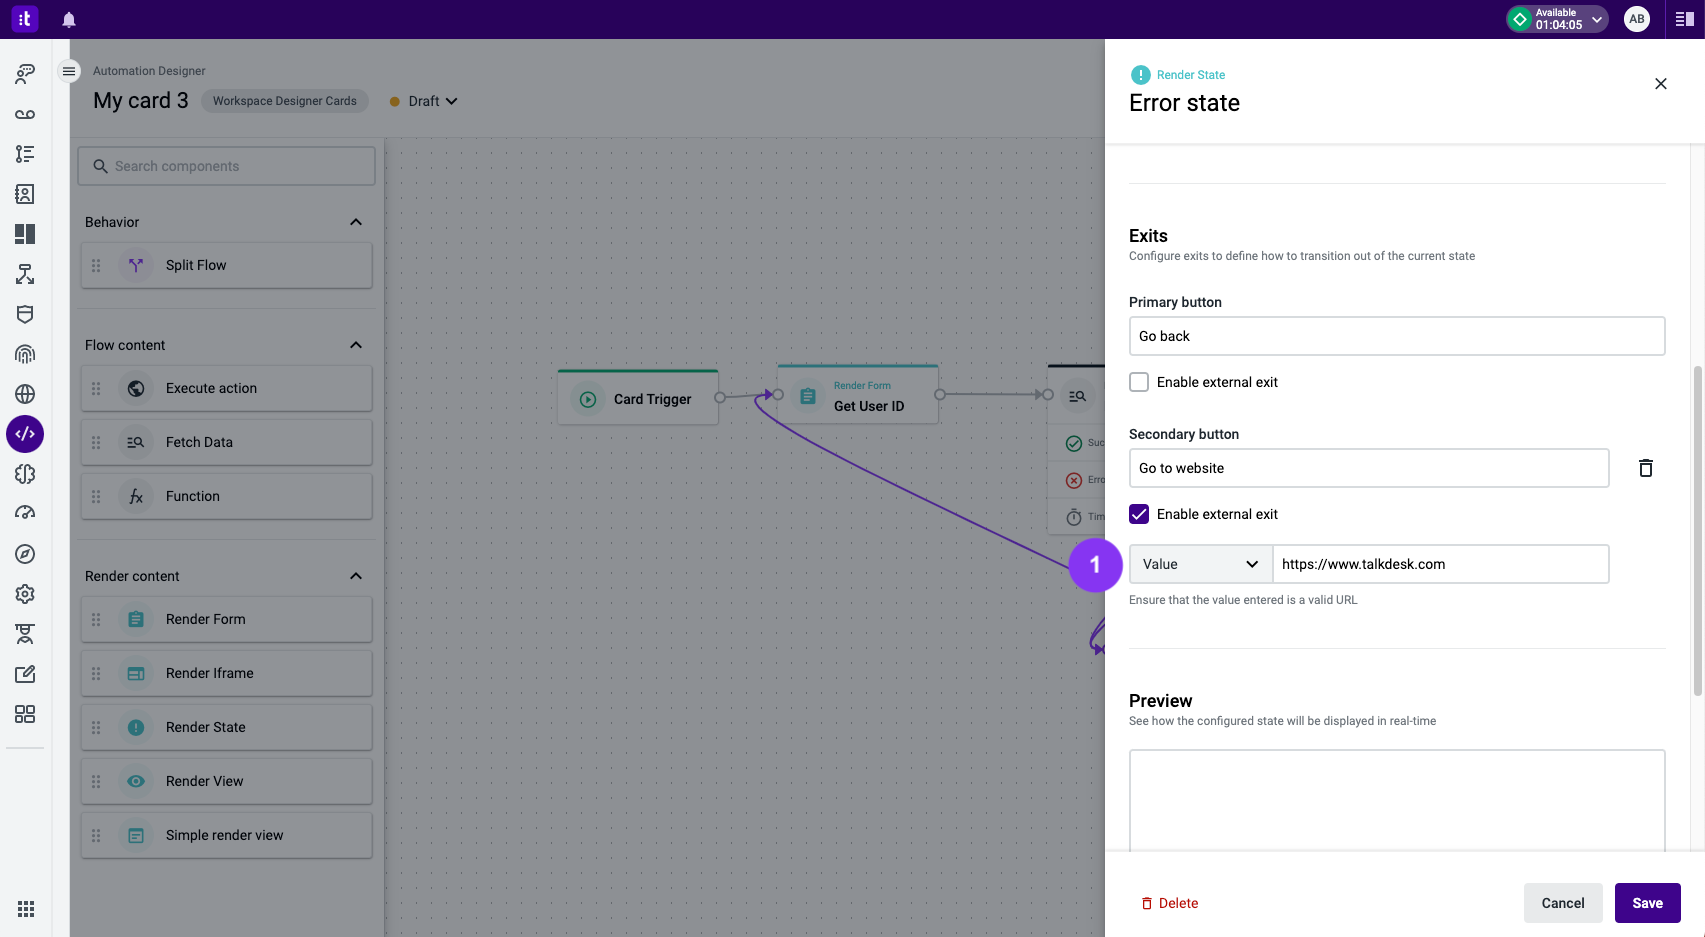
Figure 4 - Value configuration
In the second scenario, a variable that will hold the URL in the default value field needs to be created. It can then be chosen when configuring the exit (Figure 5).
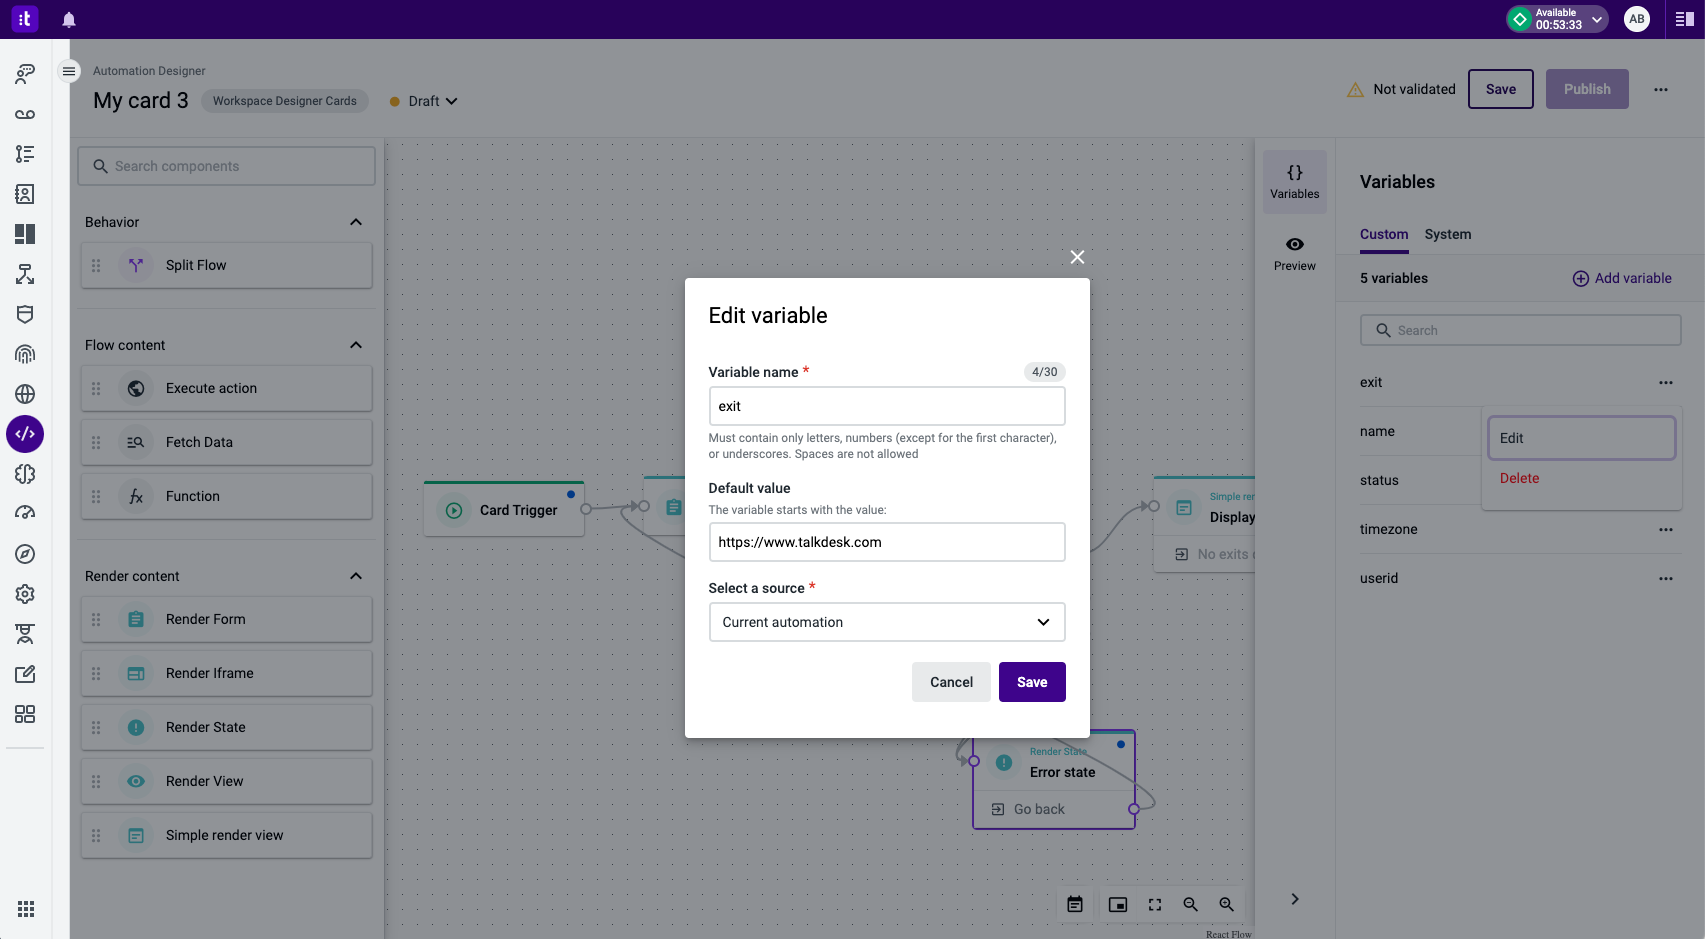
Figure 5 - Variable configuration
To see how the configured state will be displayed in real-time, there is a Preview section at the bottom of the Render State side panel (Figure 6 - right side).
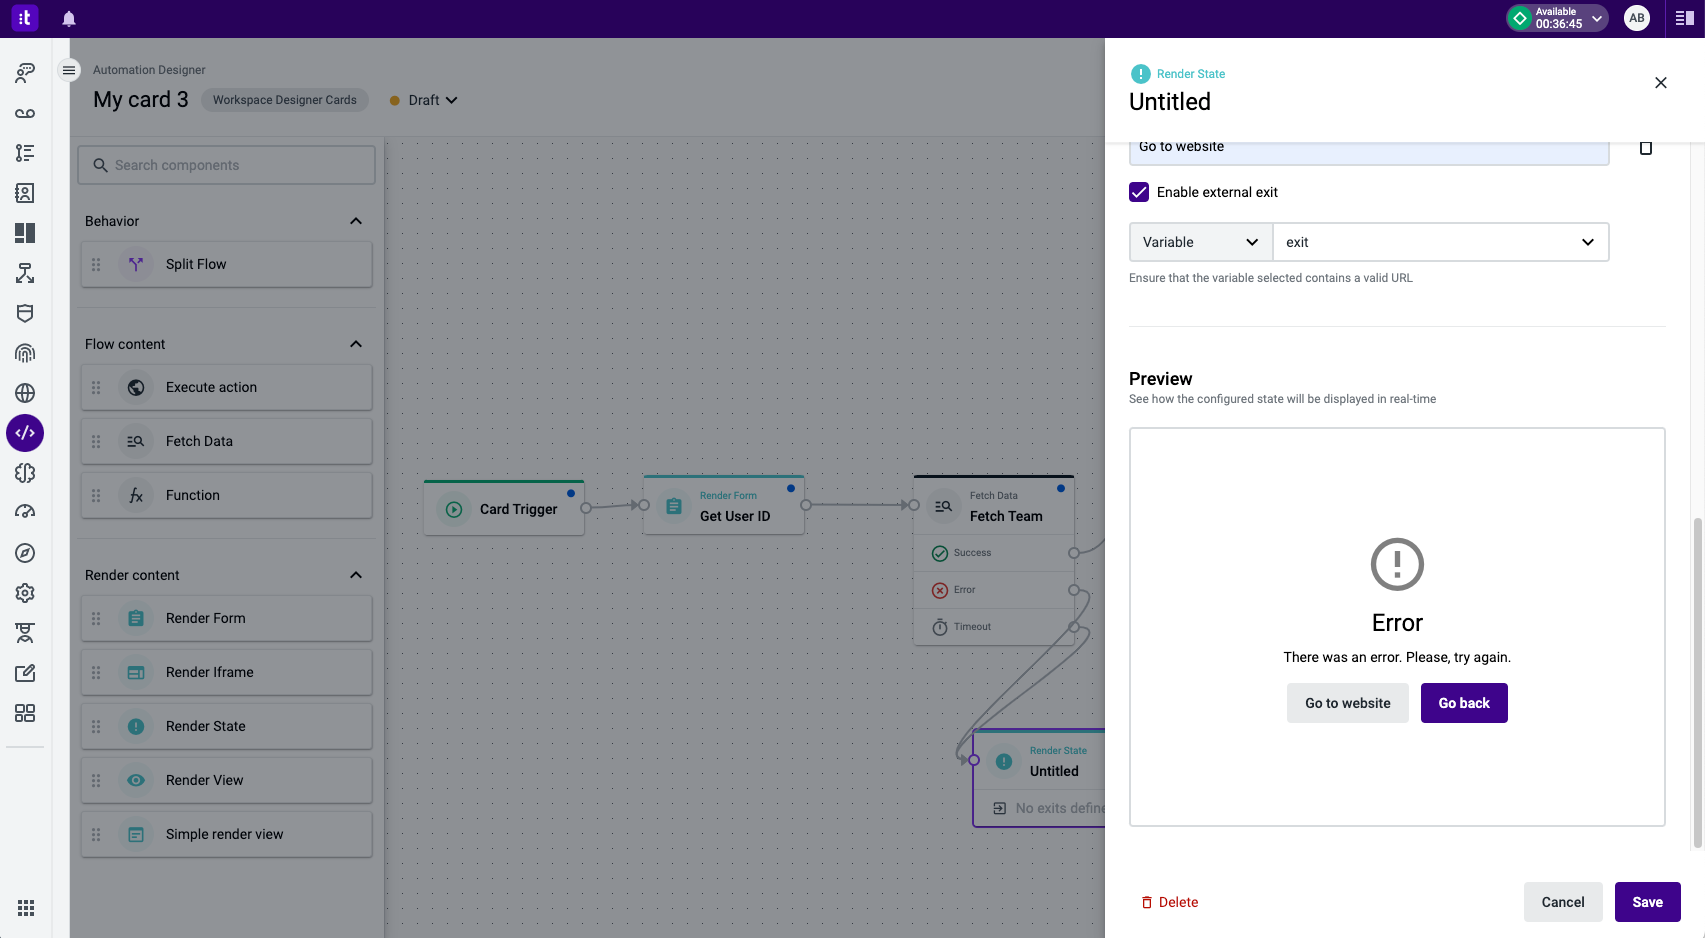
Figure 6 - Render State preview
Finally, it is only necessary to connect the exits (if there are any) and the Render State component entry point to the desired components in the automation flow (Figure 7).
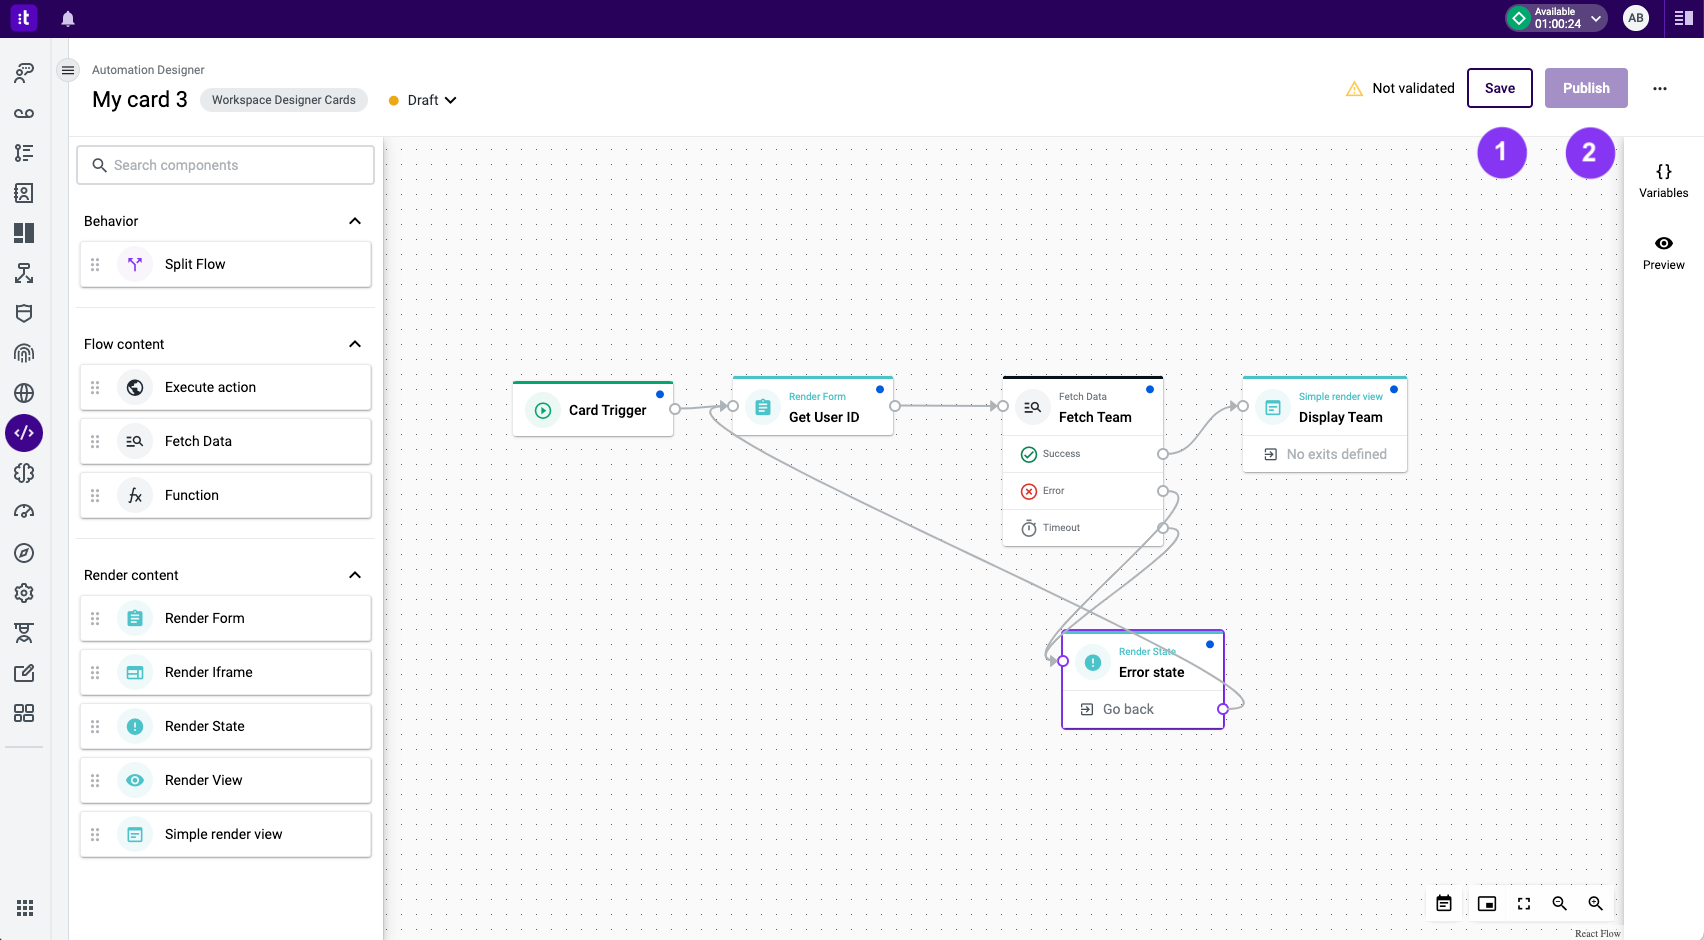
Figure 7 - Automation flow
Once you have finished configuring your flow, you can save it (Figure 7 - 1) and/or publish it (Figure 7 - 2). By saving your flow, you will validate if there are any errors and your work will be temporarily saved. Only when you click Publish will your flow changes be effectively implemented and reflected in the card/canvas usage.
TroubleshootingIf you have questions or technical issues, please open a ticket using this form.
Updated 6 months ago