Custom Connection
New Connection
Go to the same place where any other integration is configured (make sure you are logged in to your Talkdesk account): Builder (1 - Figure 1) → Integrations (2 - Figure 1) → Browse integrations (3 - Figure 1).
Here it's possible to see all the configurable integrations, as well as the new custom integration powered by Talkdesk Connections. Click “Add” on the Custom Integration card (4 - Figure 1)
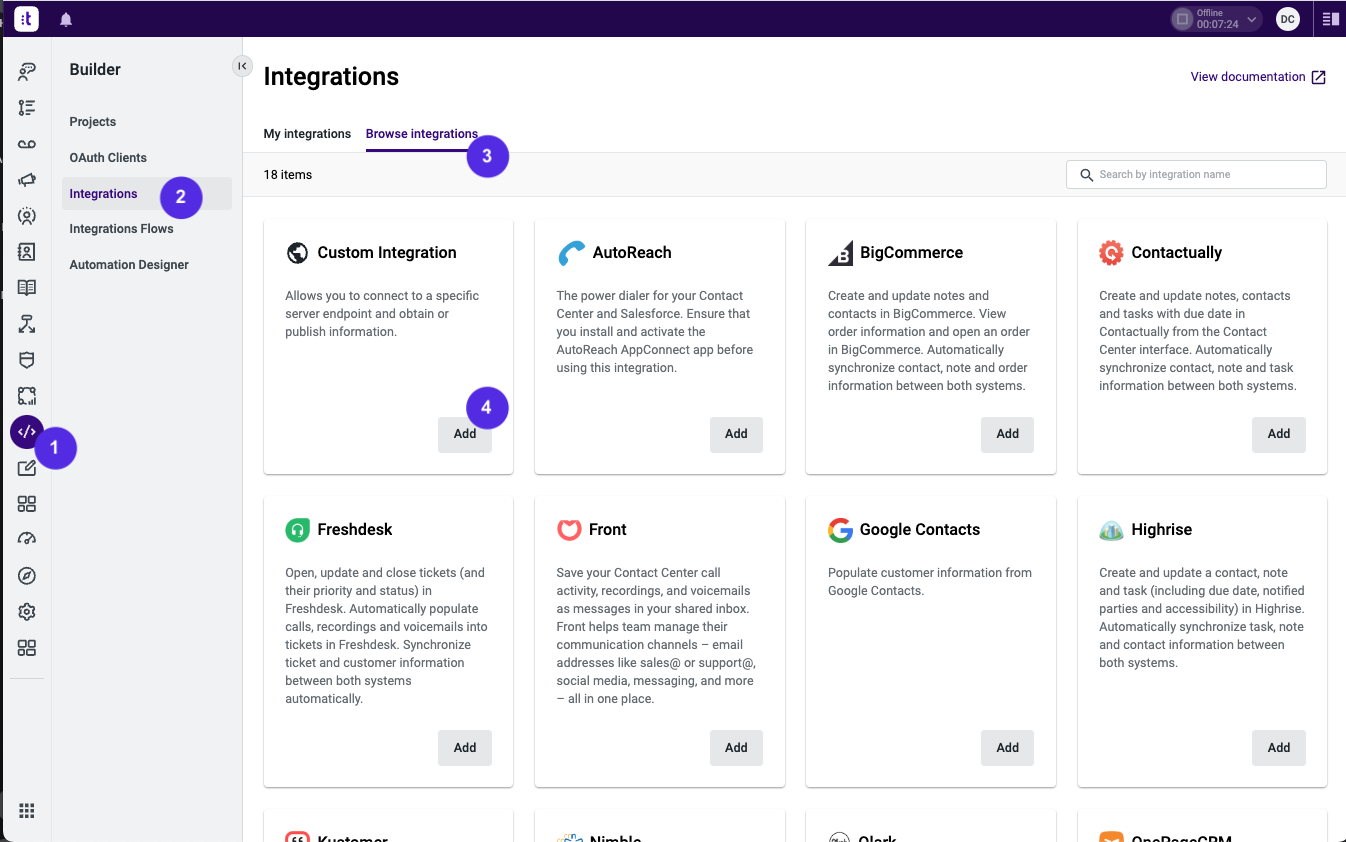
Figure 1 - Builder
Custom Connection
After clicking Add (Figure 1), you are taken to the Add Custom Integration page (Figure 2)..
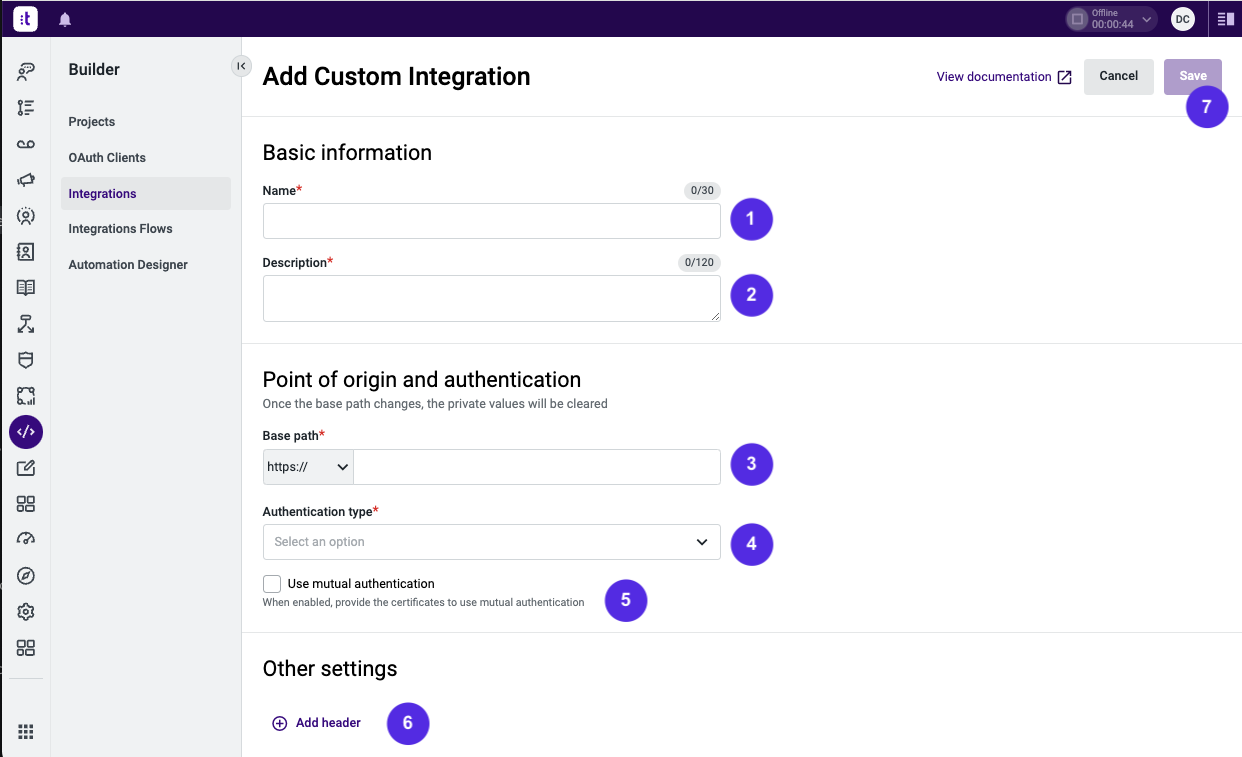
Figure 2 - Add Custom Connection page
Name (1) and Description (2), from Figure 2, identify the custom connection.
The Base path (3 - Figure 2):
- Points to the URL of the system.
- Indicates if it’s HTTP or HTTPS.
- Must not include any query parameters.
- Must not point to a specific action (endpoint).
Authentication Type
The Authentication type (4 from Figure 2) indicates how to authenticate with the external system. If the system doesn’t require any, No Authentication should be selected.
Depending on the selected authentication type, new configuration options appear. For instance, if HTTP Basic was selected, it would be necessary to indicate the corresponding username and password.
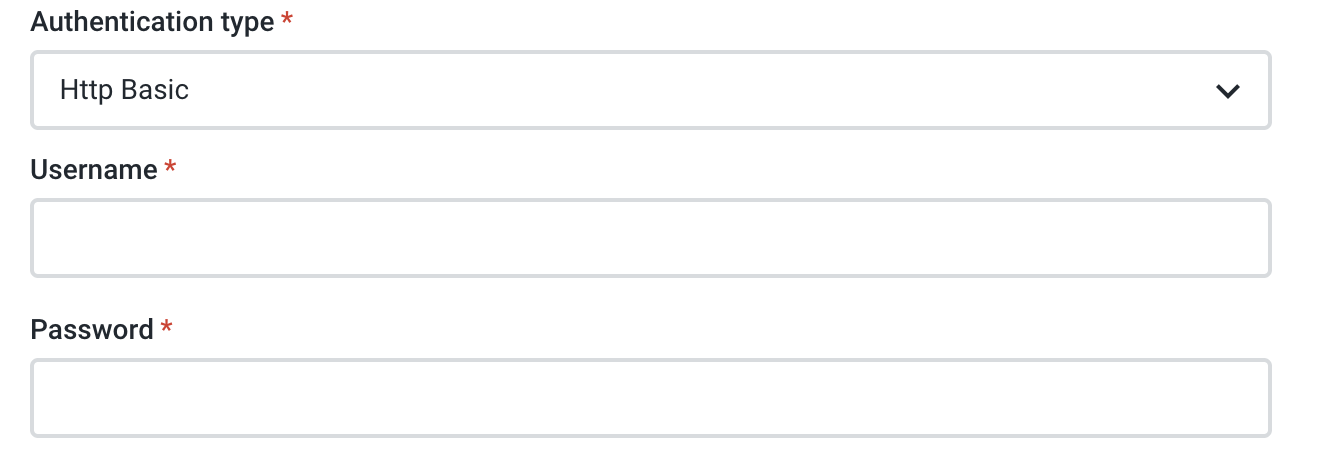
Figure 3 - HTTP Basic Authentication type configuration
Additional Authentication Parameters
Note: Please keep in mind that parameters named "Authorization" cannot be defined.
If additional parameters are needed for the authentication request, such as the audience or organization parameter, they must be added in 1-Figure 4. All parameters defined on this setting are encrypted.
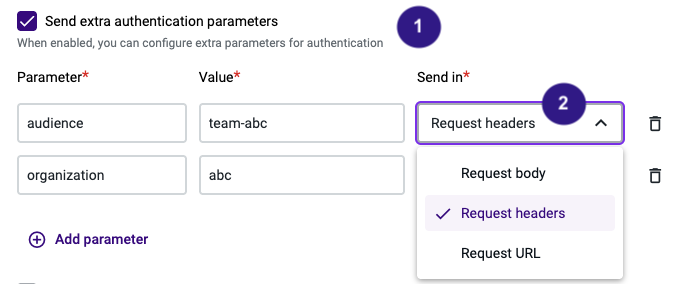
Figure 4 - Additional authentication parameters for OAuth2 Client Credentials authentication types
Note: Additional authentication parameters are only supported for OAuth2 Client Credentials, OAuth2 Client Credentials v2, OAuth Client Credentials with Scopes and OAuth2 Client Credentials with Private Key JWT. This setting is only displayed when selecting one of these authentication types.
To add new parameters in the authentication request, enable the Send extra authentication parameters setting (1-Figure 4). Parameters can be included in the request body, request headers, or request URL (2-Figure 4). For each parameter, a key-value pair must be defined and you can add as many as required by clicking on Add parameter option.
Please keep in mind that, if you add any parameter that matches the ones sent by default in the OAuth2 authentication request, the value that you add will override the ones that we inject. For instance, adding client_id as an authentication additional parameter.
Additional Settings (for actions’ executions)
Note: Please keep in mind that parameters named "Authorization" cannot be defined.
If any headers are required to send on all the actions’ executions defined for this connection, they must be added in 6 - Figure 2. In this case, no headers were configured, but if the user were to add a new one (by clicking Add header), the options above would appear.
In Figure 5, a header with key X-Api-Version and value v2 is configured. This means that whenever an action configured for this custom connection is executed, this header is sent.
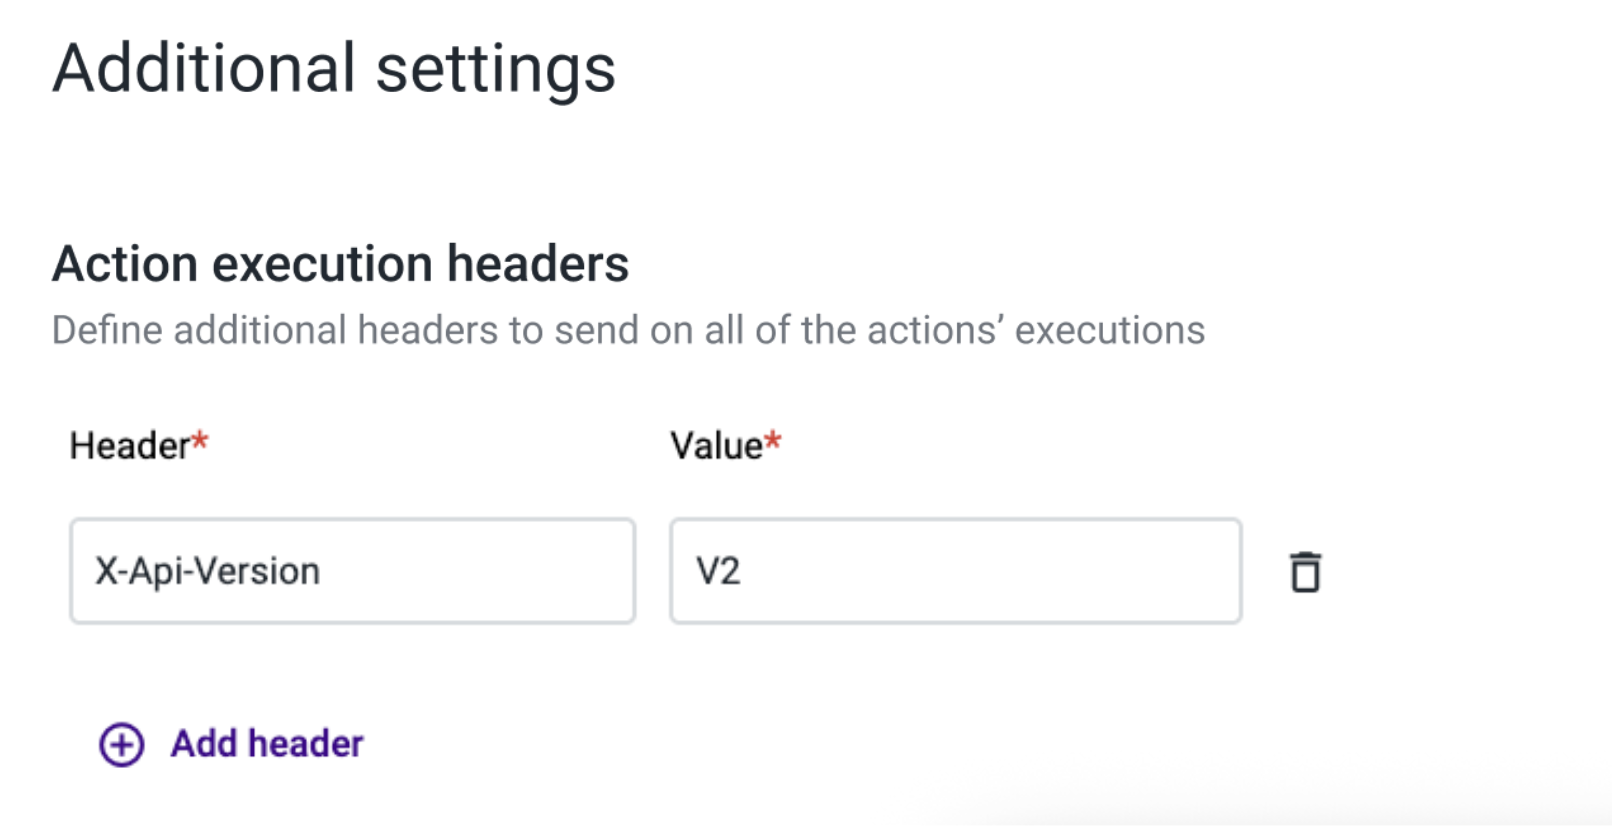
Figure 5 - Header configuration
Headers for Authentication PurposesThe information configured in the headers is not encrypted, so these headers must not be used to communicate sensitive information such as the authentication details.
Saving
Click Save (7 - Figure 2), and the custom integration will be saved.
If the Save button is not enabled, then there must be an error in the configuration (check again if all the required fields were filled correctly).
After clicking Save, you will land on this page (Figure 6).
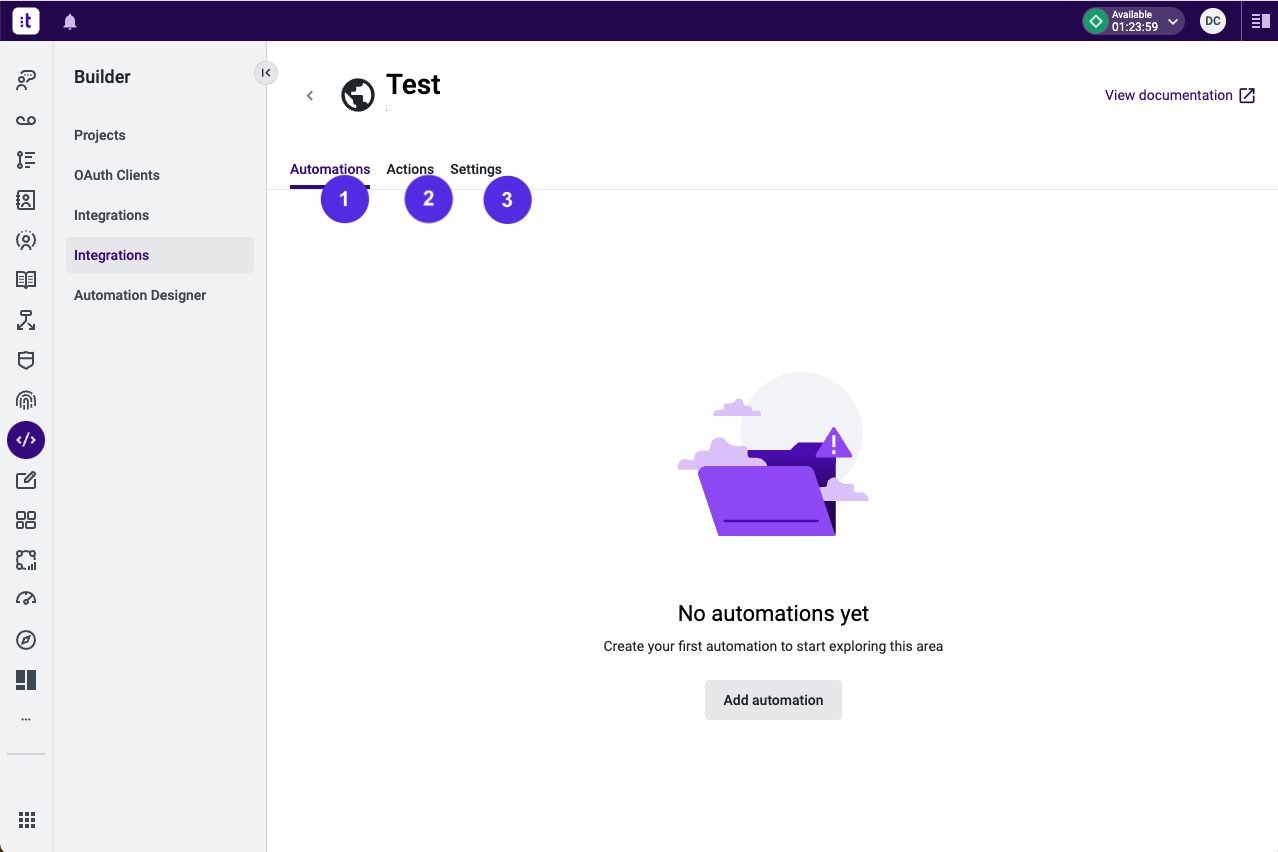
Figure 6 - Empty list of automations
At the end, you are redirected to the custom connection page.
By default, the Automations tab (1 - Figure 6) is selected. Here, the custom automations of that custom connection are listed. As this custom connection has just been added, the page will show no automations.
To create custom automations you will require to create custom actions. That can be done on the Actions tab (2 - Figure 6).
By clicking the Settings tab (3 - Figure 6), you can see the configuration of the custom connection, as shown below.
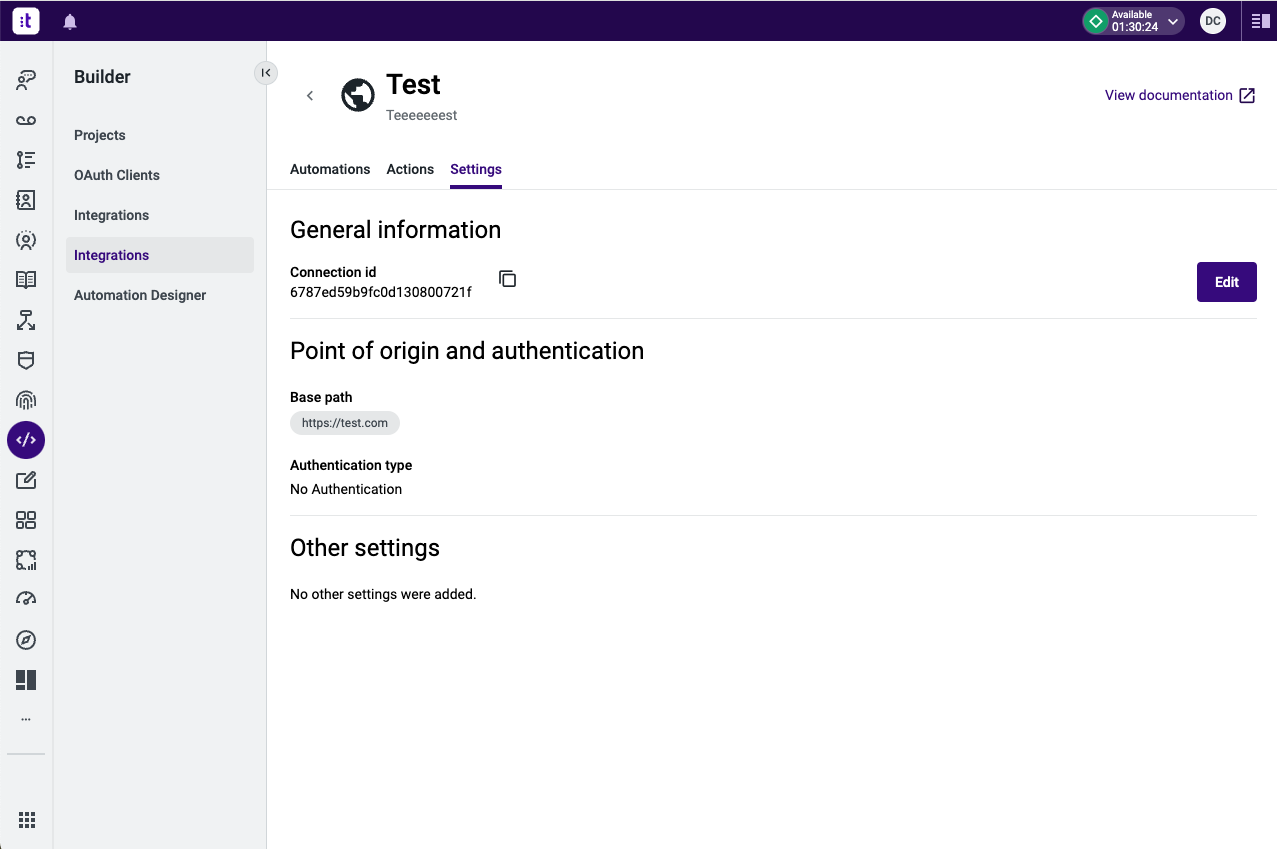
Figure 7 - Custom connection settings tab
Action on ZendeskIf you want to execute an action on a new Zendesk instance, a custom connection with Zendesk must be added.
Configuration Authentication outside ConnectionsPlease note that if you are able to successfully configure an authentication on a product other than Connections (e.g. Postman), it does not mean the same configuration will work on Connections, as they are different products with different capabilities.
Troubleshooting
If you have questions or technical issues, please open a ticket using this form.
Updated 6 months ago