Build a Connections Flow
You can only follow these steps if you have Connections Flows installed. Connection Flows is available in EA upon request. If you believe it aligns with your use case, please contact your Customer Success Manager.
Connection Flows are built using Talkdesk Virtual Agent Automation Designer™. The Automation Designer includes the sections below.
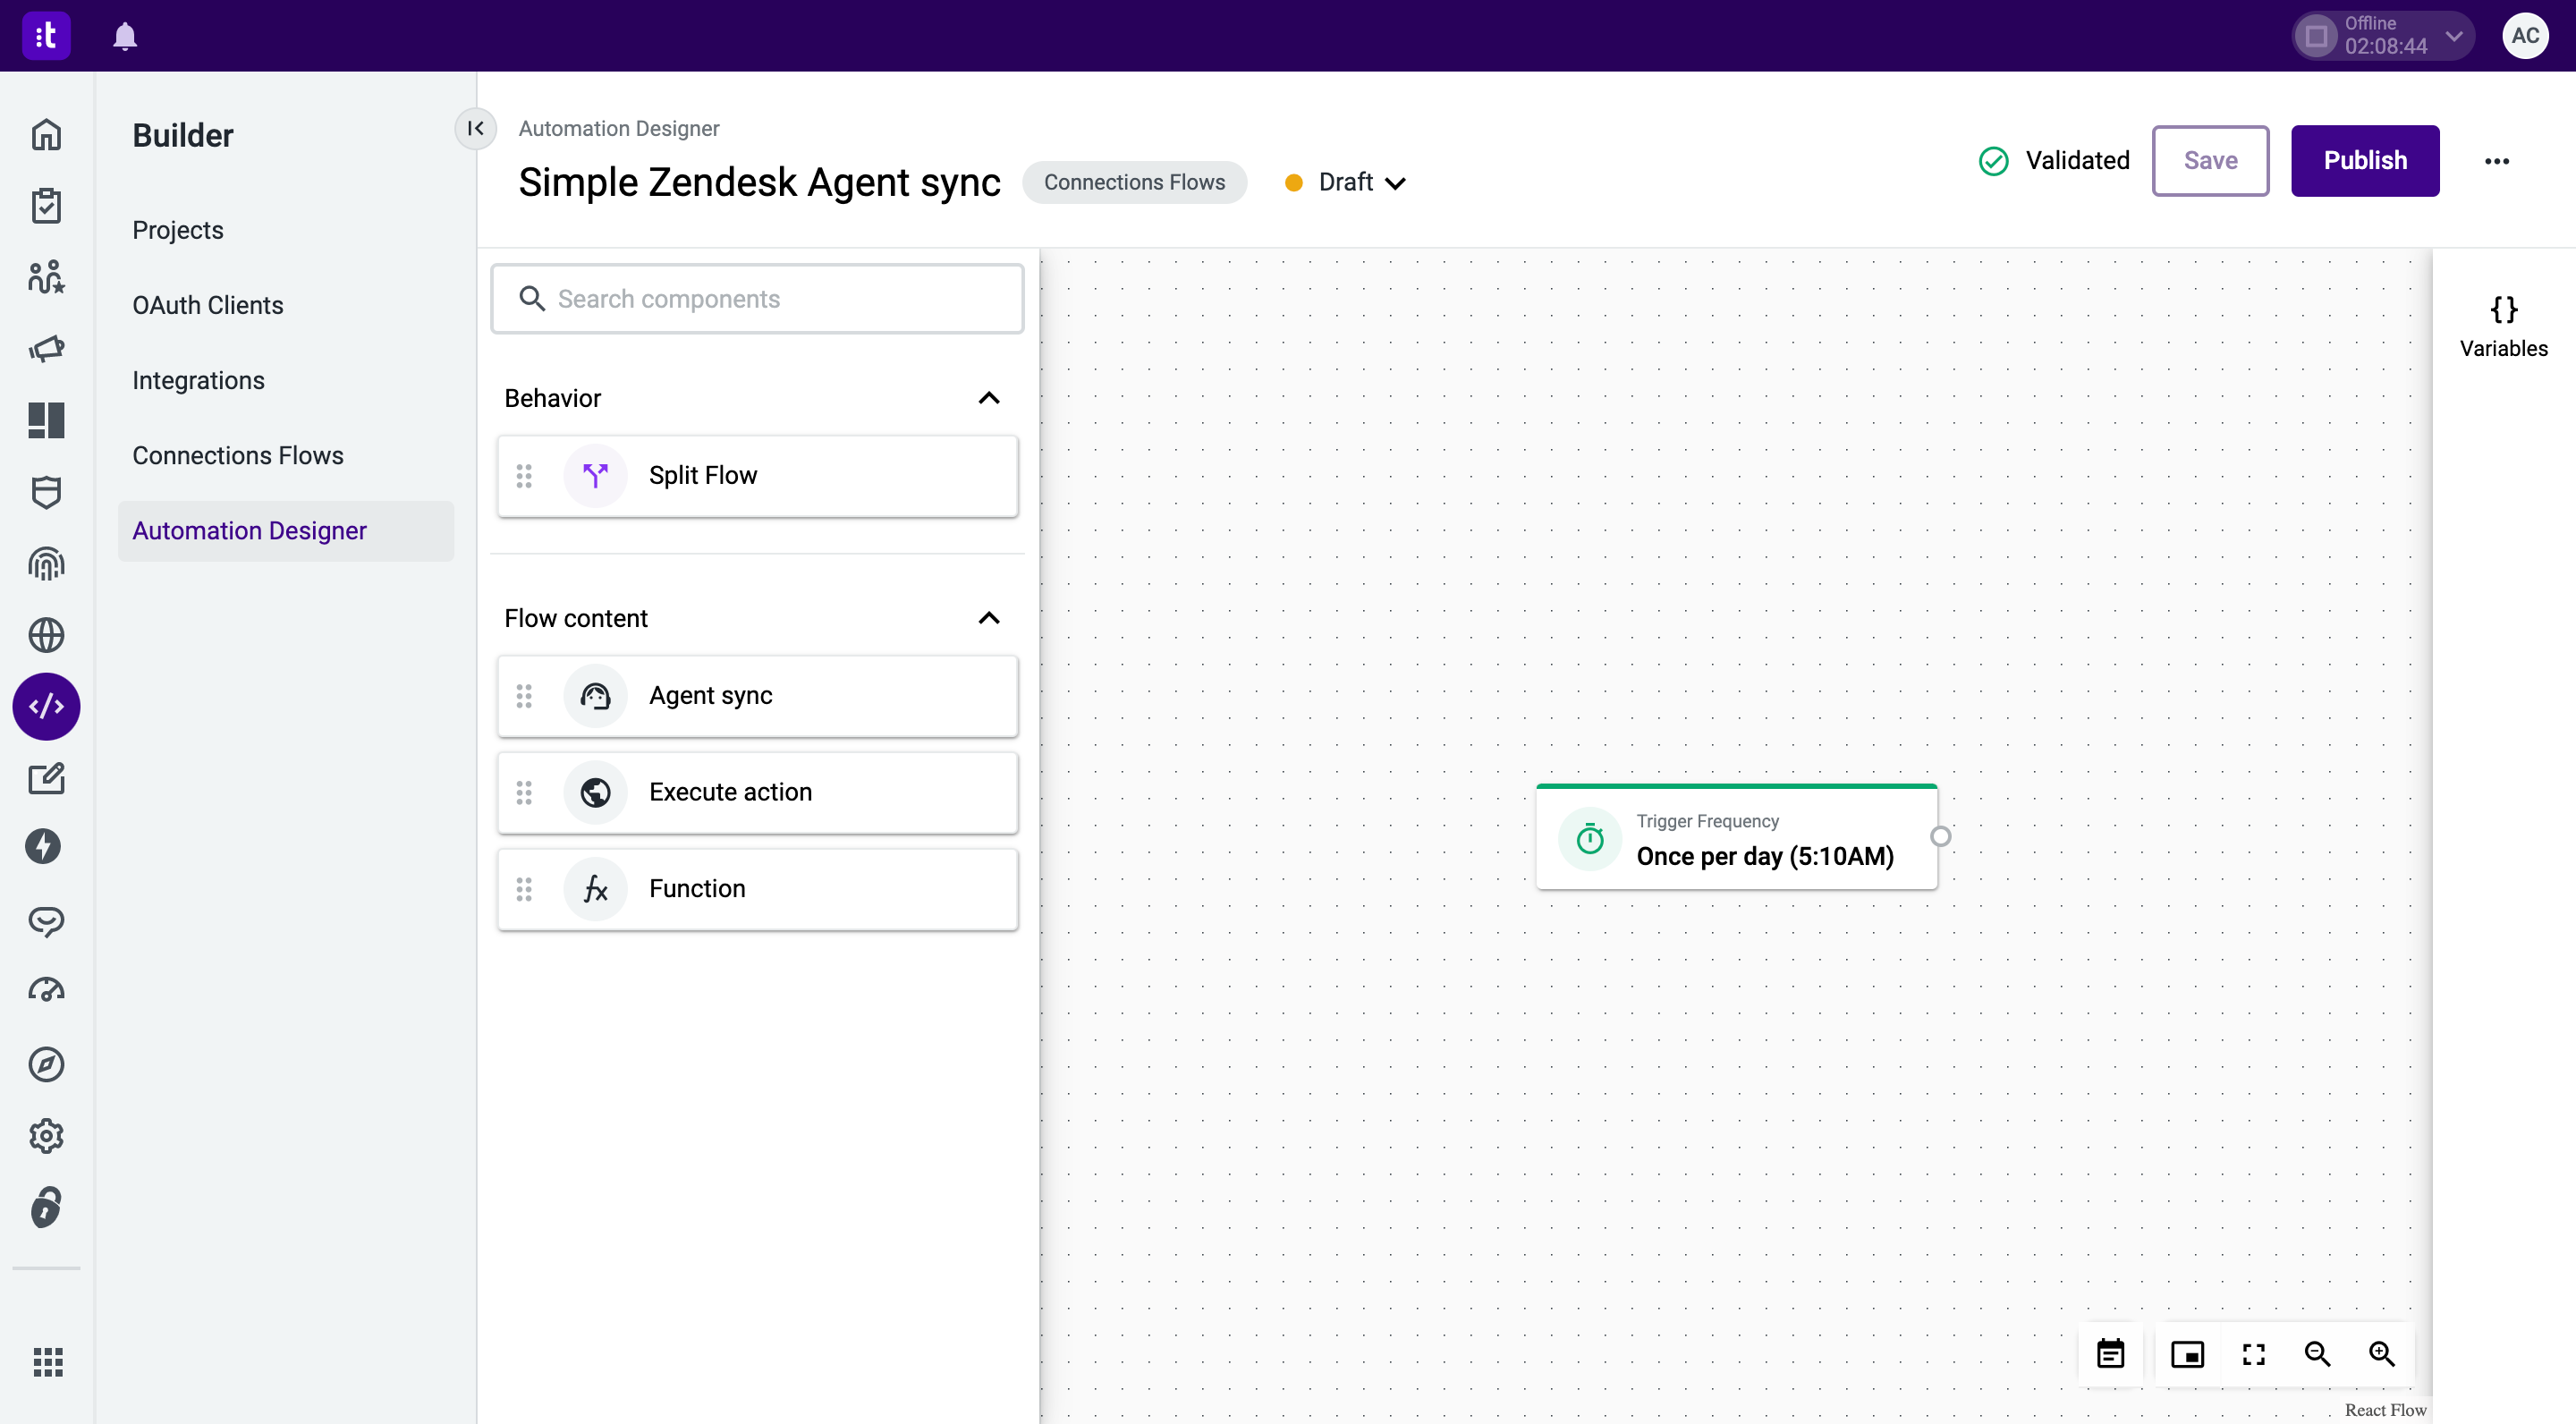
Figure 1 - Building a Connections Flow
When you first create a Connections Flow, you will find a Frequency trigger. This trigger can’t be deleted, as it defines under what conditions a flow runs automatically. You can then drag various components from the Component Sidebar to link and build your flow (Figure 2).
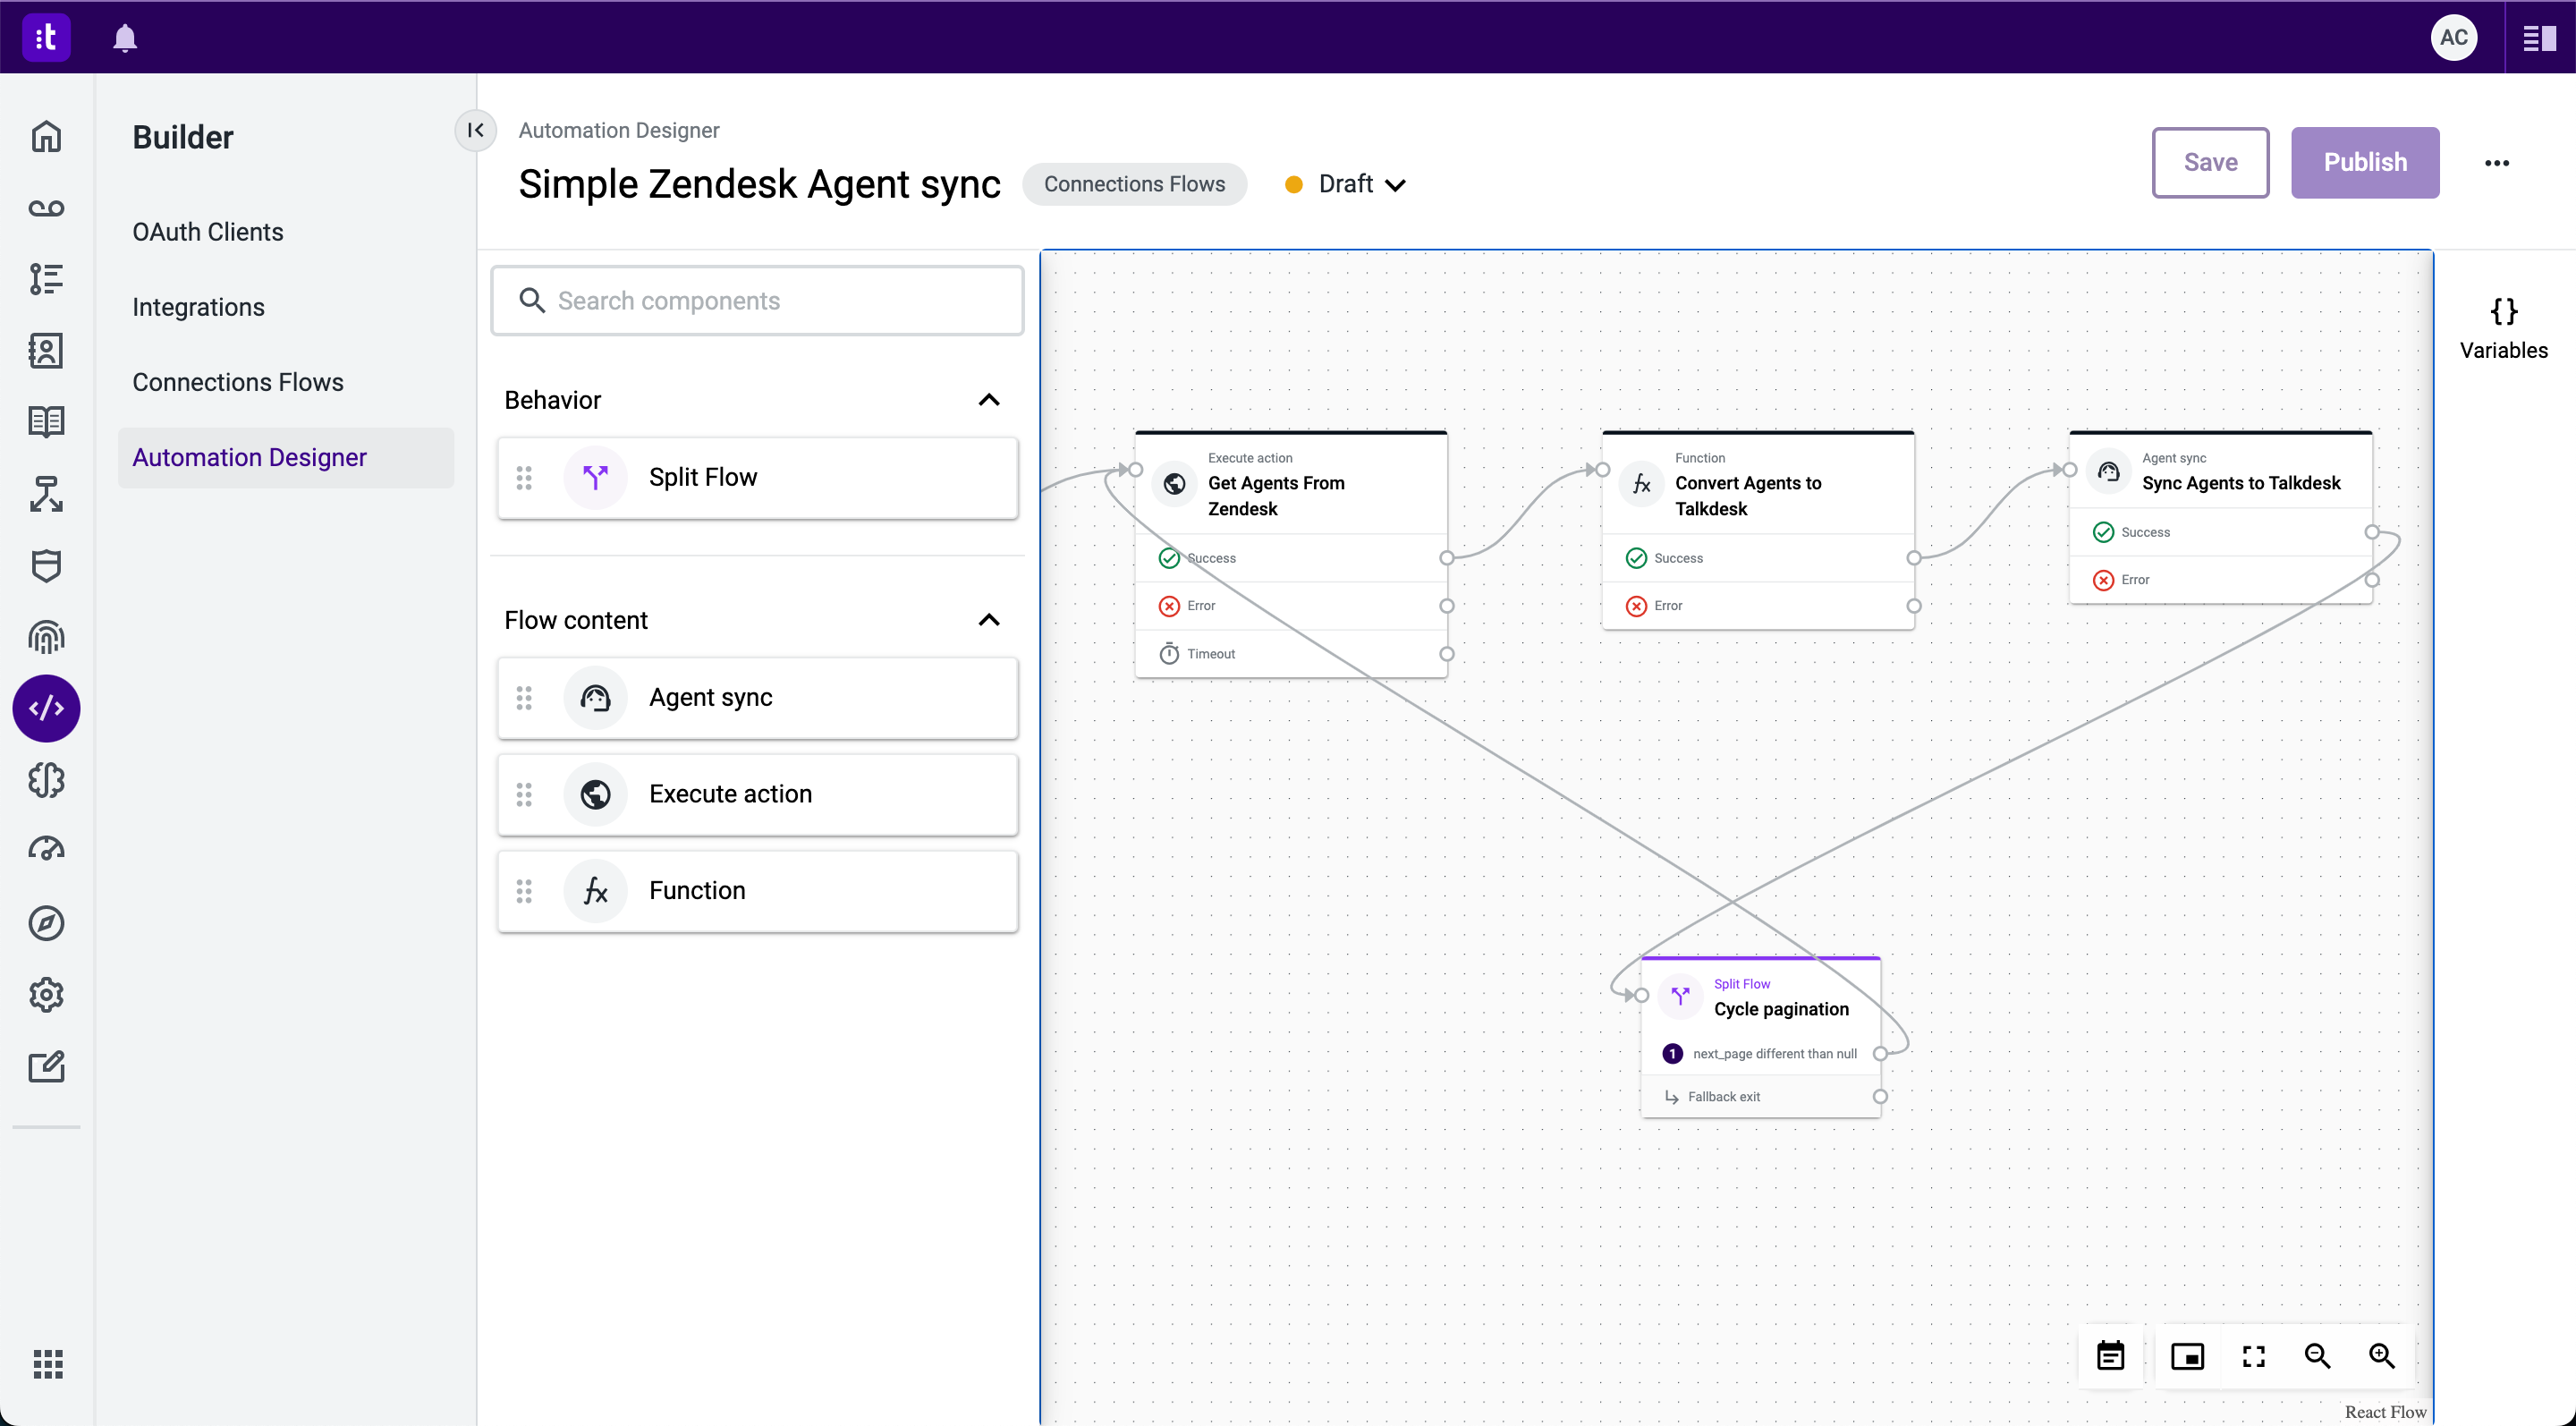
Figure 2 - Dragging components
Automation Designer Title Bar
Here you can find information about the flow (Figure 3).

Figure 3 - Automation Designer title bar
The Automation Designer Title Bar (Figure 3) includes:
a) The flow title (Figure 3 - 1).
b) The flow type (Figure 3 - 2). In this case, the flow type is Connections Flows. Other flow types can be edited using Automation Designer.
c) The flow version type (Figure 3 - 3). Flow versions can be Draft or Published. Published versions are read-only, so you won't see panels and toolbars that allow you to edit the flow.
d) Validation errors (Figure 3 - 4). Errors will only be shown if parts of your flow are not valid.
e) Save button (Figure 3 - 5). This button will only be enabled if there are any unsaved changes.
f) Publish button (Figure 3 - 6). This button will only be enabled if a saved draft differs from the published version.
g) A popup menu (Figure 3 - 7) that allows exporting or importing a version of a flow. This popup menu (Figure 4 - 1) includes the Import and Export version options. Exporting a flow as JSON will allow you to edit it later in Automation Designer. These options can be used to back up intermediate versions or to duplicate flows.

Figure 4 - Popup menu
Automation Designer Canvas
This is where the flow is laid out (Figure 5). Here, you can move and link components. If you double-click a component, the component configuration panel will open, allowing you to edit component-specific details.

Figure 5 - Automation Designer Canvas
Components Sidebar
Here you can find the components to build your flow (Figure 6).
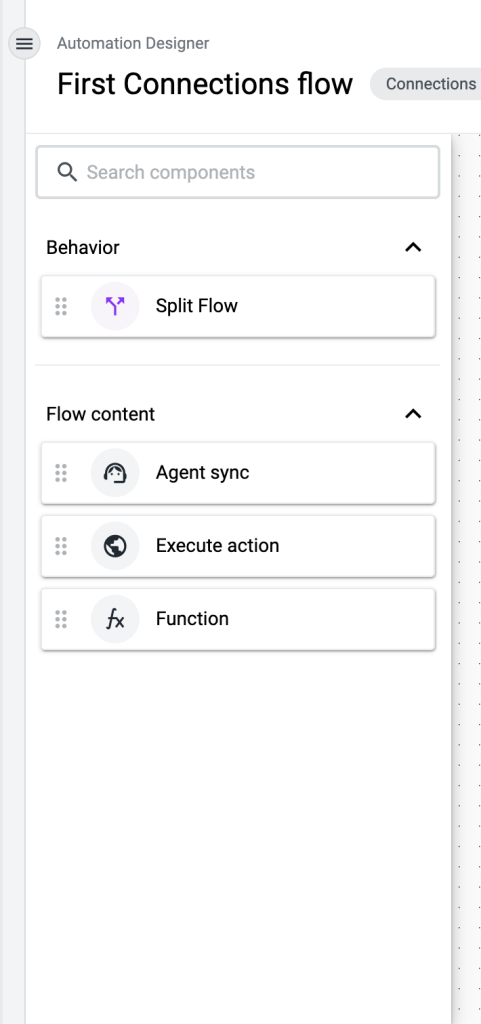
Figure 6 - The components sidebar
When opening a new flow, you will be able to see and move the trigger. On the Components Sidebar you will find other components to build a flow. You can also use the Components Sidebar to edit variables.
Component Configuration Side Panel
To open the Component Configuration Side Panel (Figure 7 - right side), double-click a component.
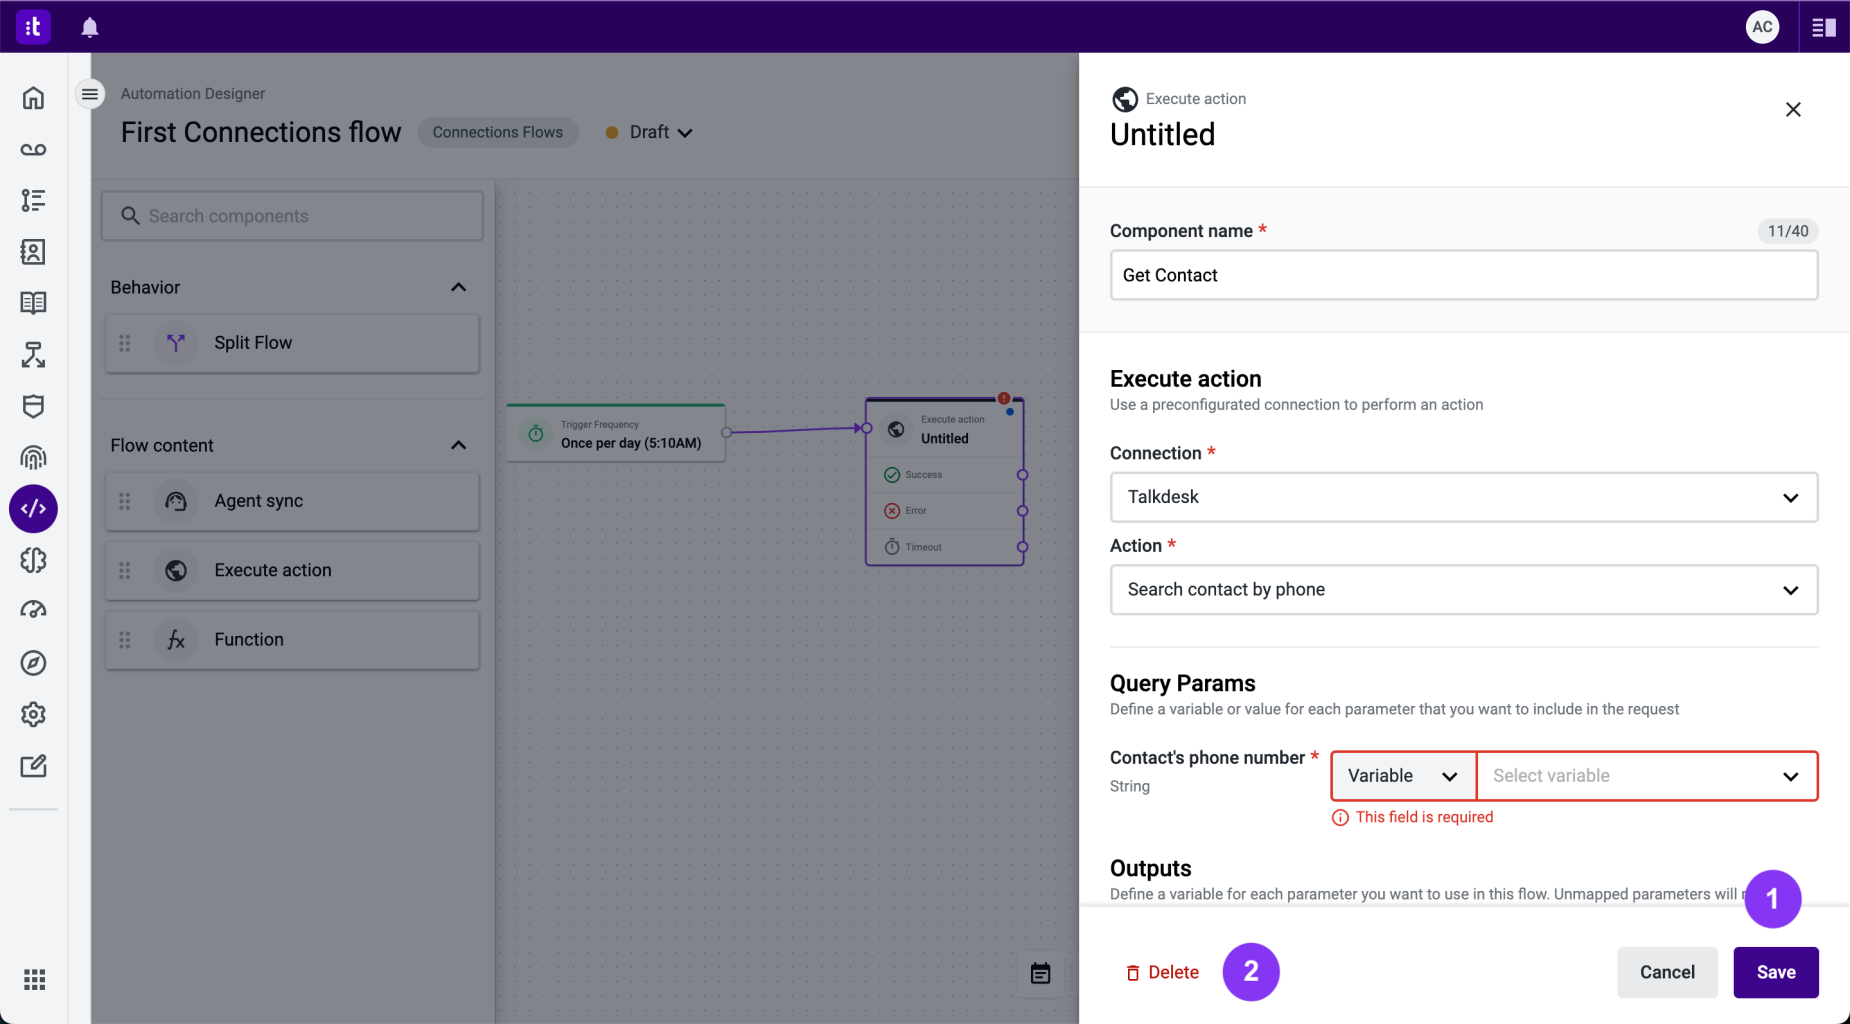
Figure 7 - Component Configuration Side Panel
To save configuration changes to a component, click the Save button (Figure 5 - 1). Saving will work even if you don't fill in all the required fields, but you will be able to track these errors through the validation errors section of the Title Bar (Figure 1 - 4). You can delete a component by clicking the Delete button (Figure 5 - 2).
Variables Side Panel
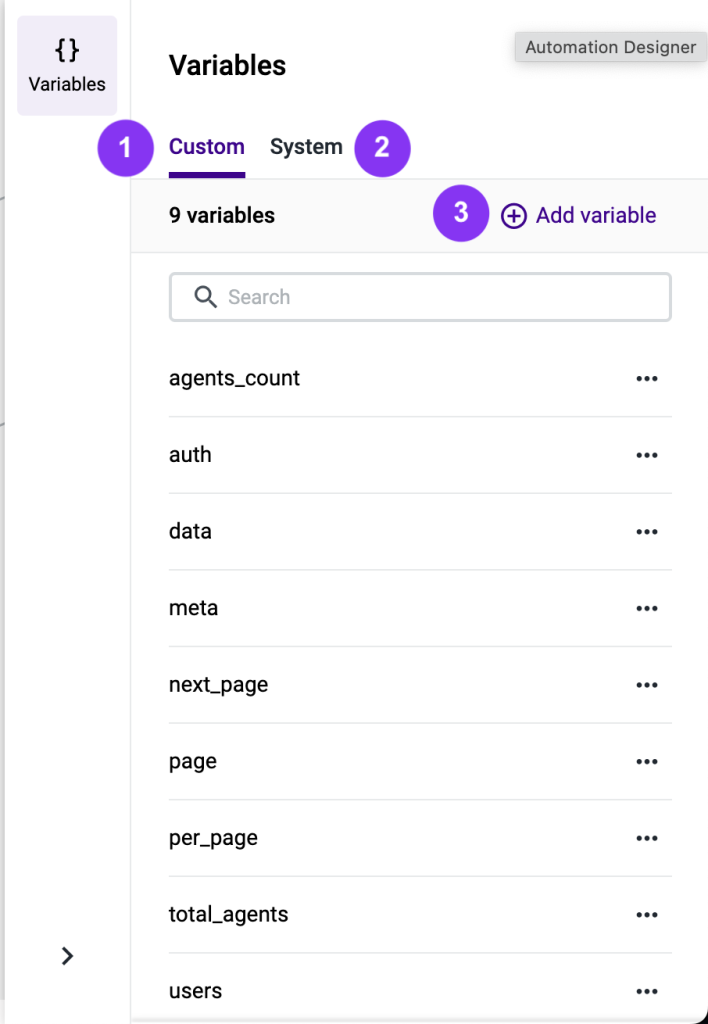
Figure 8 - Variables Side Panel
Variables can be found in a sidebar to the right of the Automation Designer Canvas. The Variables Side Panel (Figure 8) has two tabs:
- Custom variables – created by you and specific to this flow (Figure 8 - 1).
- System variables – available for all flows of a given type (Figure 8 - 2). There are no system variables for Connections Flows.
To create a variable, click the Add variable button (Figure 8 - 3). This will open a popup (Figure 9), asking you to enter a variable name (Figure 9 - 1). Once you're done, click the Confirm button (Figure 9 - 2) to confirm the variable's creation.
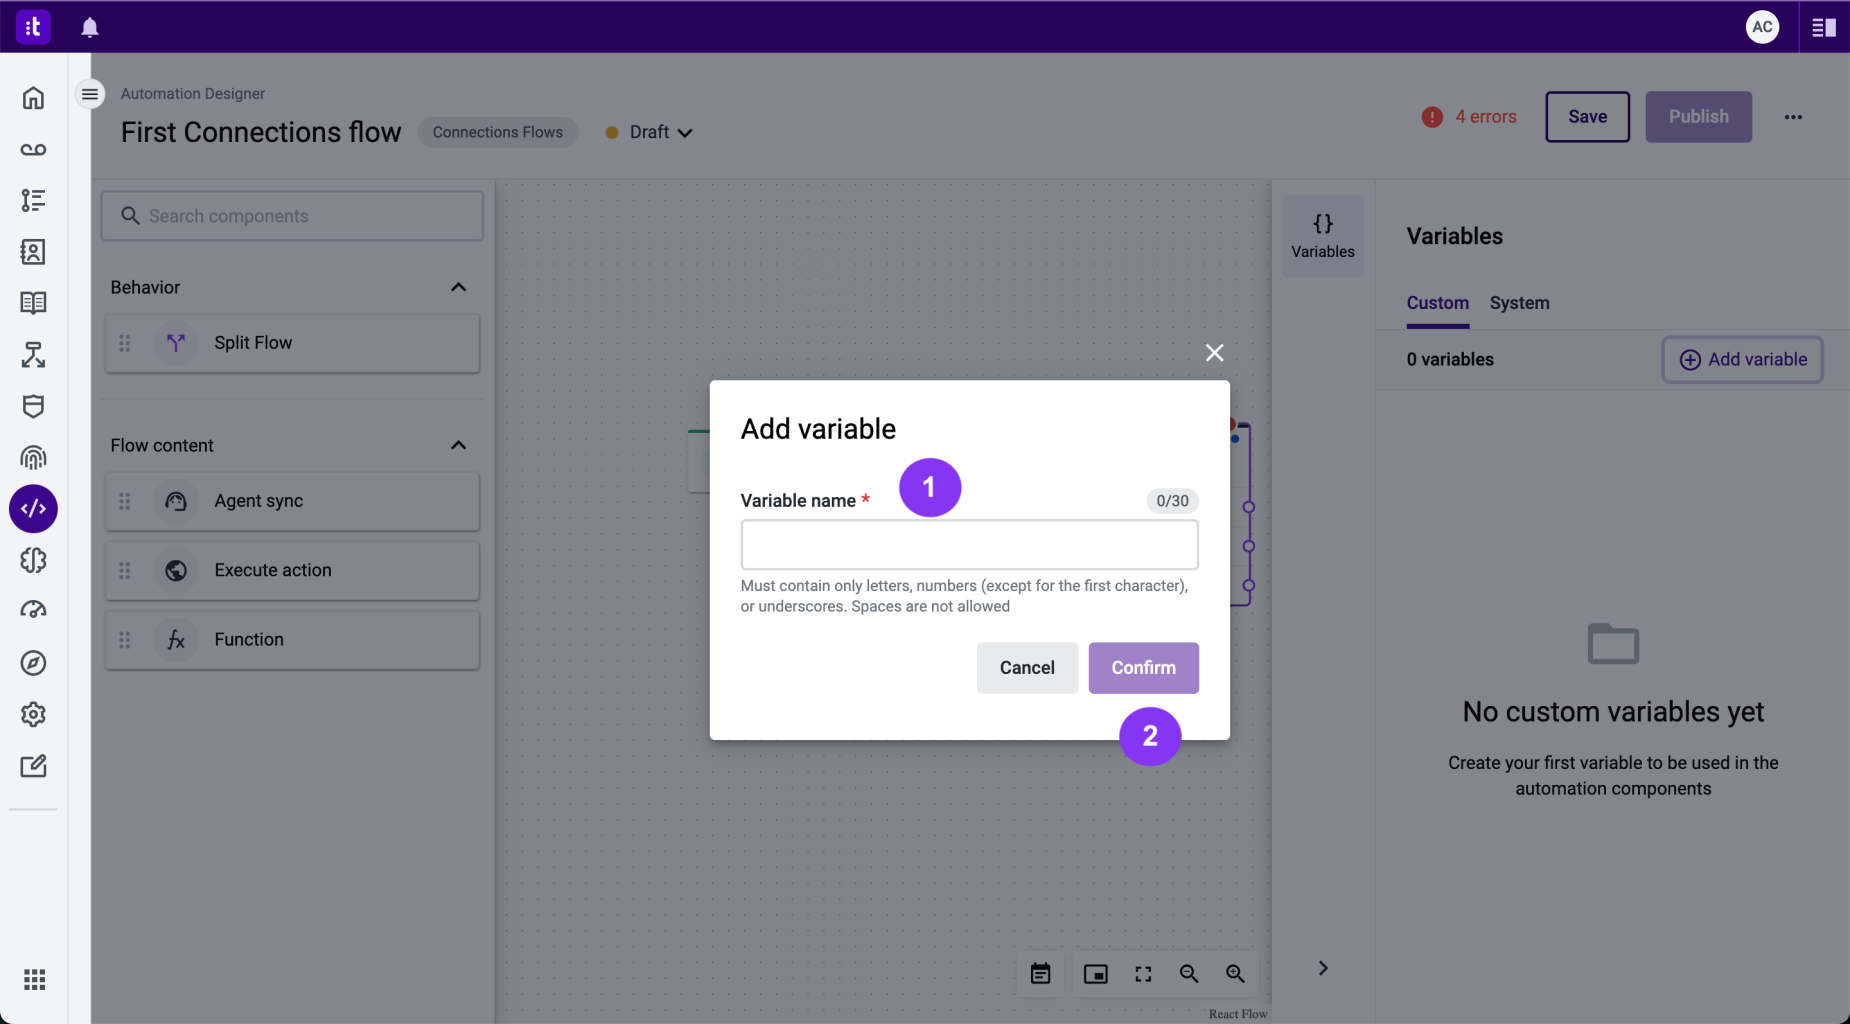
Figure 9 - Add variable
Once you've confirmed the new variable, it will be listed on the side panel (Figure 10 - 1). Once a variable is created, you can edit (Figure 10 - 2) or delete (Figure 10 - 3) the variable.
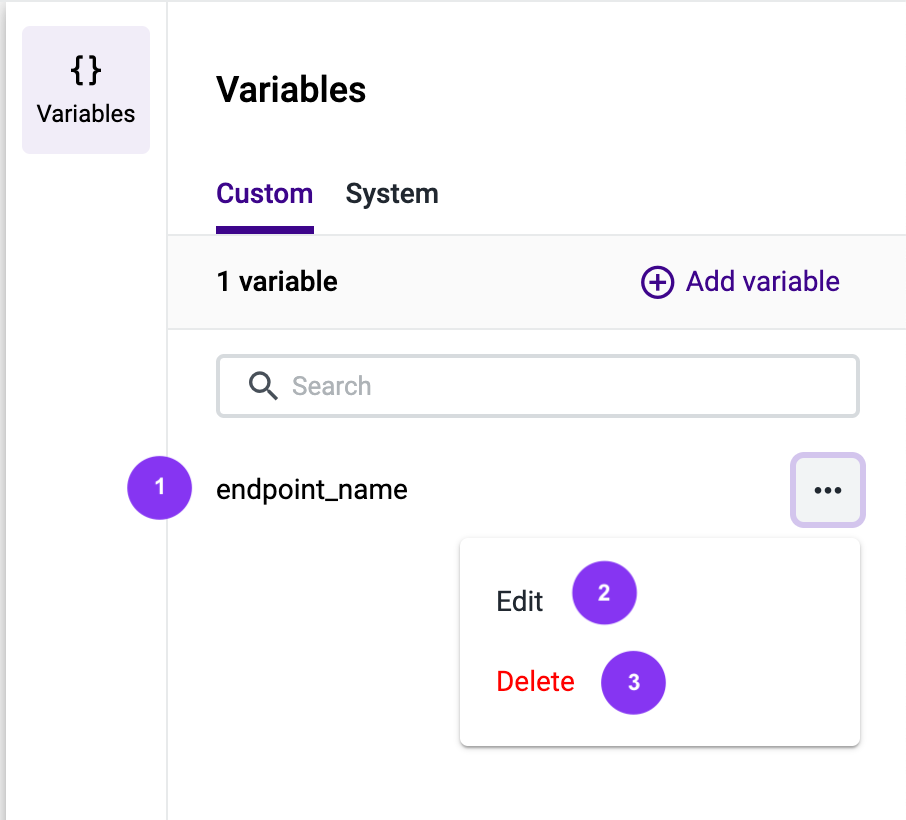
Figure 8 - New variable
To easily find an existing variable, you can use the search box (Figure 11 - 1) and check the list of variables on the Variables Side Panel.
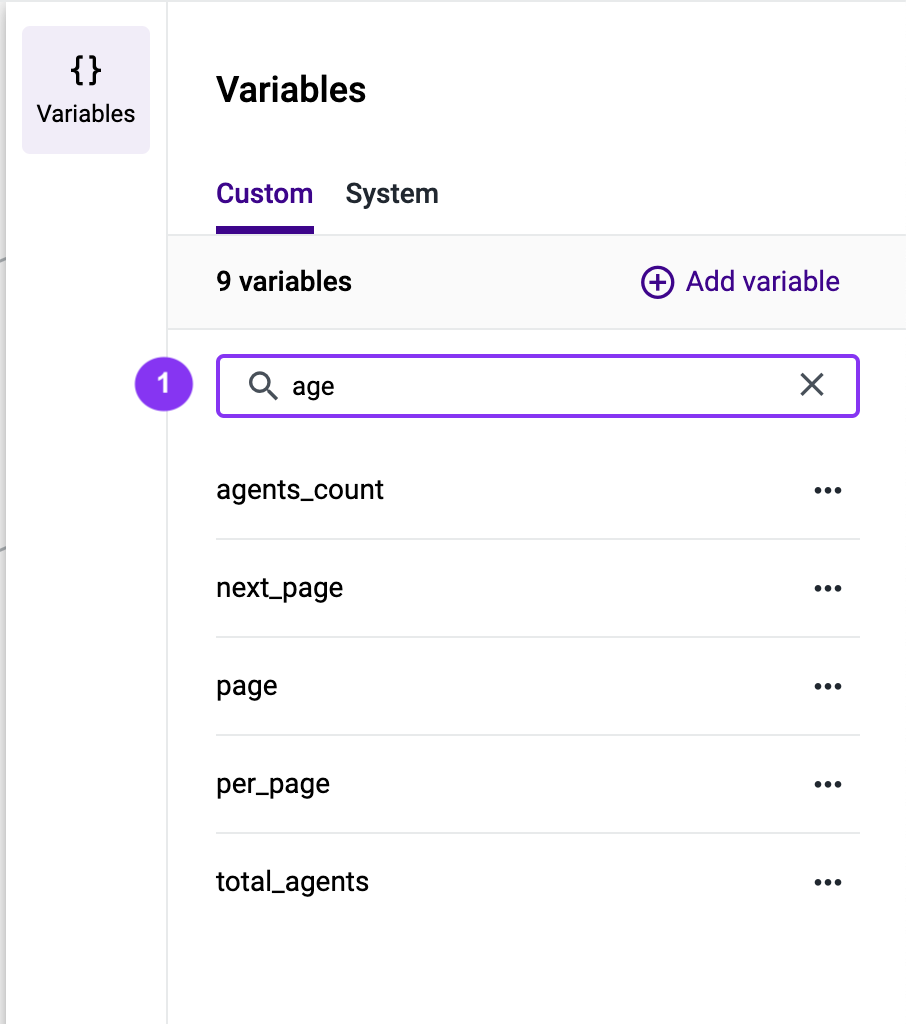
Figure 11 - Find a variable
TroubleshootingIf you have questions or technical issues, please open a ticket using this form.